HomeVintage Fisher PriceMy Etsy ShopCategoriesAbout
Showing posts with label making life easy. Show all posts

Friday, September 15, 2017

My Friend Doll Beauty Salon (Hair Repair)

We're big fans of the Fisher Price My Friend Dolls from the 1970-1980s.  I have been able to purchase brand new in box dolls for my youngest and she currently has 3 of the 5 made.  As I've said before my youngest (currently age 6) doesn't quite grasp that these are really old dolls!  Especially since they come to her brand new.  She doesn't understand that they've been sitting in a closet somewhere waiting to be loved for 30+ years.  She thinks I buy them at Target, ha!

When she discovered that a friend of hers had a Mandy doll too (her mom's) she was very excited.  We set up a playdate so the girls could get the dolls (and all their clothes) together!  The morning before our get-together her mom told me that Mandy needed some hair TLC stat.  They'd tried to condition it once before but it was still pretty tangled and damaged.  

I love a challenge so in the few hours before I got the girls I gave Mandy a deep conditioning treatment and it turned out pretty well.  


Check out these before and afters.  Not too shabby!  And now a comb can go through all of the hair.  I think another longer (overnight) treatment might work on those ends a little more.
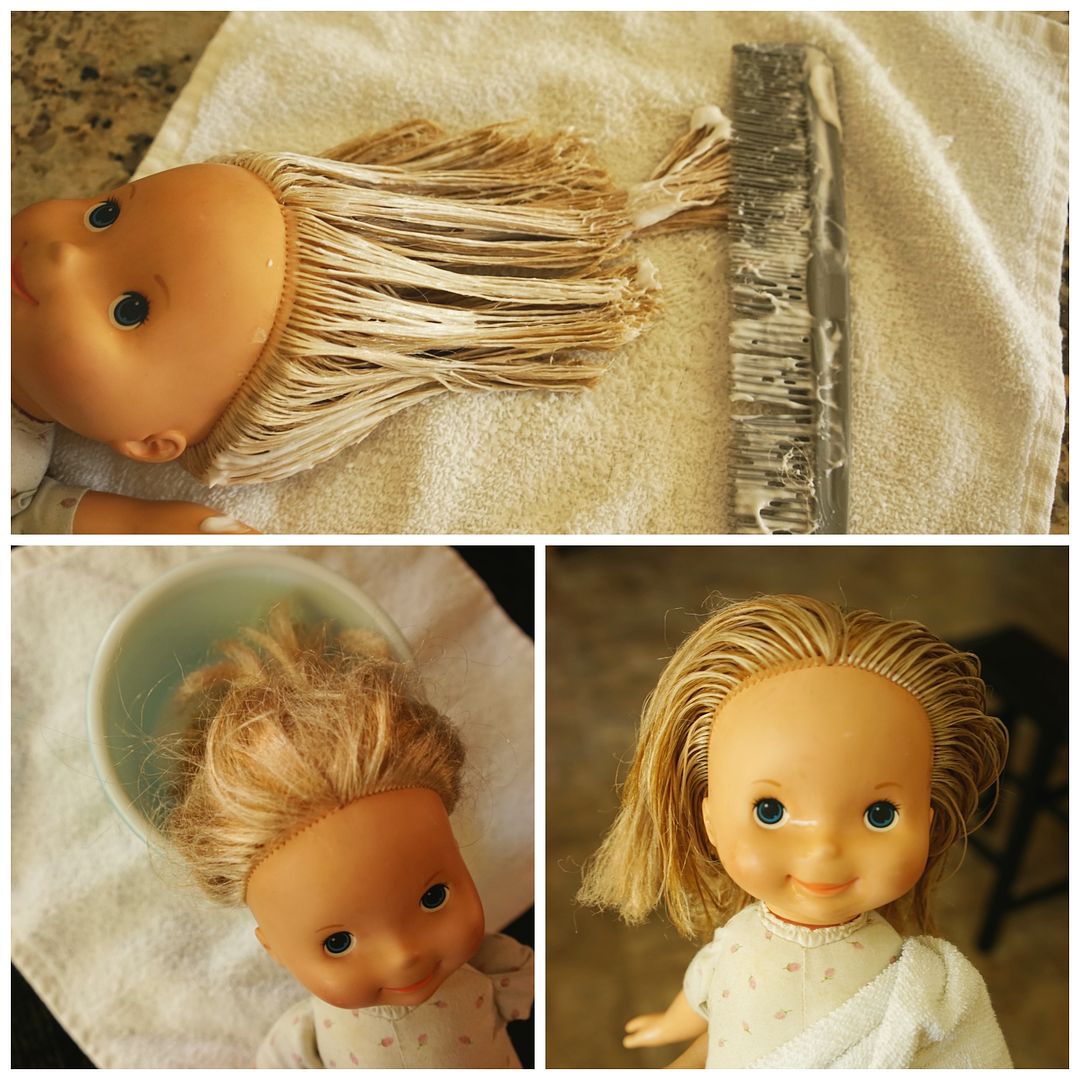

Here's what you will need: Wide tooth comb, regular comb, bowl, fabric softener, washcloth and some patience. :)

1. Put a couple cap fulls of fabric softener in a bowl.  Not too much because you don't want to waste it.  Then put the doll's hair in the bowl and slowly work the fabric softener through all of the hair.  Take time to get it into the tangles or any knots.

2. After the hair is coated, carefully place the doll aside on a washcloth and leave her alone for between 1hr and overnight depending on damage level.  Due to time constraints Mandy had the softener on her hair for about 2 hrs.

3. Slowly and carefully comb through the doll's hair, starting with the wide side of a comb.  Gently work through the tangles until you can get the comb all the way through.  Then move to the small side of the comb and do the same.

4. Rinse, rinse, rinse.  Carefully comb through the hair while it is under running water until you can feel that the hair is rinsed.  Leaving fabric conditioner on the hair long term can damage it.  

5. Lightly towel dry the hair (press don't rub) and comb through it again. Allow to air dry, don't use a dryer!

All set!  Does she look amazing?
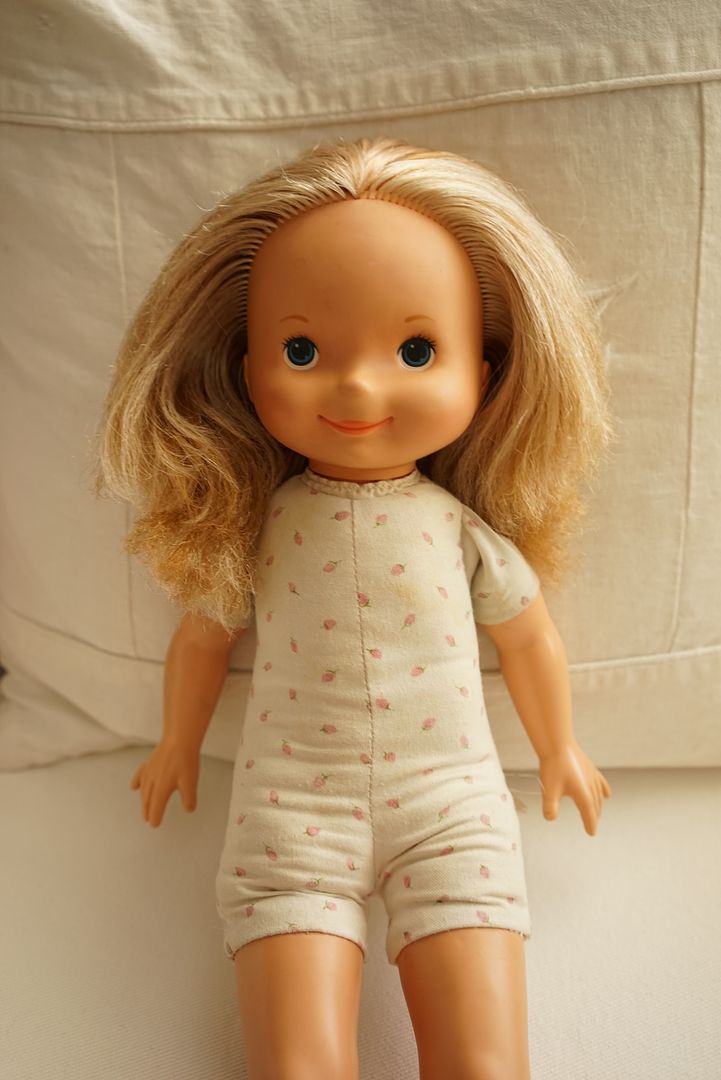

My daughter's friend was super excited to see that her Mandy had softer and more manageable hair.  Not perfect but MUCH better.  Hooray!
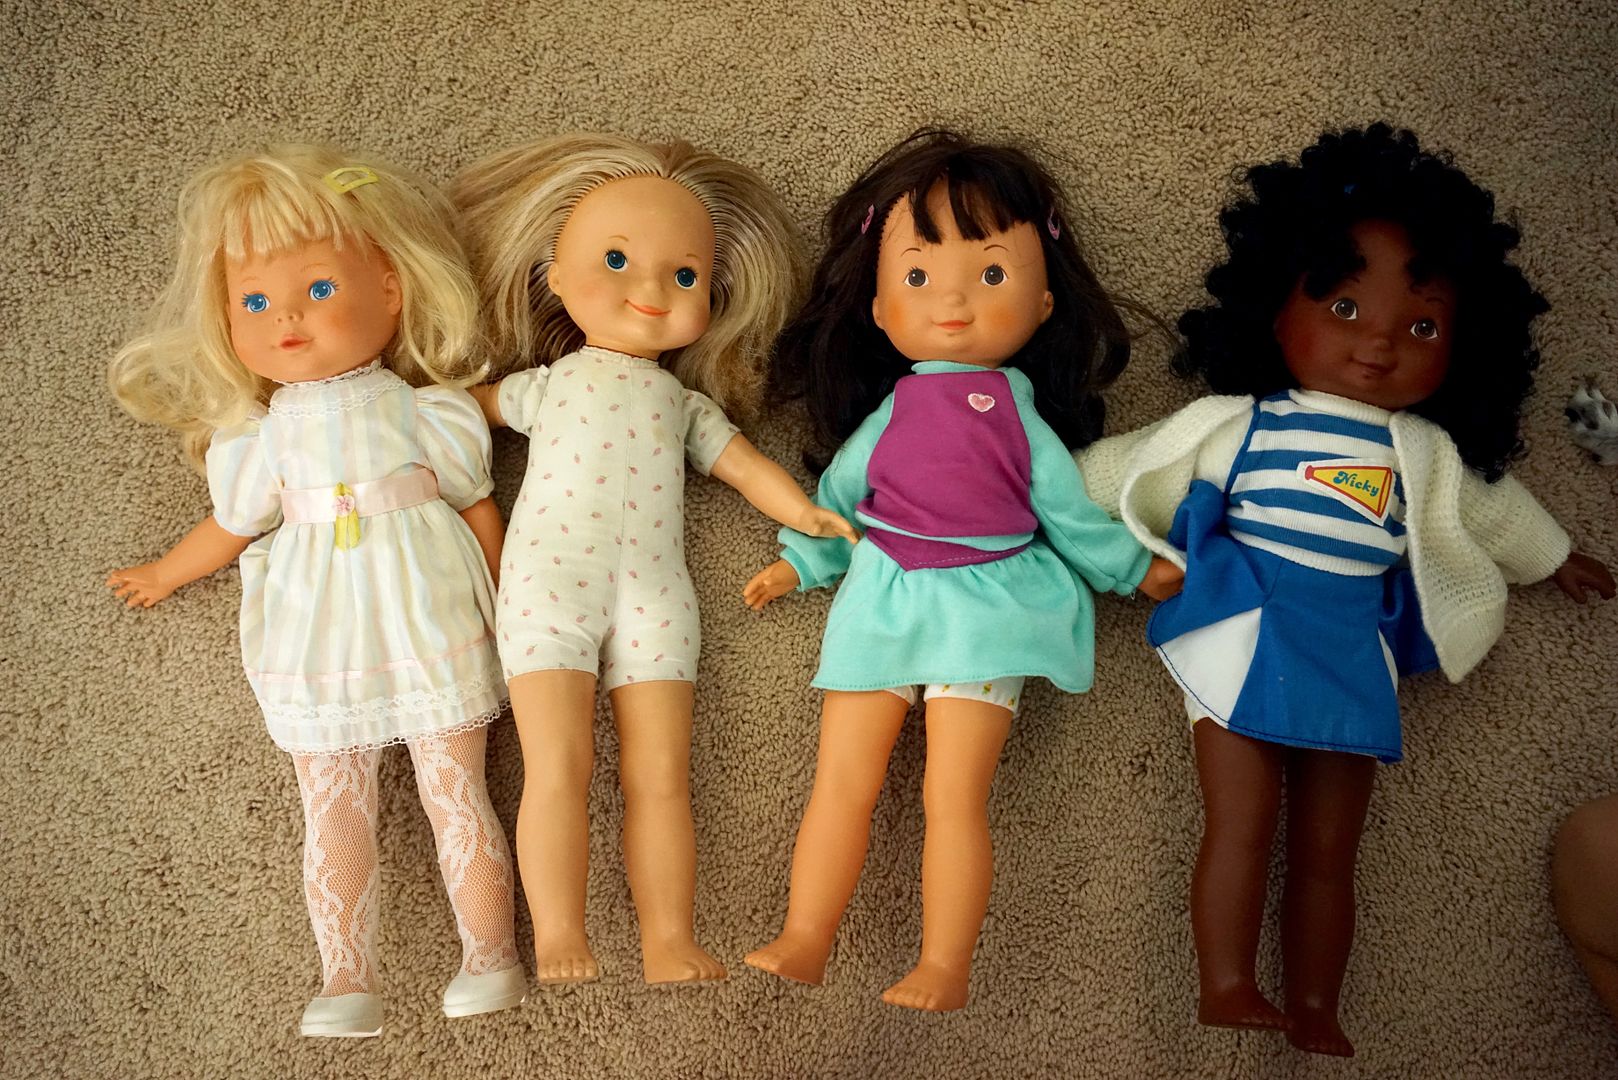

All ready for a play-date!  Note by the way that both blond dolls are "Mandy".  The far left is the last 1980s version and the visiting Mandy was one of the first editions. (for reference the other two dolls are Jenny and Nicky)


For more information on her Fisher Price Dolls

#204 Baby Ann (a soft doll) 
Monday, July 10, 2017

A little Magic Trick (removing metal marks from my Fiesta)


I have a magic trick to share with you today.  Although it might not be *real* magic the results are pretty close!

We are a Fiestaware family, our primary dishes are Fiesta, a mixture of vintage (my grandmother's) and modern from our wedding registry.  Our main color is white, which after nearly14 years of holy-matrimony/use have changed to look more.....silver.  A result of hundreds of utensils scratching across their surfaces (yikes!).


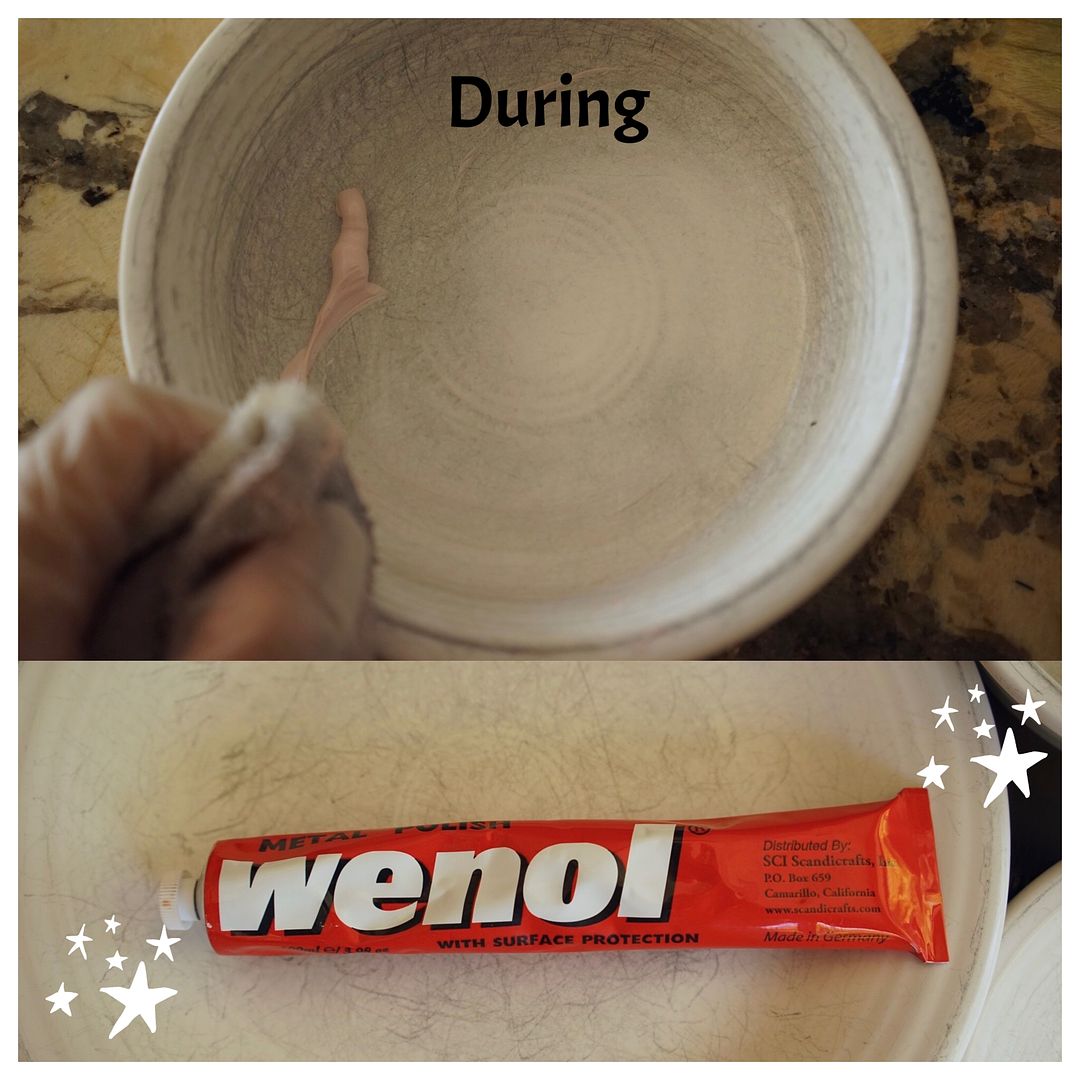
I did some research and found that wenol is the recommended antidote for this problem.  Although it is a metal polish it does wonders to remove metal from dishes.


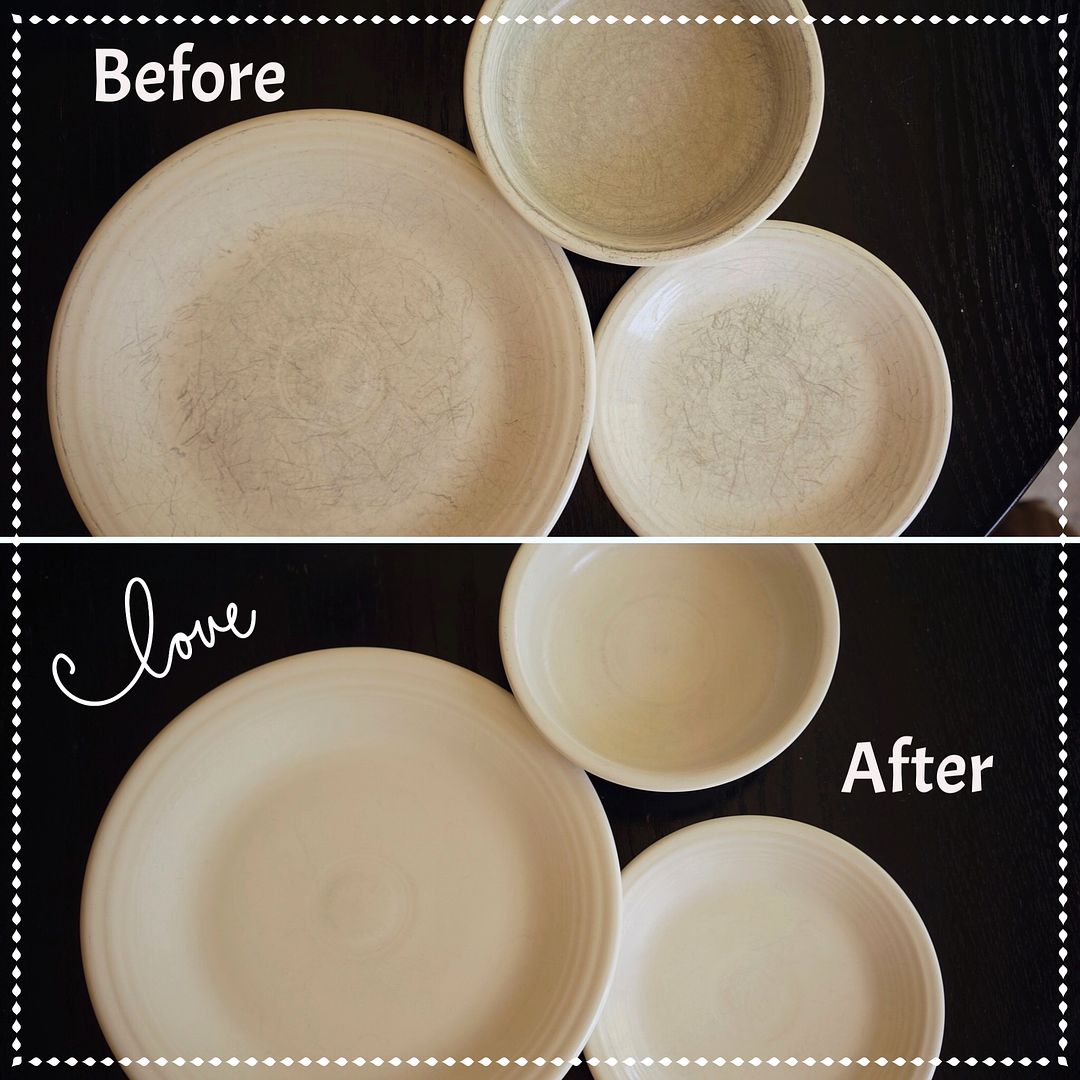
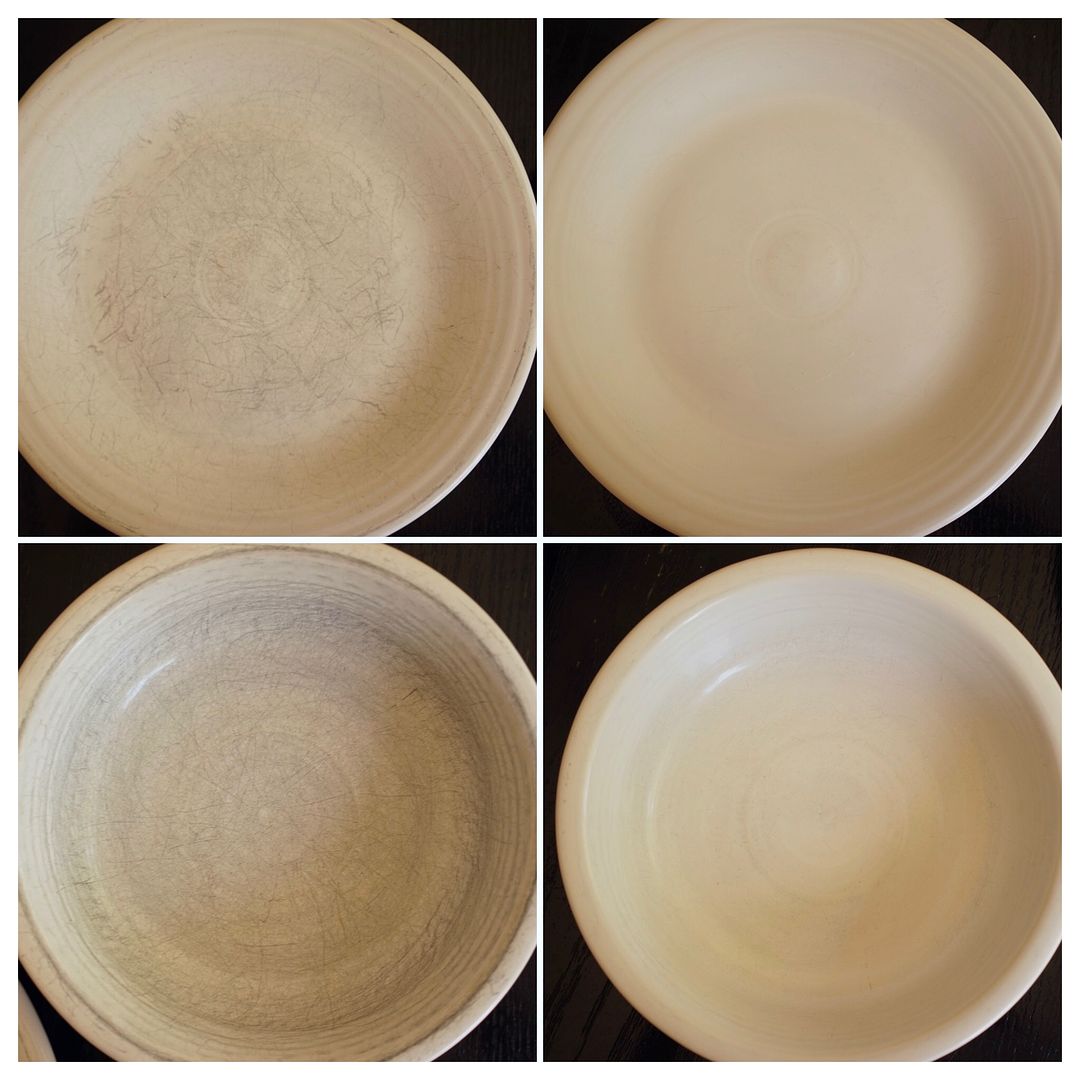
Just look!  Isn't that impressive?  It only took a little elbow grease, for the most part it was like magic!

You only need:
  • Metal scratched dishes.
  • wenol tube
  • Rag (you'll want to toss it when you're done)
  • Gloves (otherwise your hands will be stinky from the chemicals)
  • A well ventilated space.
That's it.  Since we have so many dishes I decided to just do a few at a time.  I'd take a dish after we used it; give it a quick hand wash then use the wenol (don't forget to do the bottom).  After that I put it in the dishwasher for a regular wash to remove all the chemical before we used it again.

*Another tip, it works best to have a dry dish and a dry rag.

So satisfying to have our dishes look like new with minimal effort!


For more entries on my Fiestaware check out:

Vintage Fiesta Relish Tray

Monday, June 5, 2017

Road Trip Bags for School Aged Kids (aka how to reduce travel bickering)

Do you have summer road trip plans?  Ready to pack up your family and hit the open road?  It's all fun and games until the kids keep whining and the radio won't pick up a decent signal.  Or maybe that's just me?


I've shared other traveling tips in the past and now my sweet angels (ah-hem) are both school aged (5 3/4 and 9 1/2 yrs old). In preparation for a week long trip this summer that includes 3 separate (!!!) days of driving I prepared the following keep-em-busy-organized-and-fed bags.  Perhaps I should call it a KEBOAFB instead.  Hmm, still not working.  I'll have to think about that some more.l

Anyhoo, I have been preparing these bags-of-fun (ooo that's better) for a while now; picking up goodies at the Target Dollar Spot, dollar stores, clearance sales, etc.  

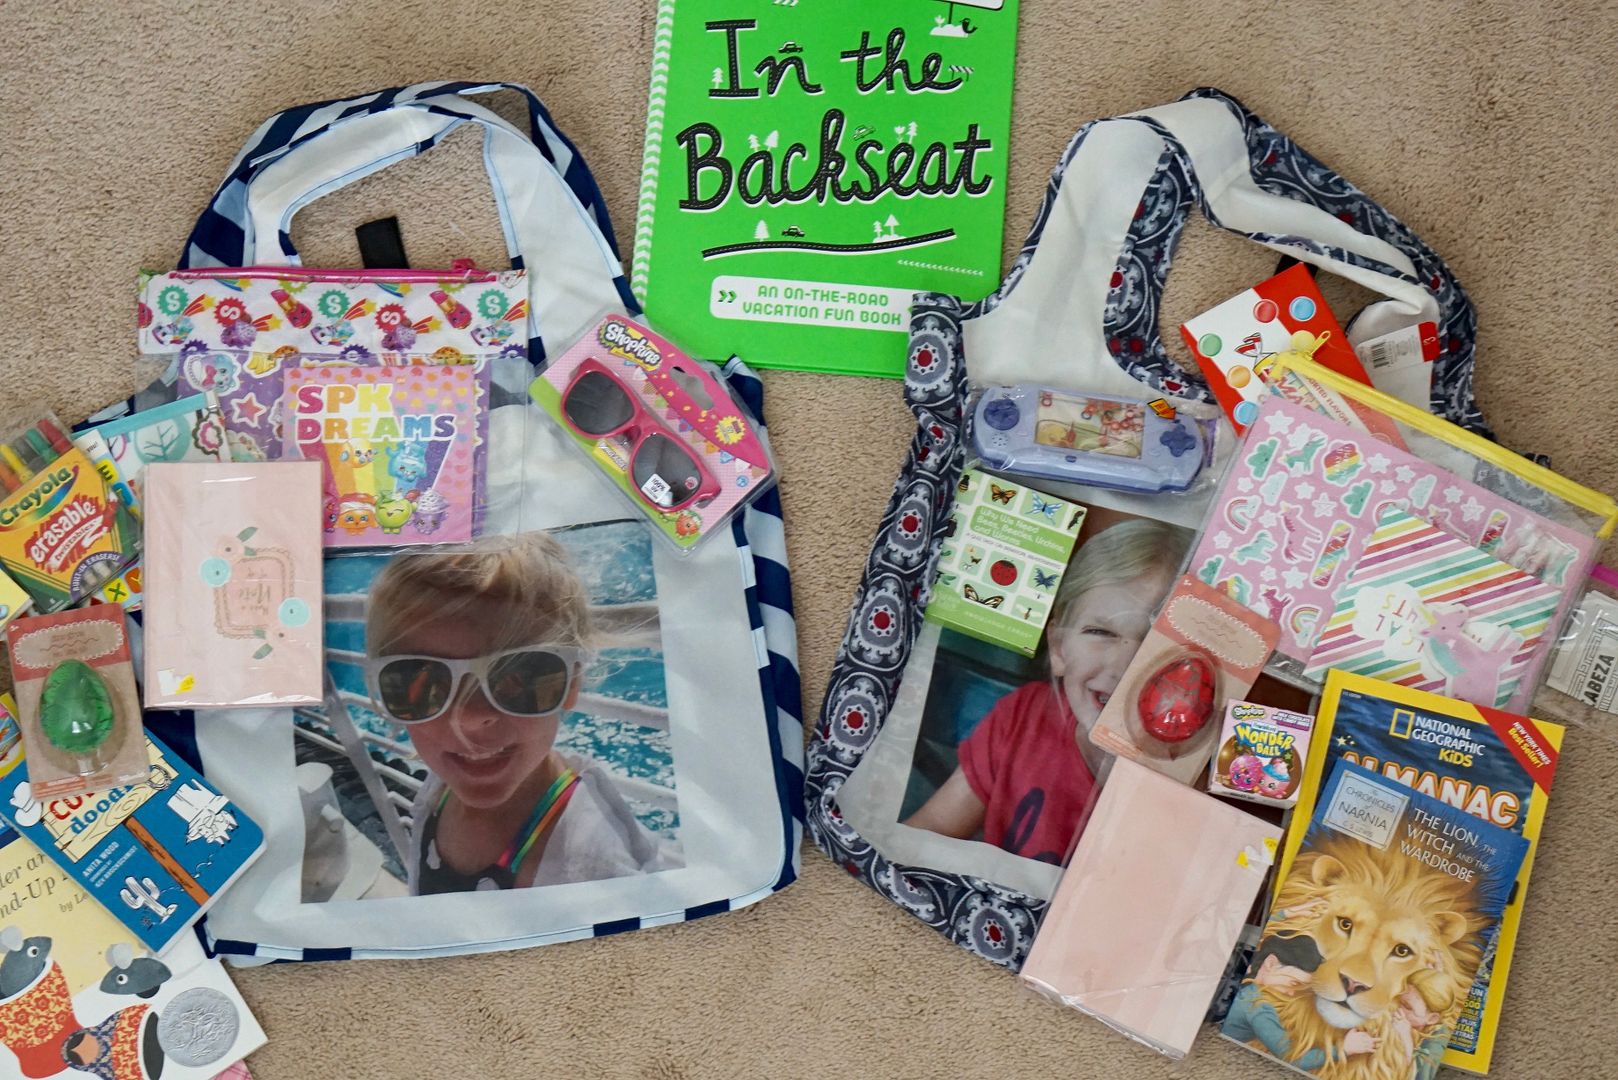
The bags are personalized for each of my precious pumpkins from Shutterfly using free codes so I only had to pay shipping.  They ended up costing $5.50 each.  Well worth it to me as they're:

1. Adorable
2. Fold able
3. Reusable
4. Easy to figure out which goes to which child! (aka no fighting)


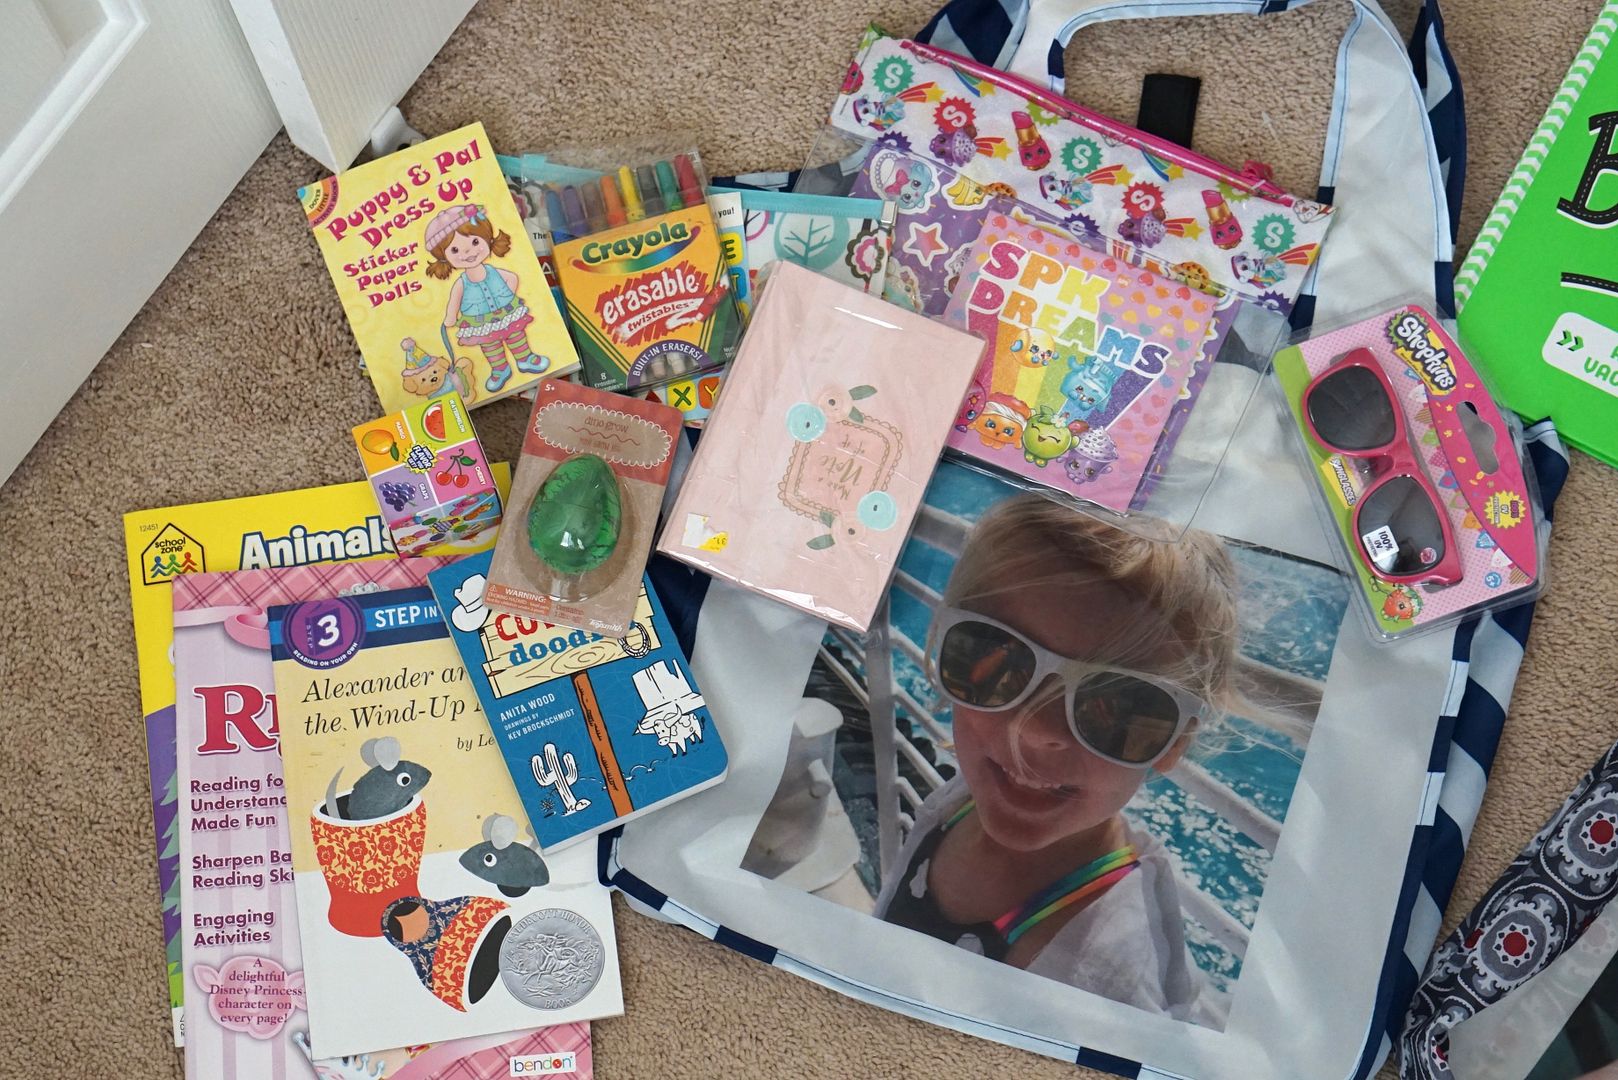
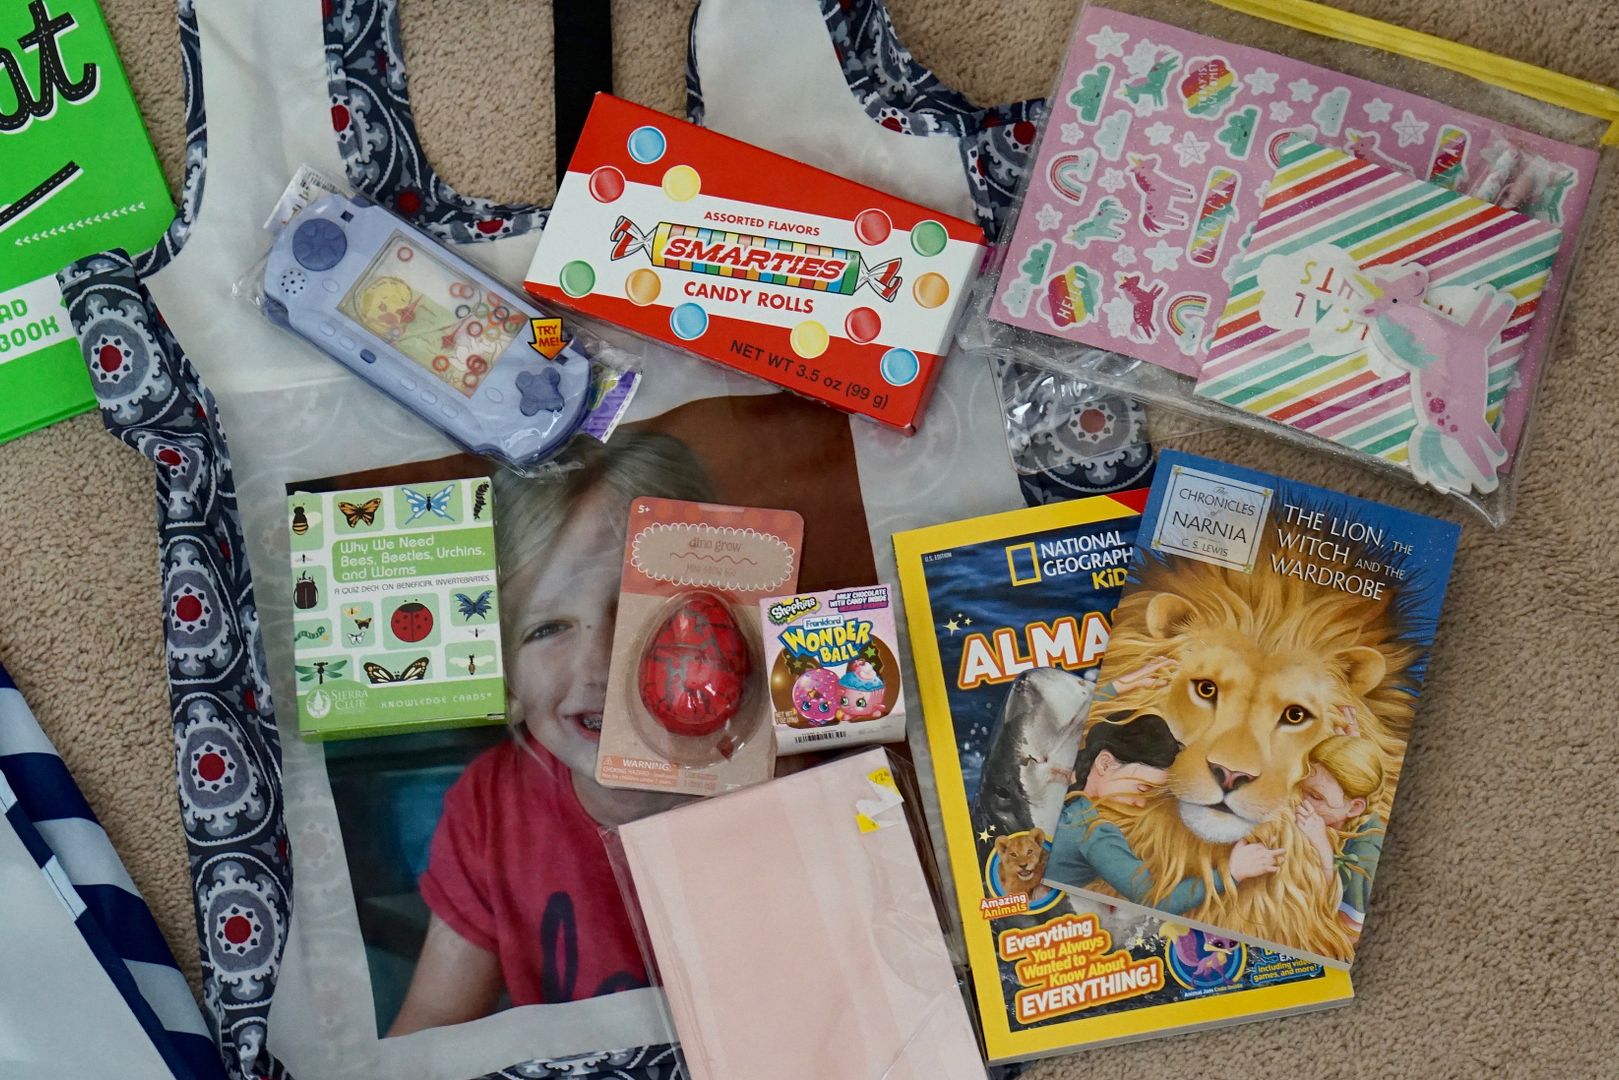
Inside each bag I included (so far)

-new book(s)
-activity book(s)
-candy
-art supplies
-sticky note books ($1! on clearance)
-activity to do at the hotel (growing dinosaur eggs)
-a couple child specific goodies


Other things to remember/consider packing for road trips include:

*Game player packet w/charger (or extra batteries) and games.
*Headphones 
*pillows/blankets to get cozy
*ipods/ipads with individual playlists and games


I found this fantastic road trip book a couple months ago and put it away for this trip.  It has activities and car games to help make the trip more interactive.  You could also get car bingo or other road-trip specific books/games for travel. 


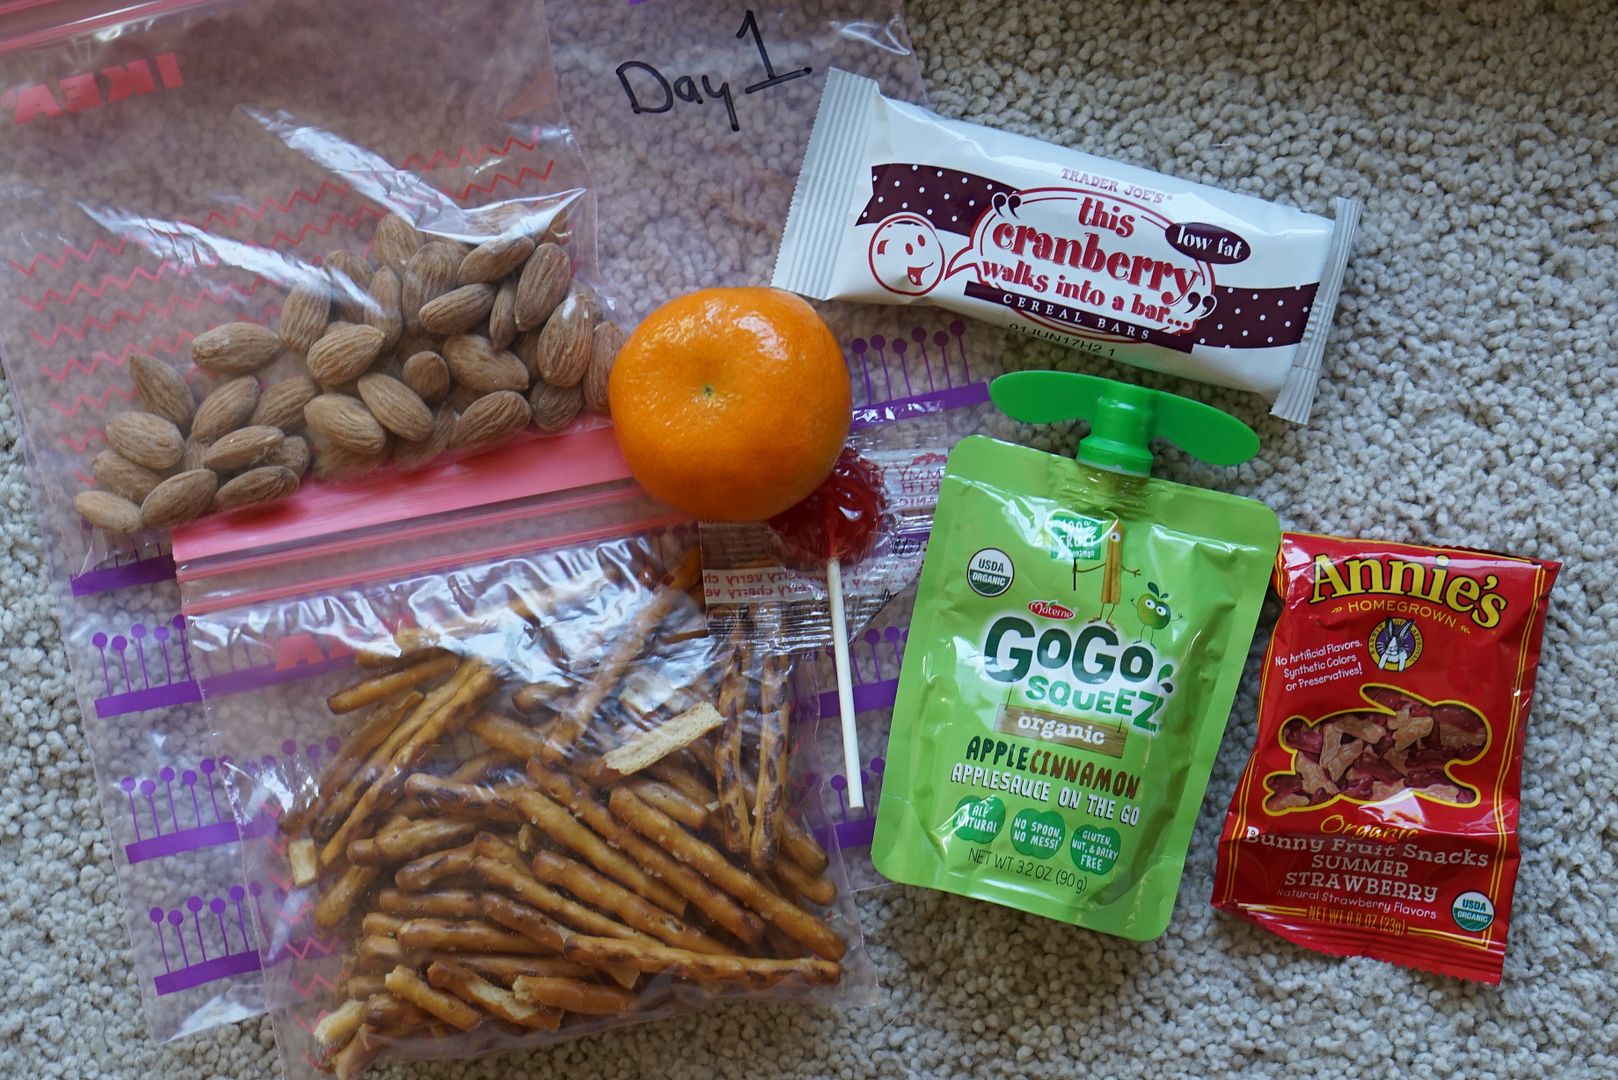
And don't forget snacks!  I made bags for each day of travel that were clearly marked.  And yes, I'm keeping Day #2/#3 somewhere else since my kids are awesome but not super-human.  If they had all the snacks in a bag they would eat them!


For travel friendly car snacks I recommend:

-Apple Sauce
-Snack Bars (I'm all about fruit/nuts lately, protein for the win!)
-Gummy Bunnies
-Hard candies (they can take awhile to eat, careful with the smaller kids for choking hazards)
-Pretzels (less messy than crackers)
-Nuts
-Fruit Tape
-Jelly Beans
-clementines

And don't forget to pack in a separate cooler:

-Cheese Sticks
-Yogurt Sticks (freeze them first if possible)
-sandwiches
-juice boxes/water bottles
-cubed meat chunks
-apple slices

You get the idea.  The more you pack ahead the less junk you'll be tempted to buy at a random 7-11 with questionably clean restrooms and selections that only included beef jerky, cheese in a can or candy bars that are most likely expired.  Just saying.

Now I'm not a travel scrooge, we'll plan stops for Slurpee's and M&M's here and there, I just prefer that the snacks be more healthy and less $$ if possible.

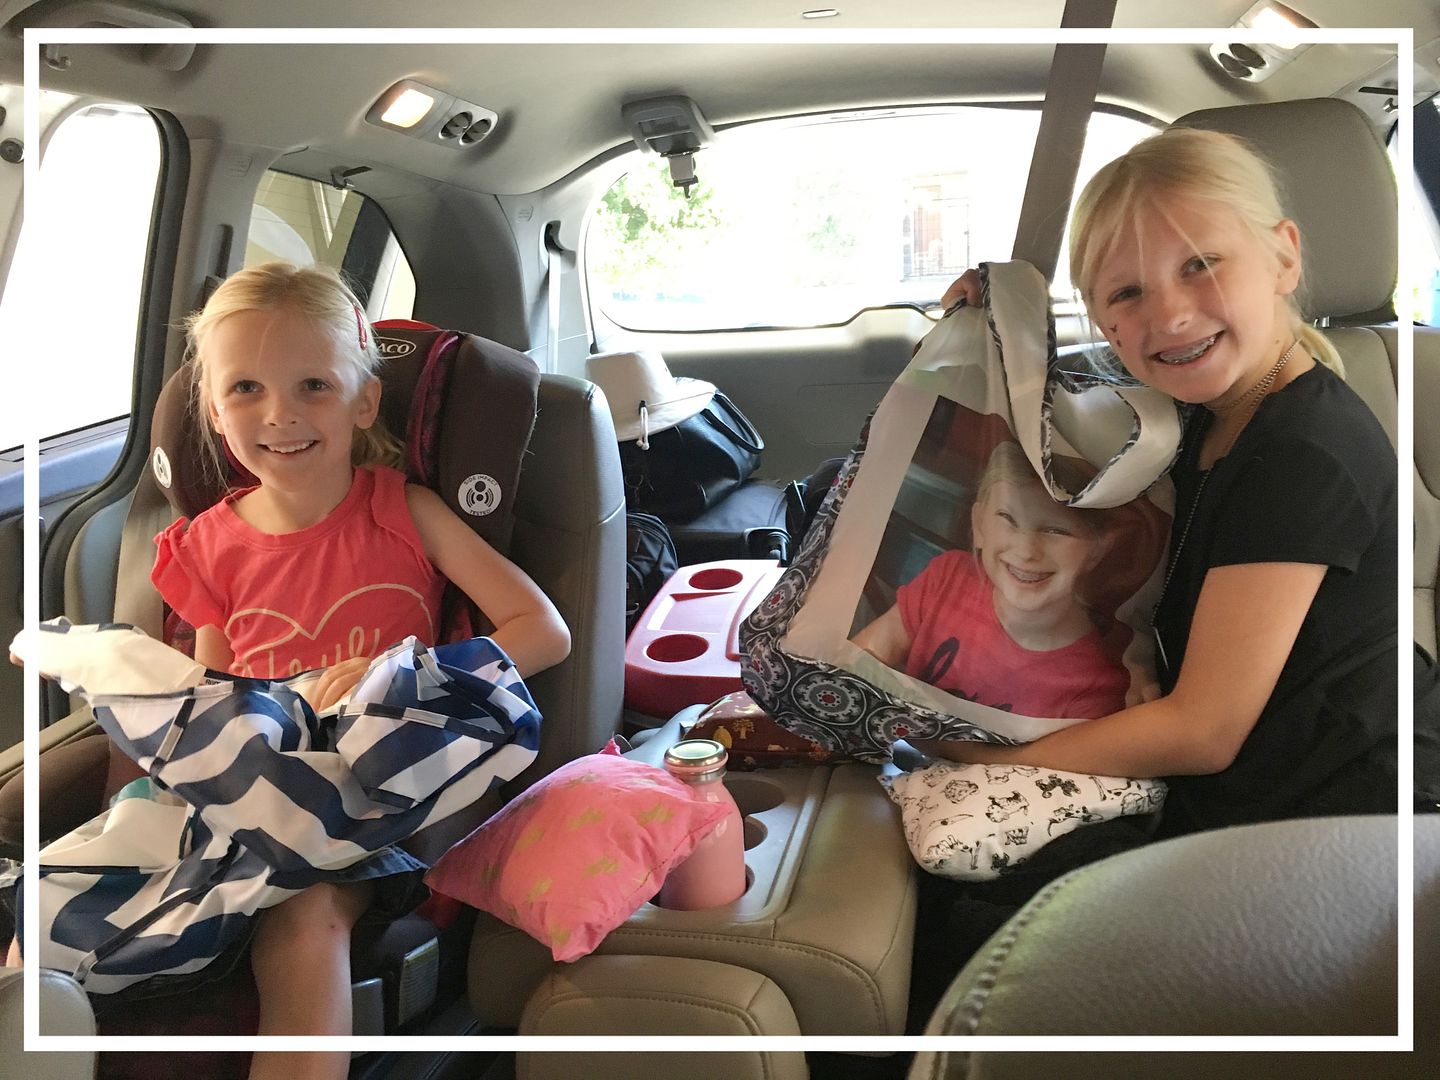
I plan on putting the bags-oh-fun in their carseats the morning that we take off.  I'm excited to see their reactions but preparing myself for the inevitable "no fair she got _____".  Sigh.  


ETA: Guess what they were a hit and I didn't hear them say "no fair"!!  Hooray. 

For more travel trips check out:

Road Trips with Babies & Pre-Schoolers
Traveling with a Toddler - Airplane Activity Kits
Drugging Your Kids and Other Ways to Survive a Red Eye Flight
Disneyland with Small Children - Tips and Tricks

Wednesday, March 29, 2017

I still have napkins from my wedding: De-cluttering Tips

This spring I've been motivated to de-clutter and minimize my house and simplify my life.  I think it was the combination of friends doing the same, watching The Minimalists on Netflix (great film!) and also needing an activity to keep me busy after Dad died.

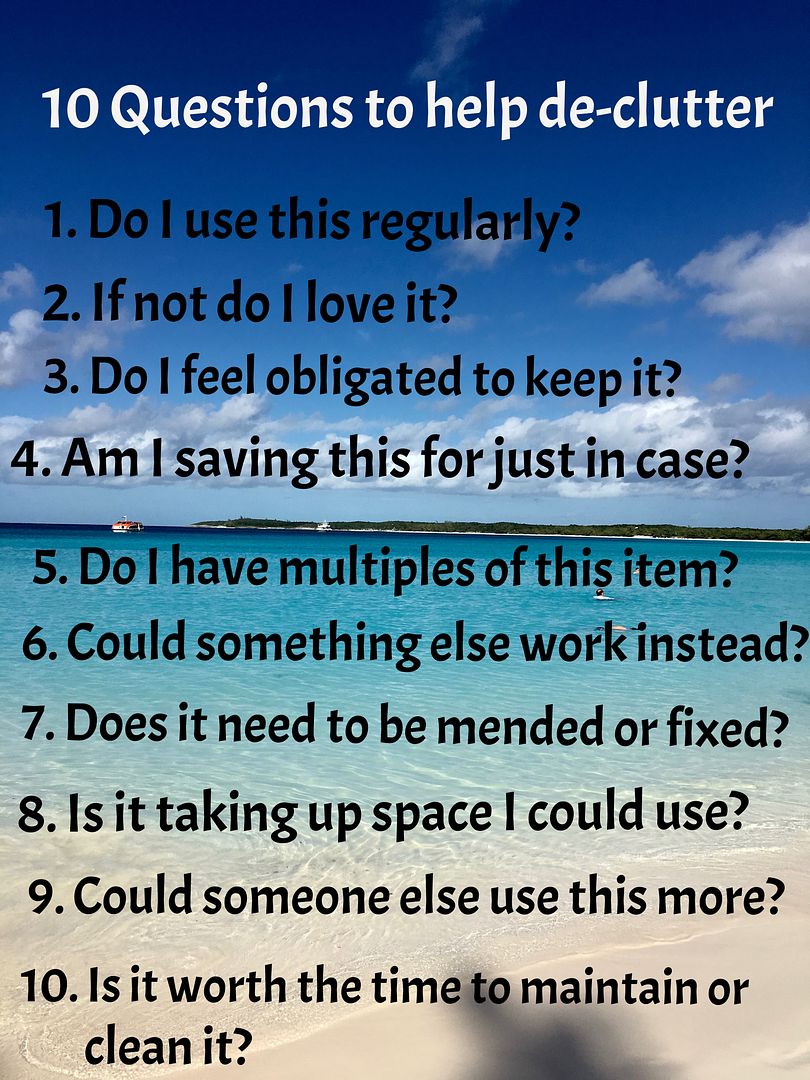
I started going through my house one room, one drawer and one closet at a time.  I walked through this de-cluttering checklist and before I knew it I'd filled my van twice with stuff to get rid of. 


Now the fact that I have so much crap is nothing to be proud of, but I am feeling better/proud of seeing it leave my house!

I'm also working on minimizing what I bring into the house by buying less but that's a story for another day.


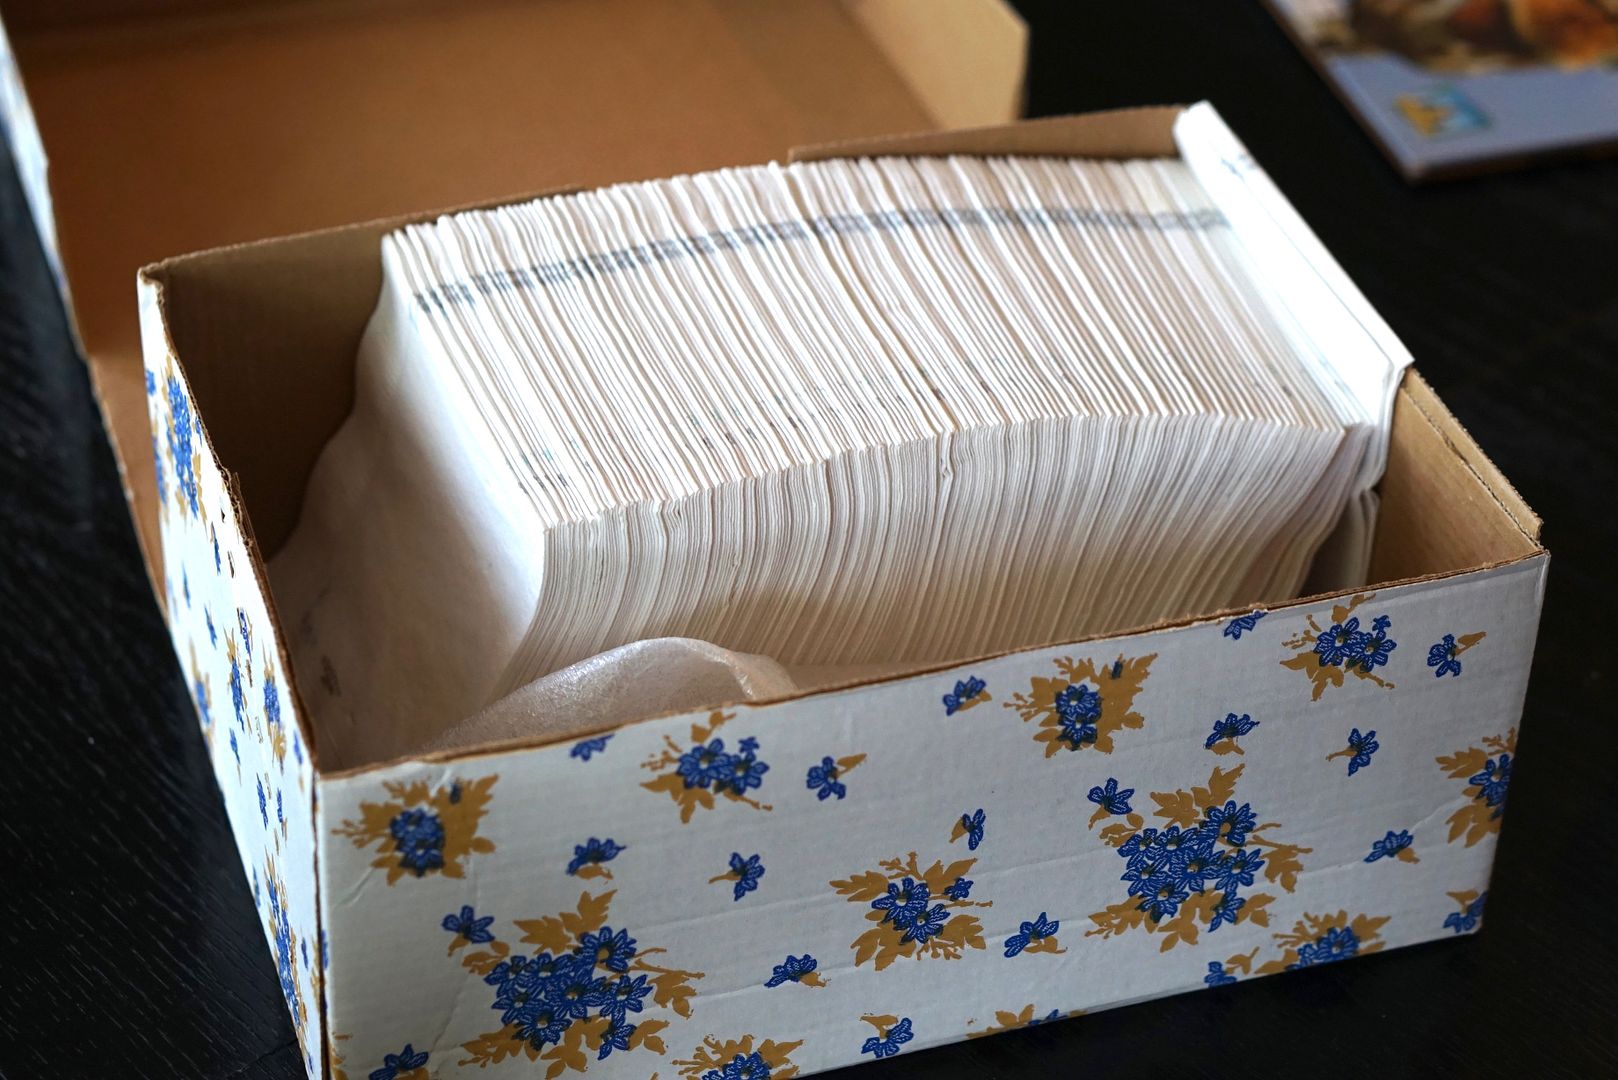
During my room by room process of getting rid of items I found a few interesting discoveries including a box full of cocktail napkins from my wedding.....13 years ago.

Now you may ask how that box had managed to move across the country and across town into 3 different homes?  Well...I guess I was sentimental and thought I'd use them someday.  You know for my 25th anniversary or something.  Ha!

To make the saving situation worse the napkins weren't even personalized, they were just purchased at a wedding supply store. Sigh.  

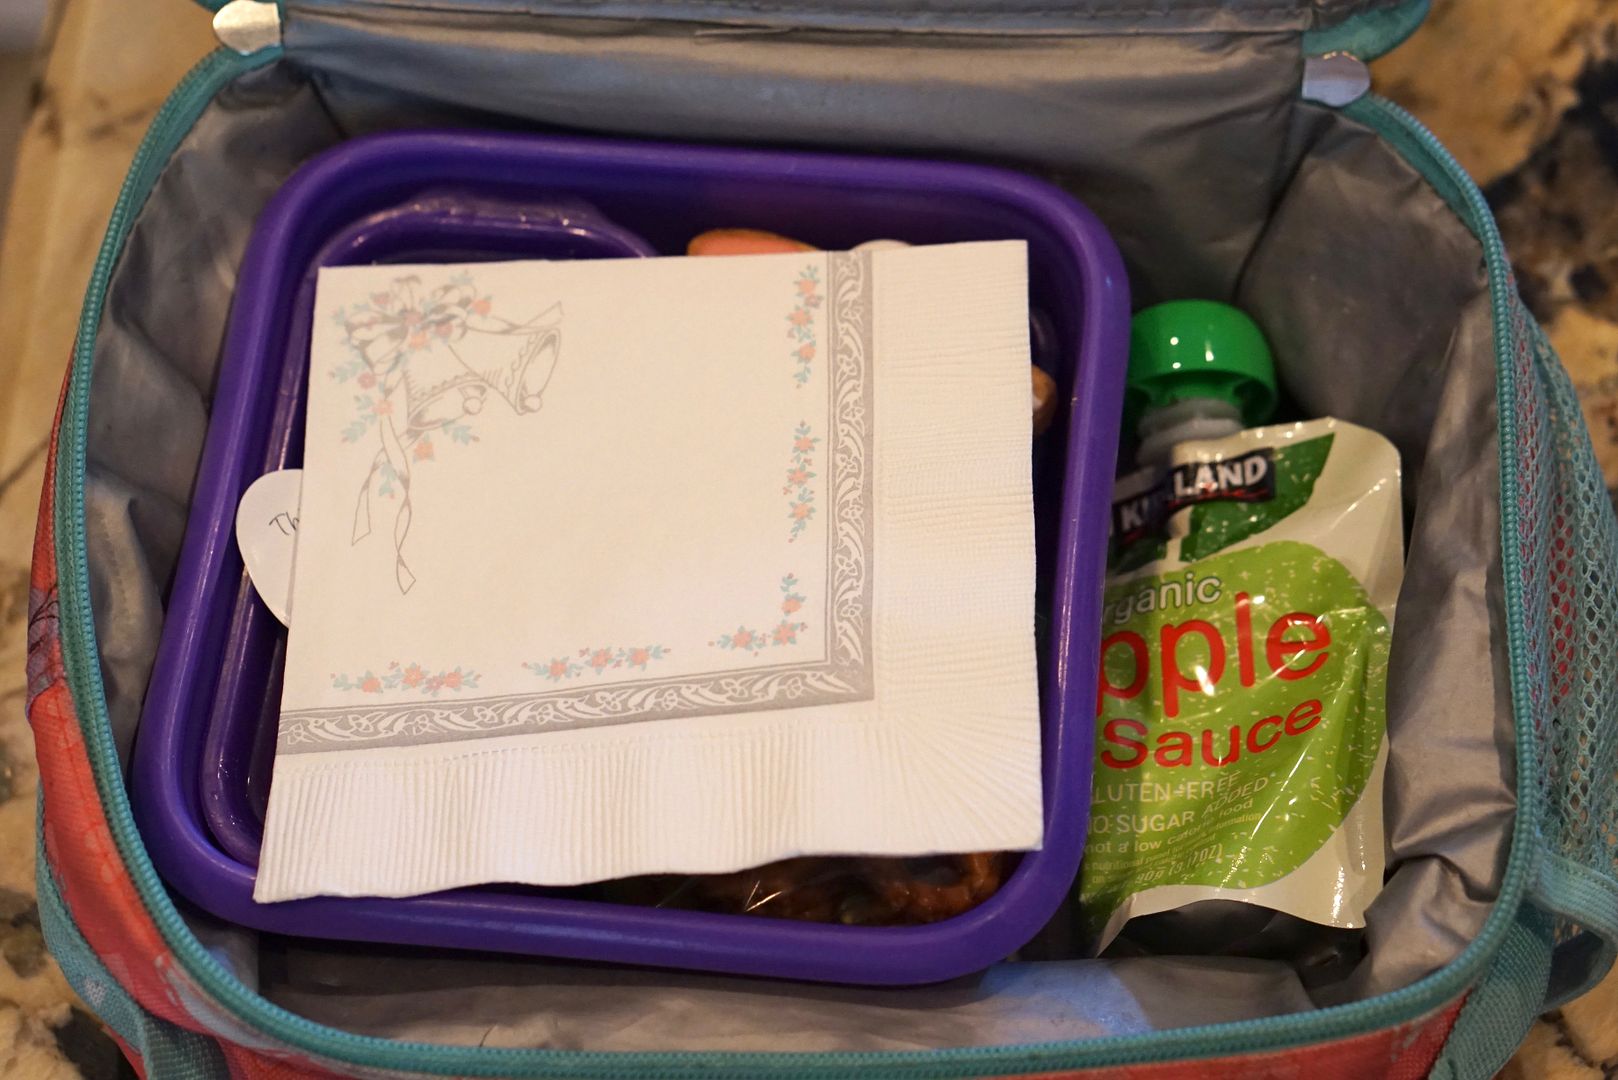
So I realized that I needed to get rid of them (#1, #4 & #8 on the list above).  I had the realization that they'd be a perfect size for my girl's lunch boxes.  They loved the idea of having a piece of our wedding at school each day and told all their friends about it.


Hooray, it's a win-win.  My kids get napkins (which they needed) and I get more space in my cabinet.  I plan on keeping the very last one for my wedding scrapbook, but it will be awhile before we use all these.

I'm sure I'll be back with more de-cluttering discoveries, you never know what you'll find in a box or drawer around here. :)

Friday, March 3, 2017

Fisher Price Friday - Storage Updates

It's been awhile since I had a Fisher Price Friday!  I've got a few toys and goodies to share but today I want to show off our storage changes.  For years I've kept most of our kid's collection in a big armoire which was good and bad.  The good is that the playroom looked neat when they were tucked away, but the bad is that my youngest had a hard time reaching many of the toys and also I couldn't see them!


So I did a switch and moved (most) of the FPLP toys to the bookshelves and put the books in the armoire instead (and got rid of a bunch).

As a result my little person is using the little people toys more!  Hooray!


The baskets on the bottom hold little people, miscellaneous pieces, vehicles and a few pull toys.


As a result of the move a few toys had to move to the closet and some we're getting rid of (selling soon in my Etsy shop).  We can't keep them all forever, although I'm happy that my youngest has a few more years of play in her. :)

To see how the playroom has looked in the past:

Playroom Storage
Playroom Organization

Wednesday, June 15, 2016

Tips and Hints to help Moms recover after Surgery (or bed rest)

A month ago I had a surgery that required me to take it really easy for a few weeks.  As a result of my recovery it was impossible to do my regular job, you know, parenting two kids and taking care of my household.

Fortunately for me I had a very capable and helpful husband, a mom who flew in to stay for a week and a few amazing friends who did SO much to make things run smoothly.  I also did quite a bit of preparation to make things easier for me (and my family) until I could get back to normal.  It's been 5 weeks now and I'm at about 90%!

I thought I'd pass along my favorite tips for recovering moms, or even for moms on bed rest.

Before surgery do shopping trips to fill your cupboards but also make special care to get items that are heavy (many procedures have weight lifting restriction for days/weeks after).  Things like dog food, bottled water, cat litter, bleach bottles/detergent, soda, etc.  Stock up your pantry and freezer with easy to make or ready made meals.

After surgery you can have these same heavy items as well as regular groceries delivered to your house with services like Safeway Grocery Delivery or Amazon Prime Now (both available in my area).  You can also use Drugstore.com or (regular) Amazon for basics like toilet paper, dog food and other must-haves.


We used Safeway Grocery Delivery two weeks after my surgery.  By that time our stocked up groceries had depleted and my mom had gone back home. ;)  We've been so happy with Safeway Delivery that we've had 2 more orders!  Not only are they super convenient but the delivery charge is very low (I paid $3.95 for my last two orders, the first time was FREE!).

Pros
They bring the groceries where you want.  We had ours brought all the way into the kitchen so I didn't have to lift a thing.
Delivery workers have been very courteous and kind, and you can't tip them, so they're just naturally that way.
Produce has been fresh, no complaints!


Cons
Some items are more expensive, especially produce.
They use dozens of plastic grocery bags (I normally use re-useable grocery bags).  

I normally enjoy grocery shopping so once I'm back to normal I'll probably return to my regular stores (especially to get FREE Starbucks refills!) but....one of the best things about grocery delivery is my cold/frozen items stay that way since they arrive in a freezer truck!  Living in Phoenix where the summer temps reach 120 this is huge.  There are months in the summer where I can't even try to purchase ice cream, it's just not possible to get home without melting.  So I might just keep getting deliveries for all things frozen until it cools down out there....sometime in November. ;)

Now moving on to other non-food helpful hints. :)

Bedroom/Bed rest Tips:

The first couple of weeks I spent most of the day in bed and I found ways to make it more comfortable and kid friendly.  Here is what worked for me.

For your bed/bedroom:

1. Make sure you have extra pillows and a Boppy if you still have one.  That pillow worked great to keep me more upright the first few nights!
2. Folding bed table tray - This was a lifesaver, I used it for my laptop, dinner tray and iPad (while watching shows).  My daughter also used it as a table to color on.
3. Lined Notebook Pad/Pen - Keep one on your bedside table to keep track of medications/times and other random notes.  Trust me, if you're taking enough meds you won't remember unless you write it down!
4. Water Pitcher - I took the pitcher from the hospital but you could use your own.  Hydration is super important and the easier it is to get water the better!
5. Last but not least - Snacks!  Fill up a bedside table drawer with snacks like saltine crackers, chocolates, protein bars, etc.  That way if you need food without getting up it's right there!  If you don't have drawers then try a shoe box next to the bed.

For your Kids:

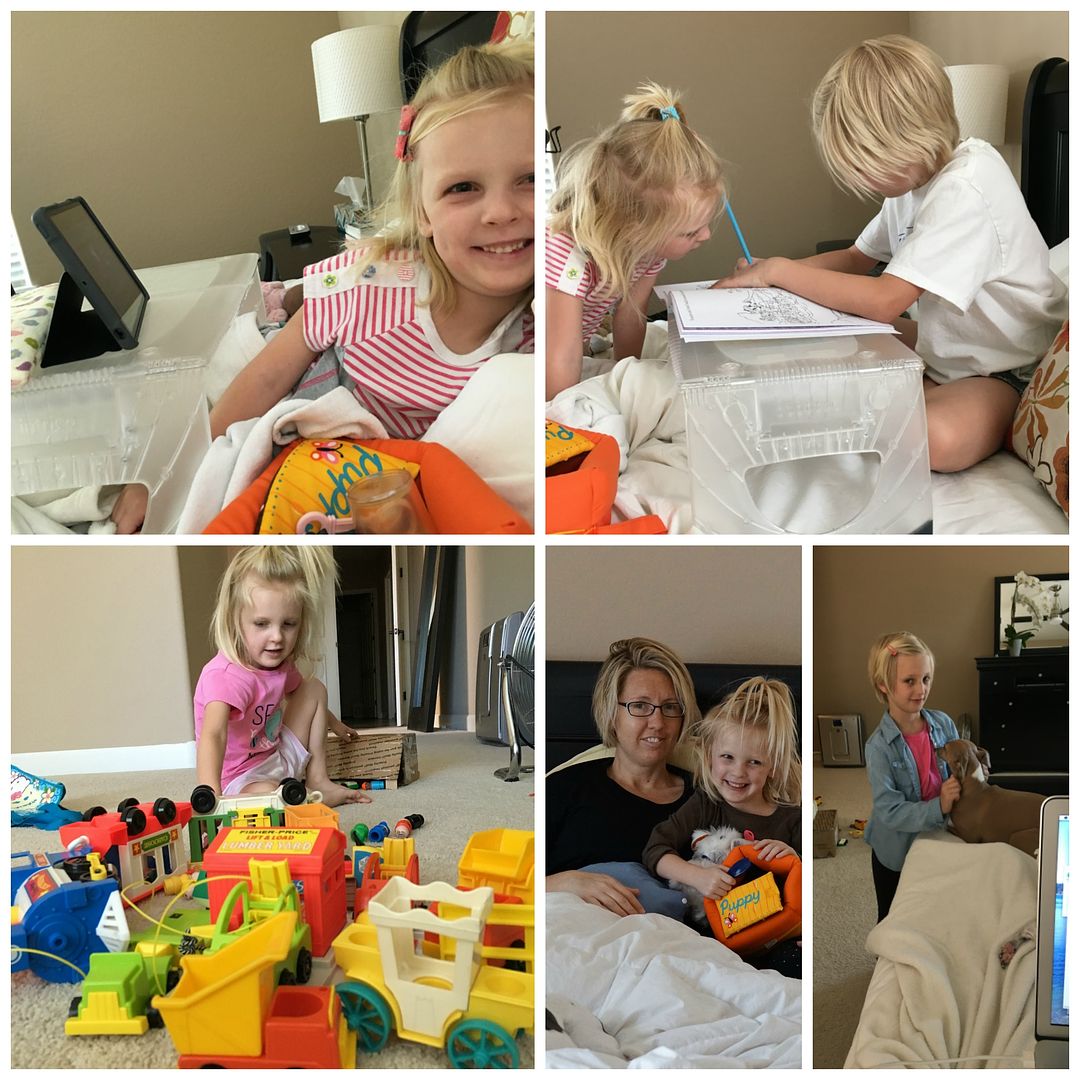
Preparing ahead for the kids was key, since there were days where my little one (4 year old) would spend hours with me while I was resting/sleeping.  She's a great kid but I still did some prep to keep it interesting for her.  The upside is that my kids wanted to be in my room with me!


Before my surgery I bought a variety of special activity books (w/coloring pages, stickers, make your own book, etc) that they could only work on while in my room.  I included a bag of colored pencils (pens/crayons would have been messy on my white sheets!!) that stayed in the room with me.  

I also bought some new-to-them toys (vintage Fisher Price of course) that stayed in my bedroom (put away in a bottom drawer when not using).

Last but not least I had my mini iPad loaded up with kids apps, so if I absolutely needed to rest I'd give her my iPad/earphones and she was in heaven. :)

Those are my tips!  My family survived and thrived during my recovery and it went much more smoothly thanks to a little preparation and of course lots of help from friends and family!

Monday, May 23, 2016

Lunchbox Love Notes


When I was growing up my parents often left little love notes in my lunchbox the size of business cards.  I remember feeling special and loved by receiving them and even saved a few all these years. :)

I've tried here and there to put notes in my daughter's lunchbox but it always seems that I don't have enough time in the mornings and I don't think to plan ahead.

So...I came up with this clever and easy hack the other morning that did the job and was a fun surprise for my daughter.


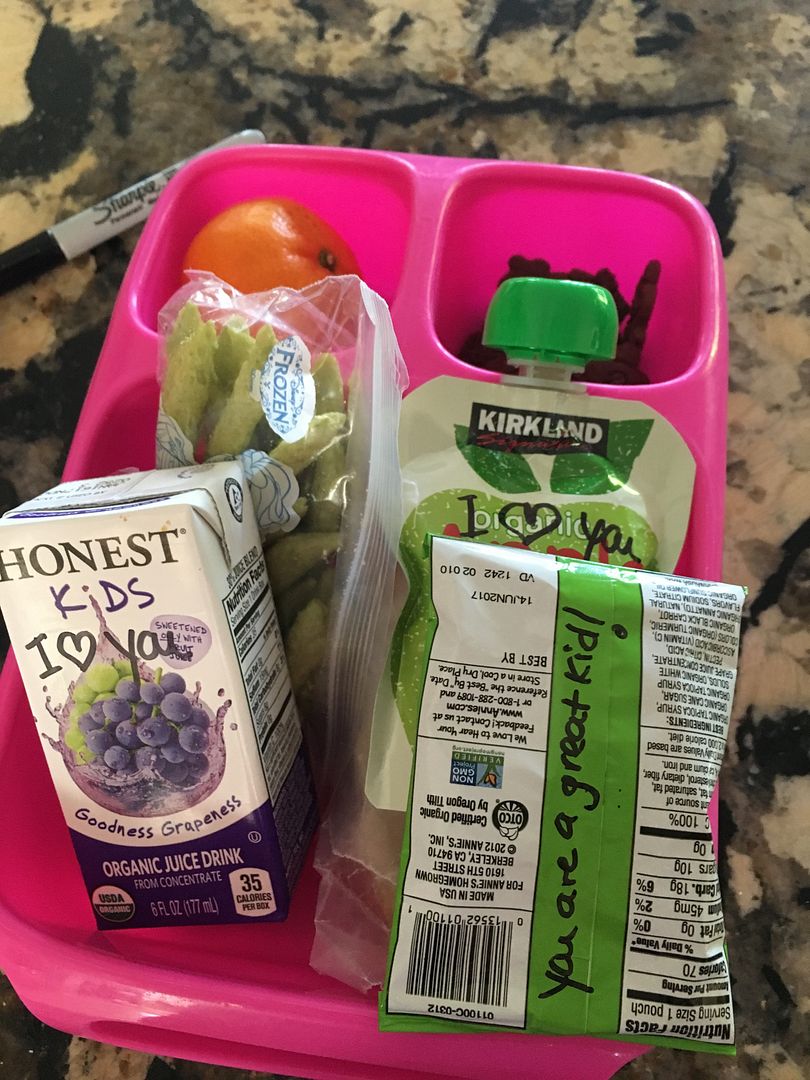
I simply used a sharpie pen and wrote little notes on the consumable packages in her box.  How great is that?  She was tickled and came home with a big smile on her face.

Now I want to keep putting paper notes in her lunch too, but this will do here and there too.  This is our last week of school for the year (she says= Yay, I say= Hmmm), so I've got the summer to prepare for notes next fall.

Let me know if you have any great ideas for lunchtime love notes!

Wednesday, March 25, 2015

Prepare Ahead Spring Onion "Chives" for Recipes


A couple weeks ago my youngest had a field trip to a local farm.  The kids picked vegetables, pet goats and rode on a "train" made of old metal barrels pulled by a tractor.  You know, typical farm stuff. ;)

One of the vegetables that we picked to take home were spring onions.  Spring onions are a relative of the green onions are wonderful in so many recipes.  The onion base can be used like a scallion or onion in cooking and the tops can be used in similar ways as chives (as long as they aren't too tough and big) although they do not have as strong a flavor.  My family likes them on top of baked potatoes, in soups and on salads.  

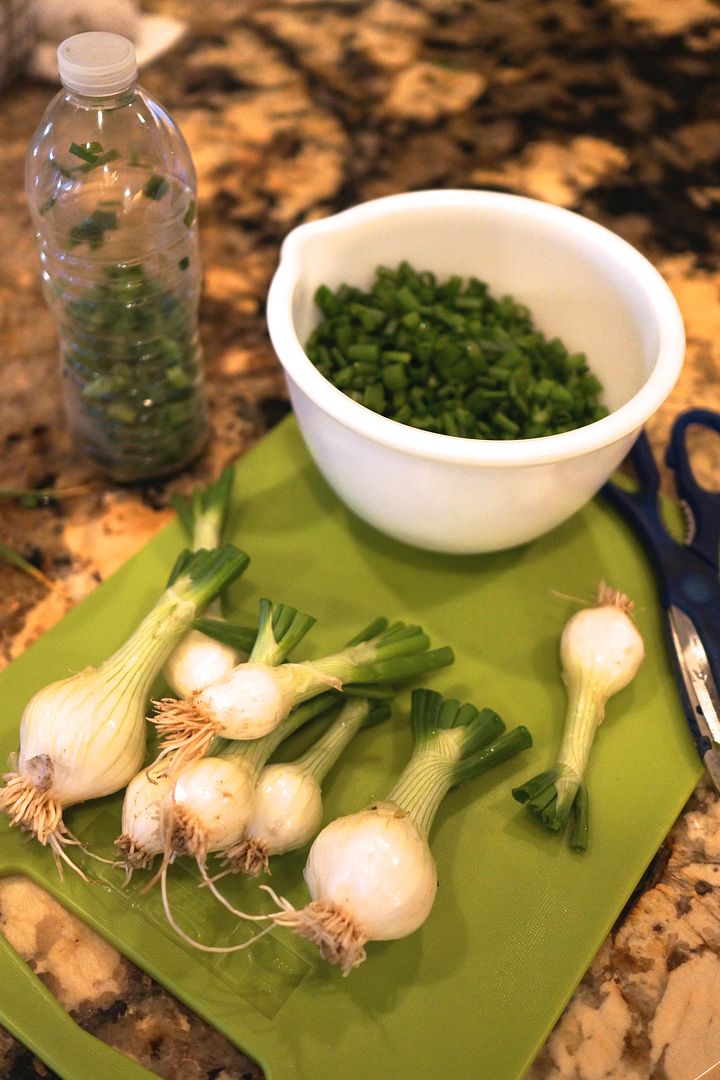
I rarely have fresh ones on hand however, I found an easy way to have spring onion "chives" ready to go at any moment.  This recipe can be used with spring onion tops or regular green onions.

It's so simple.  I just wash and then cut the onion stems into tiny pieces with a scissor.  I scoop them into an empty water bottle (or use a funnel) and place them in the freezer.  


When I need green onions for a recipe I simply shake out the amount that I need.  They thaw very quickly and taste fresh!

This particular day I also sliced up the onion bases and put them in a container in the refrigerator.  The next day I used them in a soup recipe, so easy!

So there you go, a simple way to always have green/spring onions on hand.

To grow your own spring or green onions at home (on your counter!!) go here.
Tuesday, September 9, 2014

Dollar Shave Club - A Woman's Review

Have you heard of the Dollar Shave Club?  It's a monthly subscription shaver service for men...well mostly.  They are currently trying to attract women to subscribe and use their razors too.

Now I am a HUGE fan of subscriptions.  I pretty much love anything that comes on a monthly basis to my door.  I already have The Honest Company (home and bath products), The Simple Soap (organic bar soaps!!) and Citrus Lane (pre-school toys/activities) coming to my house every month.  So when I heard about the Dollar Shave Club I decided to give them a try.


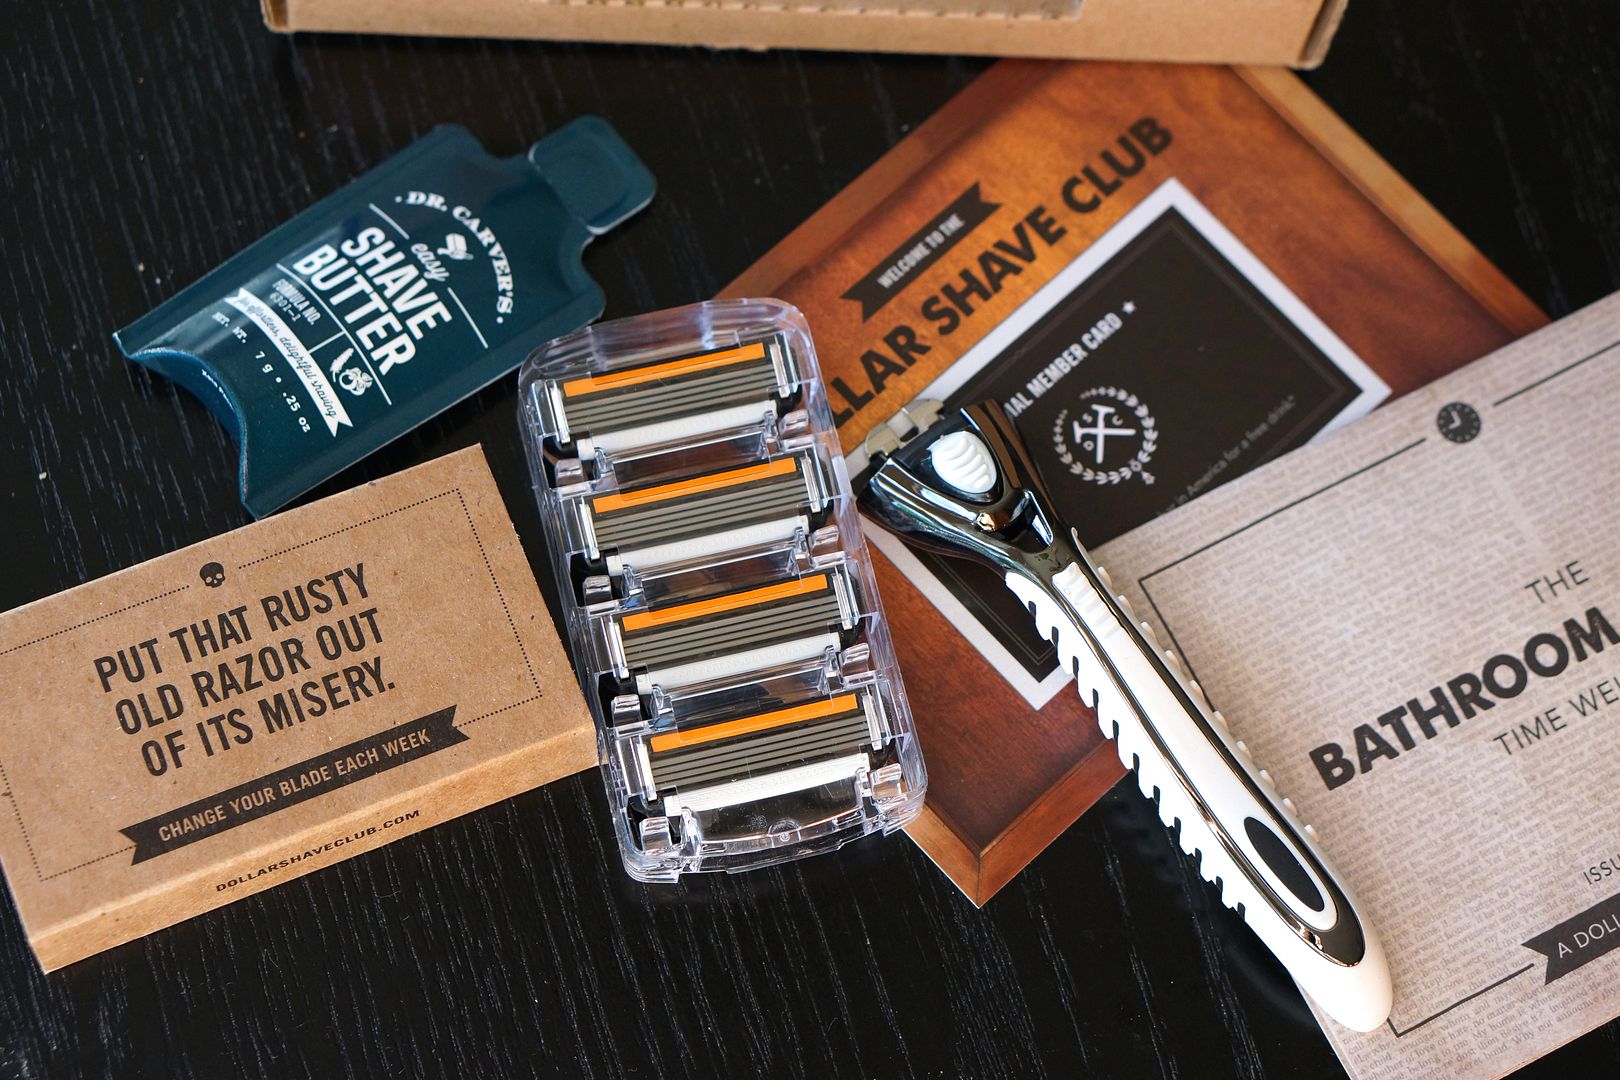
Basically the Dollar Shave Club is a mail order shaver.  They send you an initial box with a handle and 4 refills.  Then each month (or in my case every other month) they send 4 more blades.  For the low low low price of only $6 (that includes shipping).

My first box was compact, cute and creative.  Besides the razor and blades they also included a sample of shave butter (you can add a full size to your order for an extra charge) and a fun "bathroom minutes" which is a grown-up activity book of things to do/read while you are... you-know occupied in the ah-hem bathroom. ;)  It appears that they send a new one out each month to keep you entertained.  Ha!

What makes this razor better than the "lady" pastel-plastic wonder I used before is that it is higher quality for WAY less money.  I did the math and before I was paying about $3 per blade for my Schick hydro silk razors.  And the upfront cost was about $10 for the handle with 2 blades.  So basically I way paying 2x more!


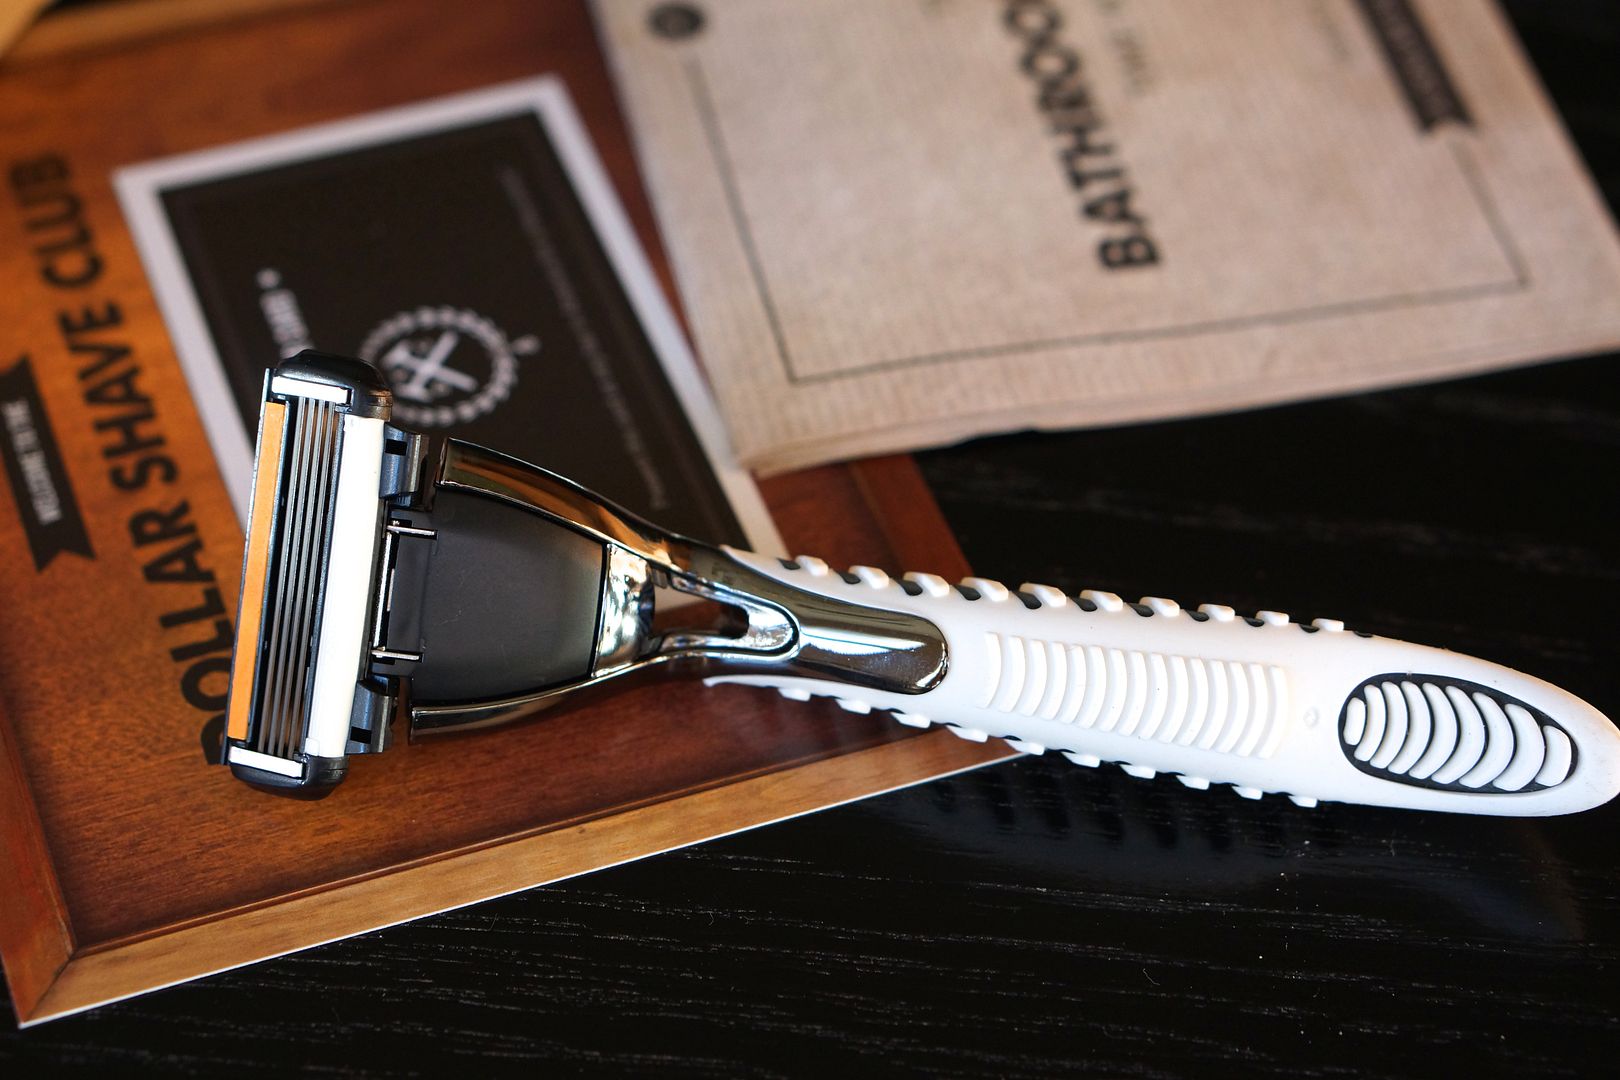
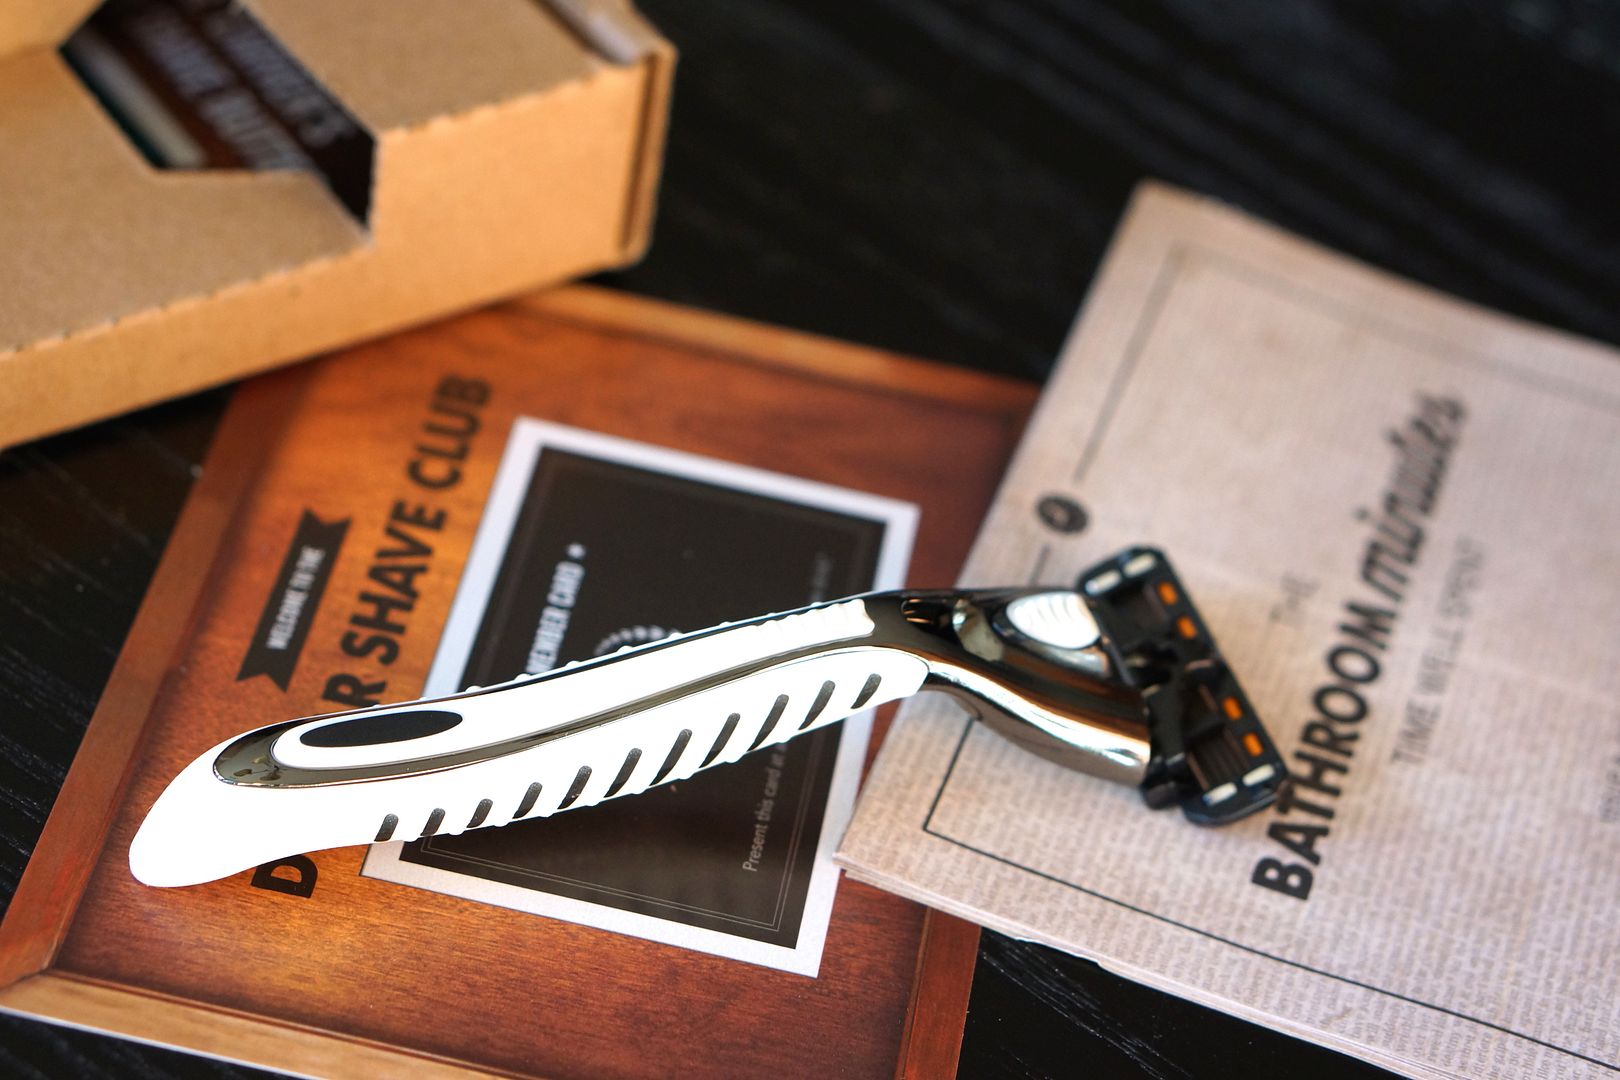
Another benefit of the Dollar Shave Club over my old "lady" razor are the Dollar Shave Club handles and blades.  It appears that men have had it better on this point, their handles have a little weight to them which is more comfortable when shaving.  Also the 4X I selected has lovely grippy sides.  I do not think that this handle is "too manly".  Hey, white is for everyone!  I'd actually prefer they not add a "lady" choice, I'm SO over pastel plastic razors.  

The Dollar Shave Club has 3 options; the Humble Twin for only a $1 a month (shipped!!) which includes 5 refills, the 4X which is $6 a month for 4 refills and the Executive at $9 a month for 4 refills.  Note that you can adjust shipping to every 2 months if you use less refills. 


The difference in the shavers are the number of blades and slight differences in the handle.  The humble has 2, the 4x has 4 and the Executive has 6.  I am currently happy with my 4X.  I had a smooth shave and loved how easy the blade moved around my bumpy knees and ankles.

My husband eyed my new razor with a hint of jealousy so I may be able to sign him up soon too (one time $4 charge for another handle).  We could each have our own handle and share the blade refills.  Ah, how simple would that be?  I heard that a easy way to tell his from hers in the shower is to put a little nail polish on one of them (I'll let you decide which). :)

So go check them out!  If you decided to try them please pretty please use THIS LINK.  That way I get credit towards my account for more free refills.

Stay tuned for more subscription club reviews.  I have the best locally made (in Oregon) organic soaps to tell you about.

Tuesday, August 26, 2014

Have you heard of My Fitness Pal?

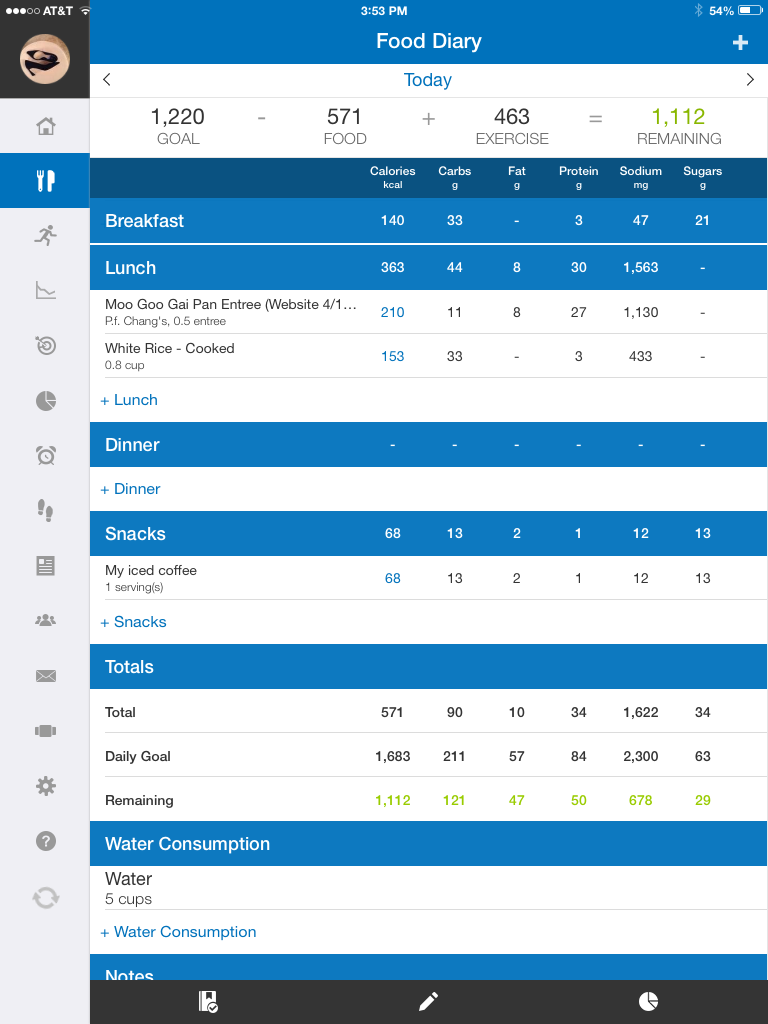
I have to share one of my latest interests/obsessions.  It's the (FREE) My Fitness Pal application.  This fabulous little program is a pretty simple and helpful tool for weight loss.  I have to admit to being a bit of a novice about dieting, for the most part I feel like I eat well and am pretty healthy.

However, over the summer this ah-hem mid-30's (okay late 30's) momma found a little extra weight creeping on.  After a few weeks of complaining I decided to take my BFFs advice and give this little tool a try.

And what do you know?  It worked!  I discovered that I was eating more calories than I needed.  And although many were "good" calories (mostly fresh fruits) it was still more than I needed.  Especially sugar. Do you have any idea how much sugar is in an orange or banana for example?  


My Fitness Pal is basically a convenient way to track calories.  Less calories in = weight loss.  It's pretty simple.  What is fabulous about it is the huge database of foods already in their system.  So it's pretty easy to find what I ate that meal.  If you use a smart phone/tablet you can also scan bar codes of food products.

Easy peasy!

Exercise it important too and the app tracks how many calories you burn and then adds those to your daily allotment.  For example this morning I did a Zumba class so an extra 463 calories were added.  

I've been using the app for the last 3 weeks and am on track for meeting my fitness goals.  I've discovered that when I eat less sugar I am also a kinder-nicer-mommy. :)  It's a win win!  Once I meet my goal I can switch to maintenance and they'll tell me how many calories/fat/carbs, etc I need to maintain my weight.

I've used it during Girl's Night Out and family dinners out since so many restaurants are already loaded in the app.

So check it out, it's free!  You can use it on your computer, phone and/or tablet.

Tuesday, September 10, 2013

No paper towels

In our family we very rarely use a paper towel.  Although one of our family motto's is "keep it clean" we still make messes, but we don't use paper towels to clean them up.  What do we do?


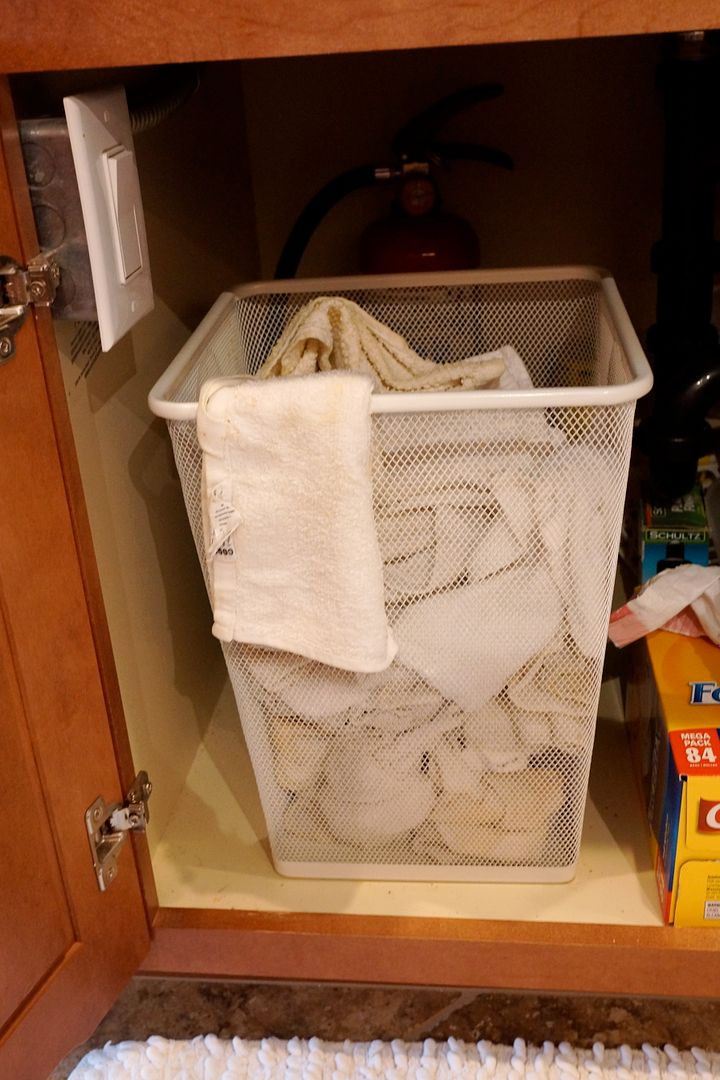
We keep it green and clean by reusing white wash cloths.  I find them a pretty and simple alternative to paper towels.  I buy them in bulk from places like Target or Ikea and keep them folded in this cute wire basket (from Target).  It sits on the kitchen counter where the paper towels would normally go for easy access.

I use them for cleaning counters, my toddler during/after meals, wiping clean dishes, etc.  After a use (or two) I put them in a mesh garbage can under my kitchen sink.  Wet ones fold over the side until they are dry to prevent anything growing down there.  The mesh garbage can is a must, keeps it dry and stink-free.

When I run out of washcloths I wash the entire can and start over.  If they start to look dingy I do a bleach soak (every few months or so).  I keep the extra clean cloths in a drawer (in folded stacks).

I can't take credit for this brilliant idea, it was my friend Sarah's.  

What do you do to keep your kitchen clean and green?

Saturday, September 7, 2013

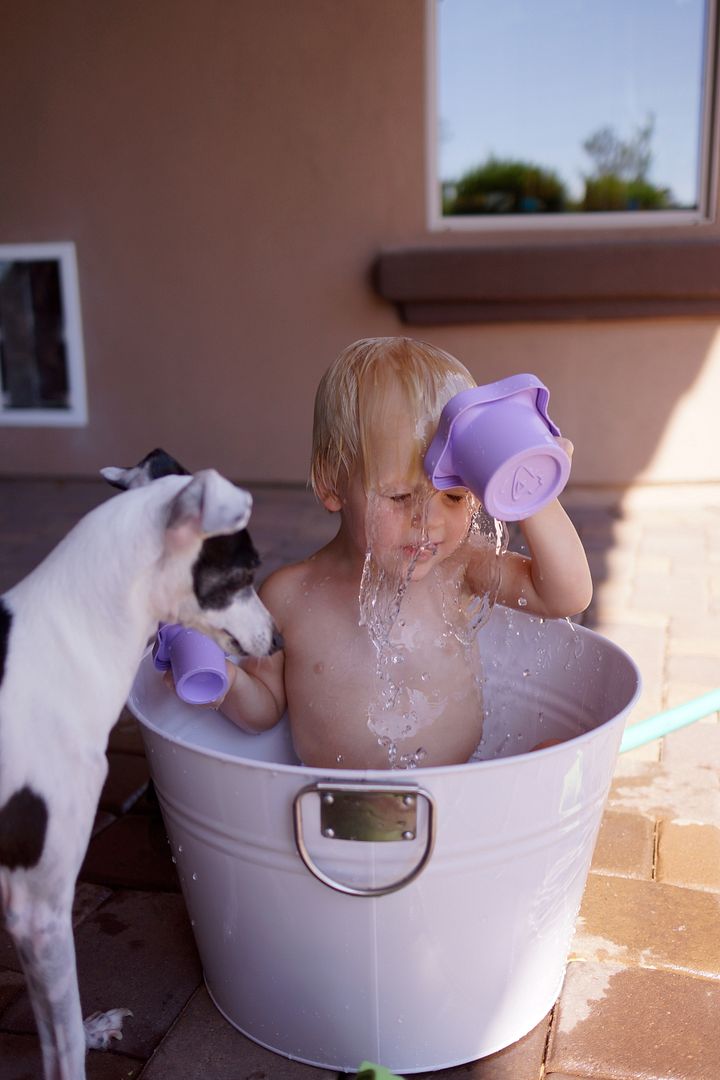
Backyard Tub

It's been hot lately, really hot.  It may be September and school may have been going for 4 weeks now but it's still hot. 

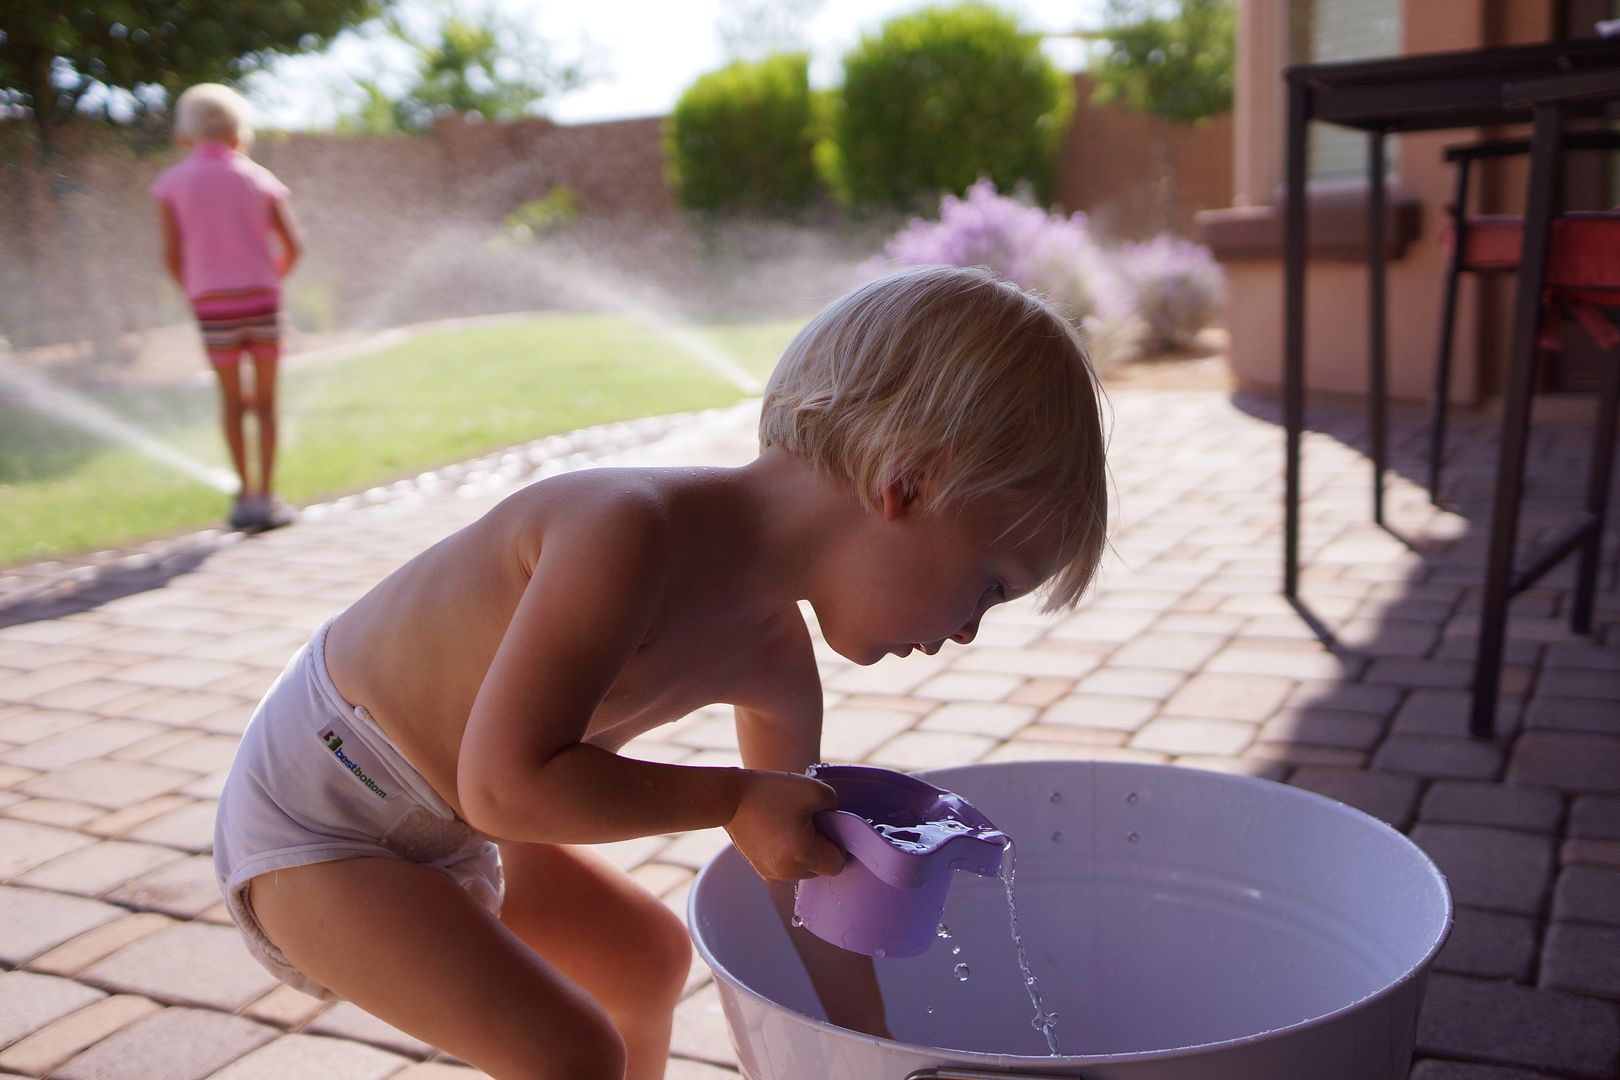
I'm talking put a bucket in the backyard with water hot (and yes I had to run the water through the hose for about 10 minutes before it was cold!!).

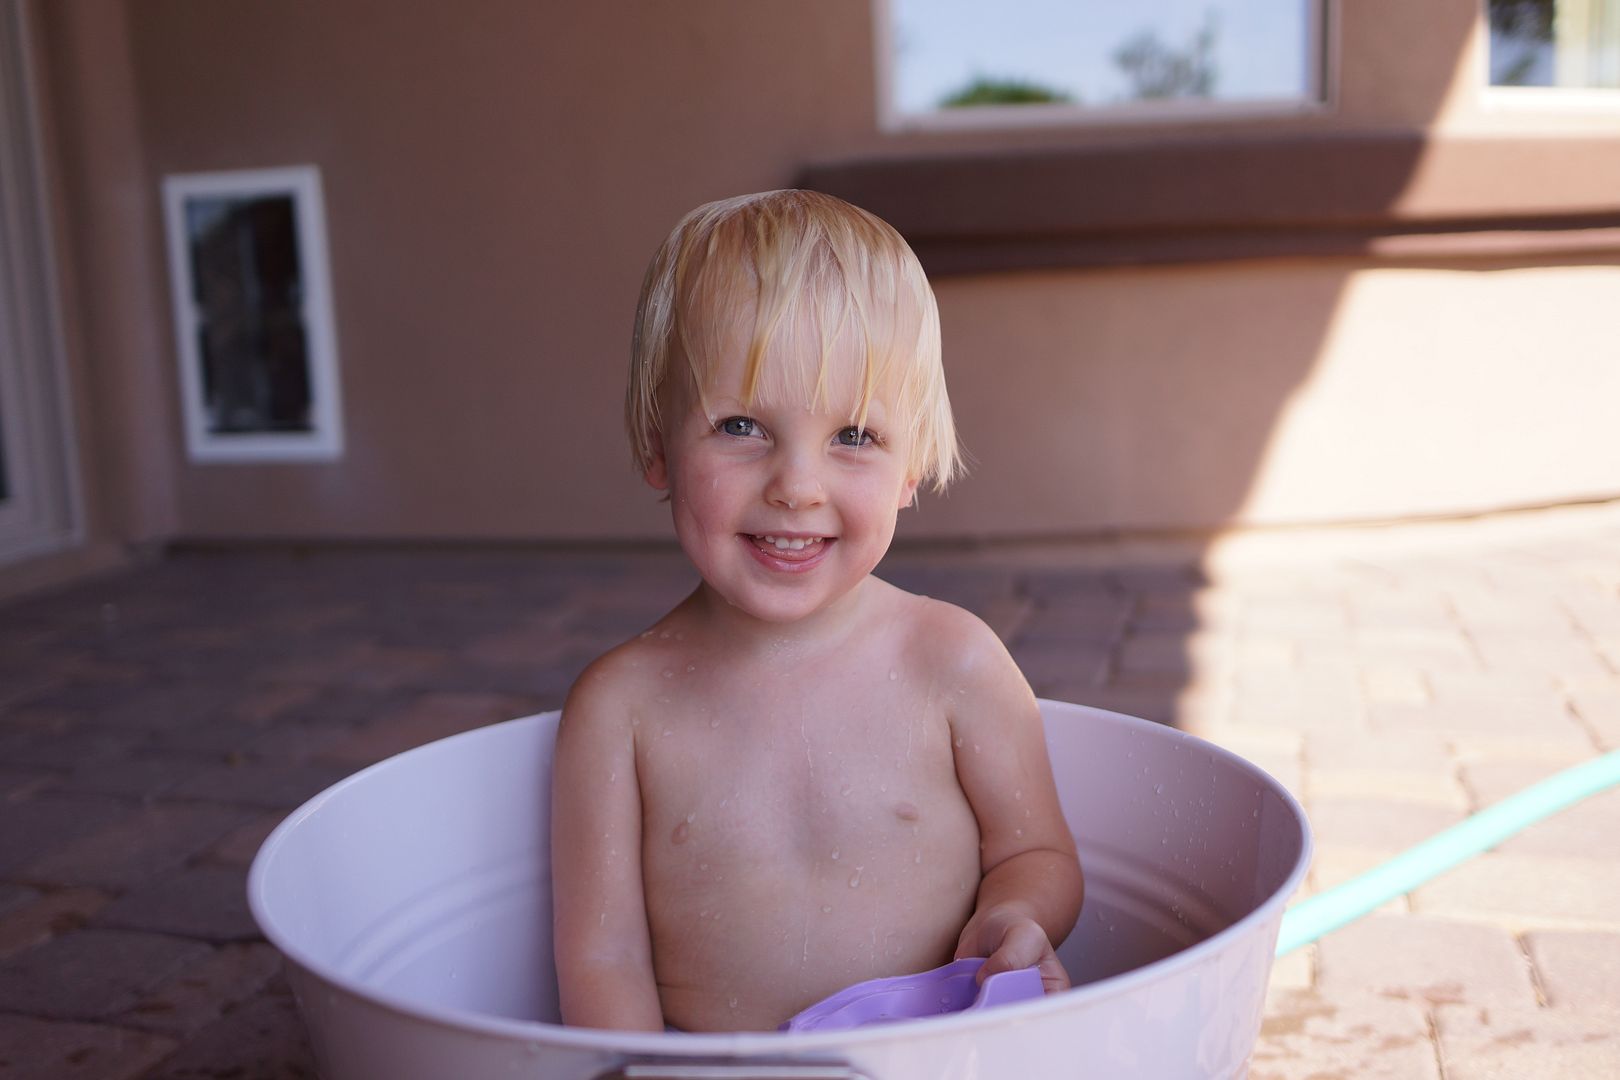
Sit in the bucket hot.

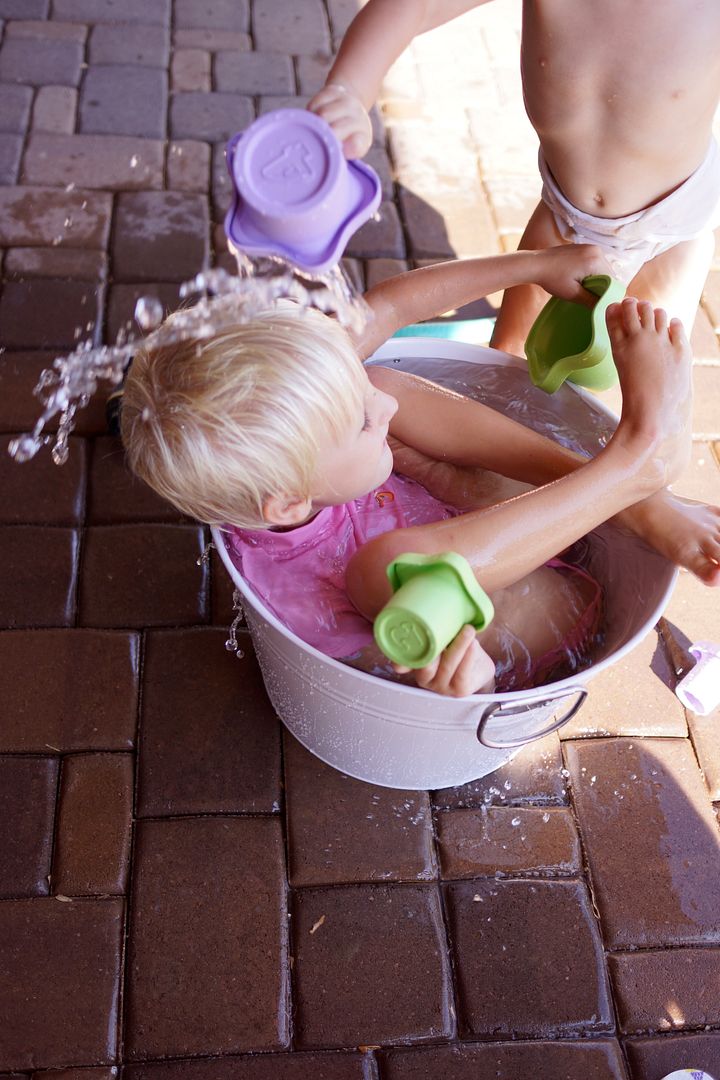
Bring your favorite purple cups into the bucket hot.

Pour water on your head hot.

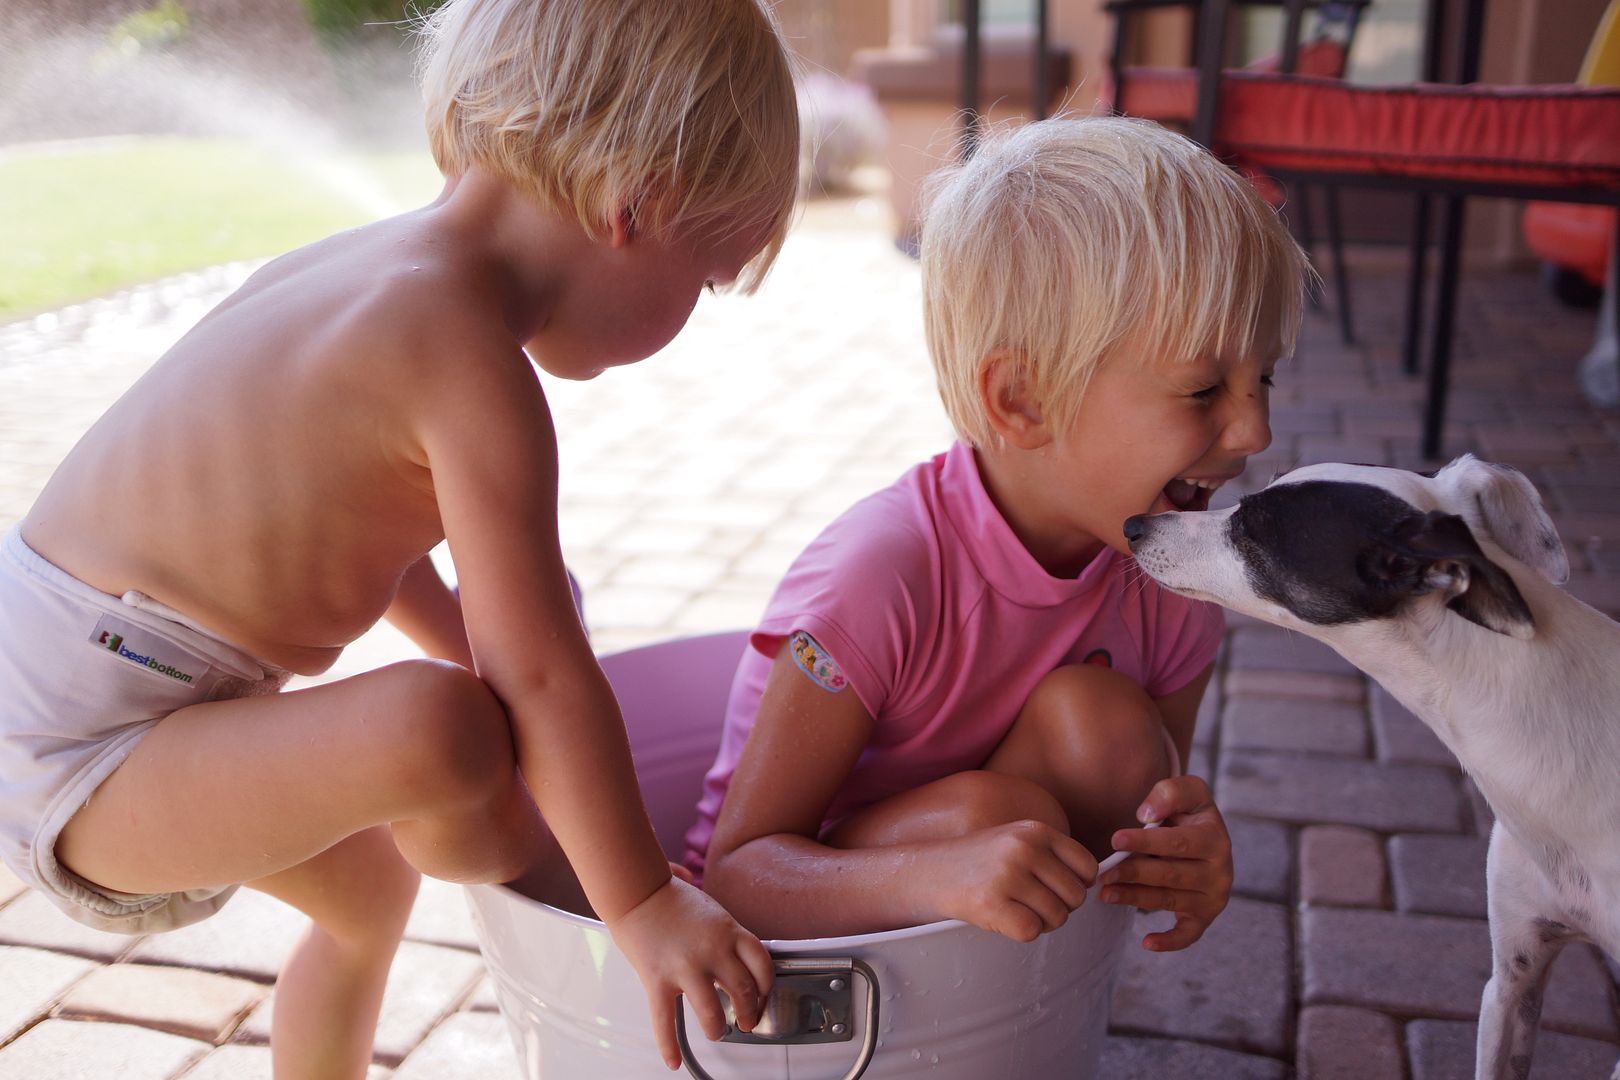
Pour water on your dog's head while he's drinking out of the bucket hot.

Pour water on your big sister's head hot.

Try to get into the tiny bucket with your big sister hot.


Whew, that's hot!

Yesterday when I dropped my daughter off at the bus stop it was 109!!  Today it is a lovely cool 88 thanks to some morning rain.  Let's hope we have a few more of these cool days instead of hot bucket days!

Thursday, May 16, 2013

Organization - Kid's Playroom Part 2


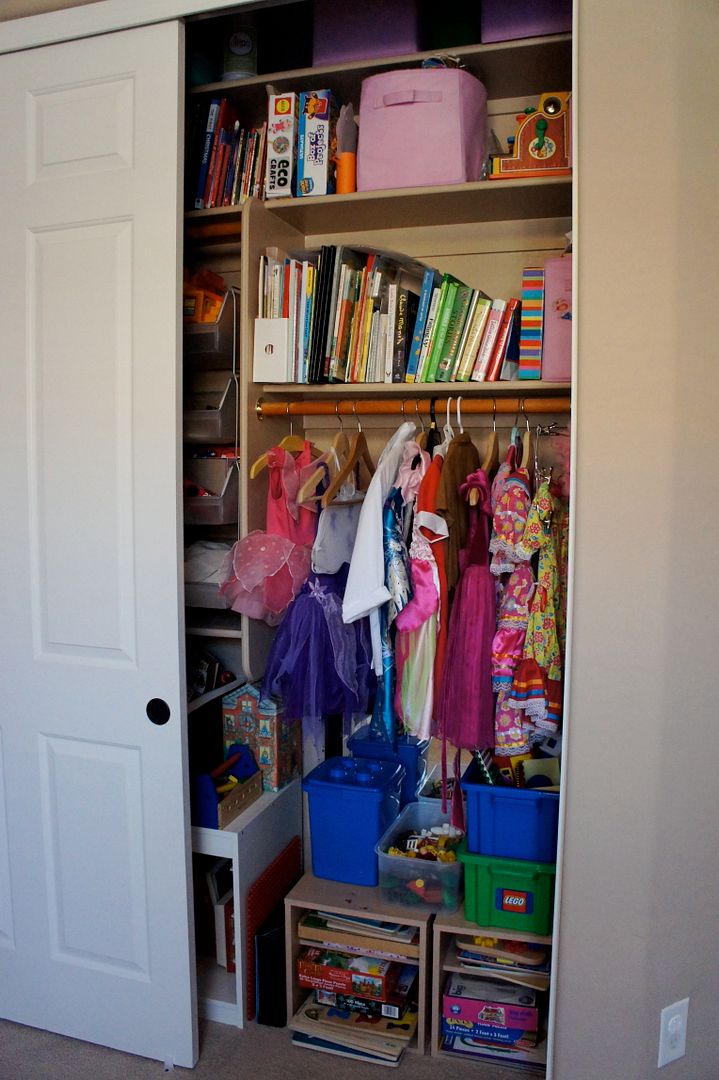
Back to the kid's playroom for part 2, today we go inside the closet!  Now I'm not saying my way or organizing is the best or even the prettiest, but it works for us.


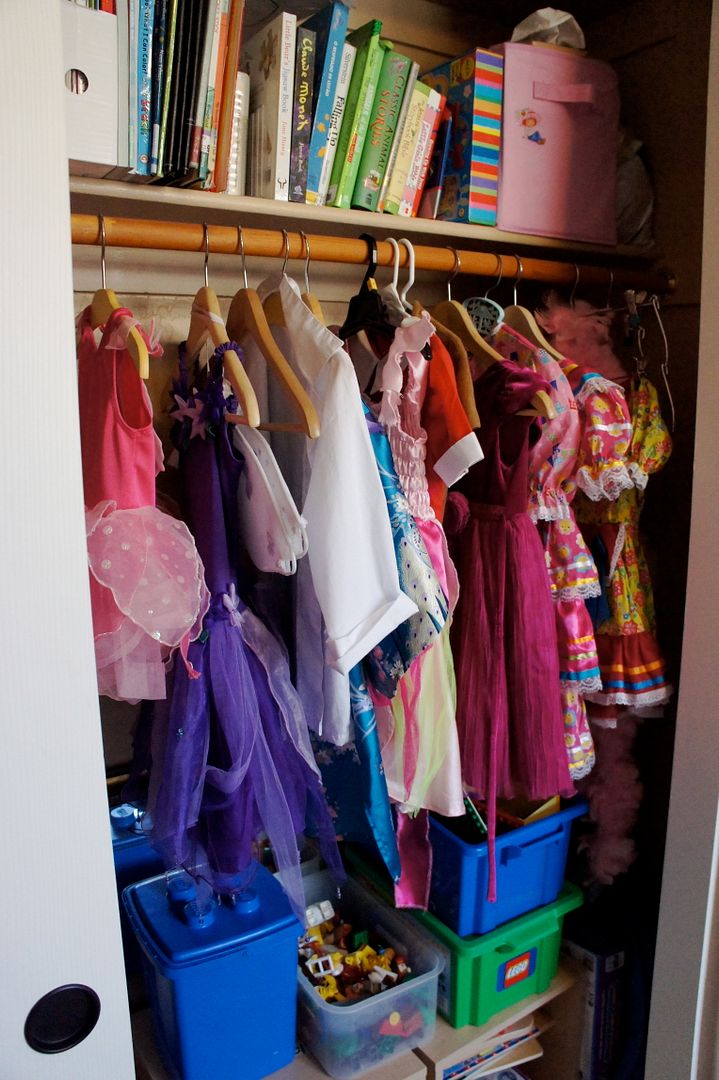
The right side of the closet has my daughter's dress up clothes.  I use a combination of regular hangers and multiple (3 and 4 tier) skirt hangers.  The tiered hangers work great for tiny clothes, wings and the outfits that tend to fall of regular hangers.


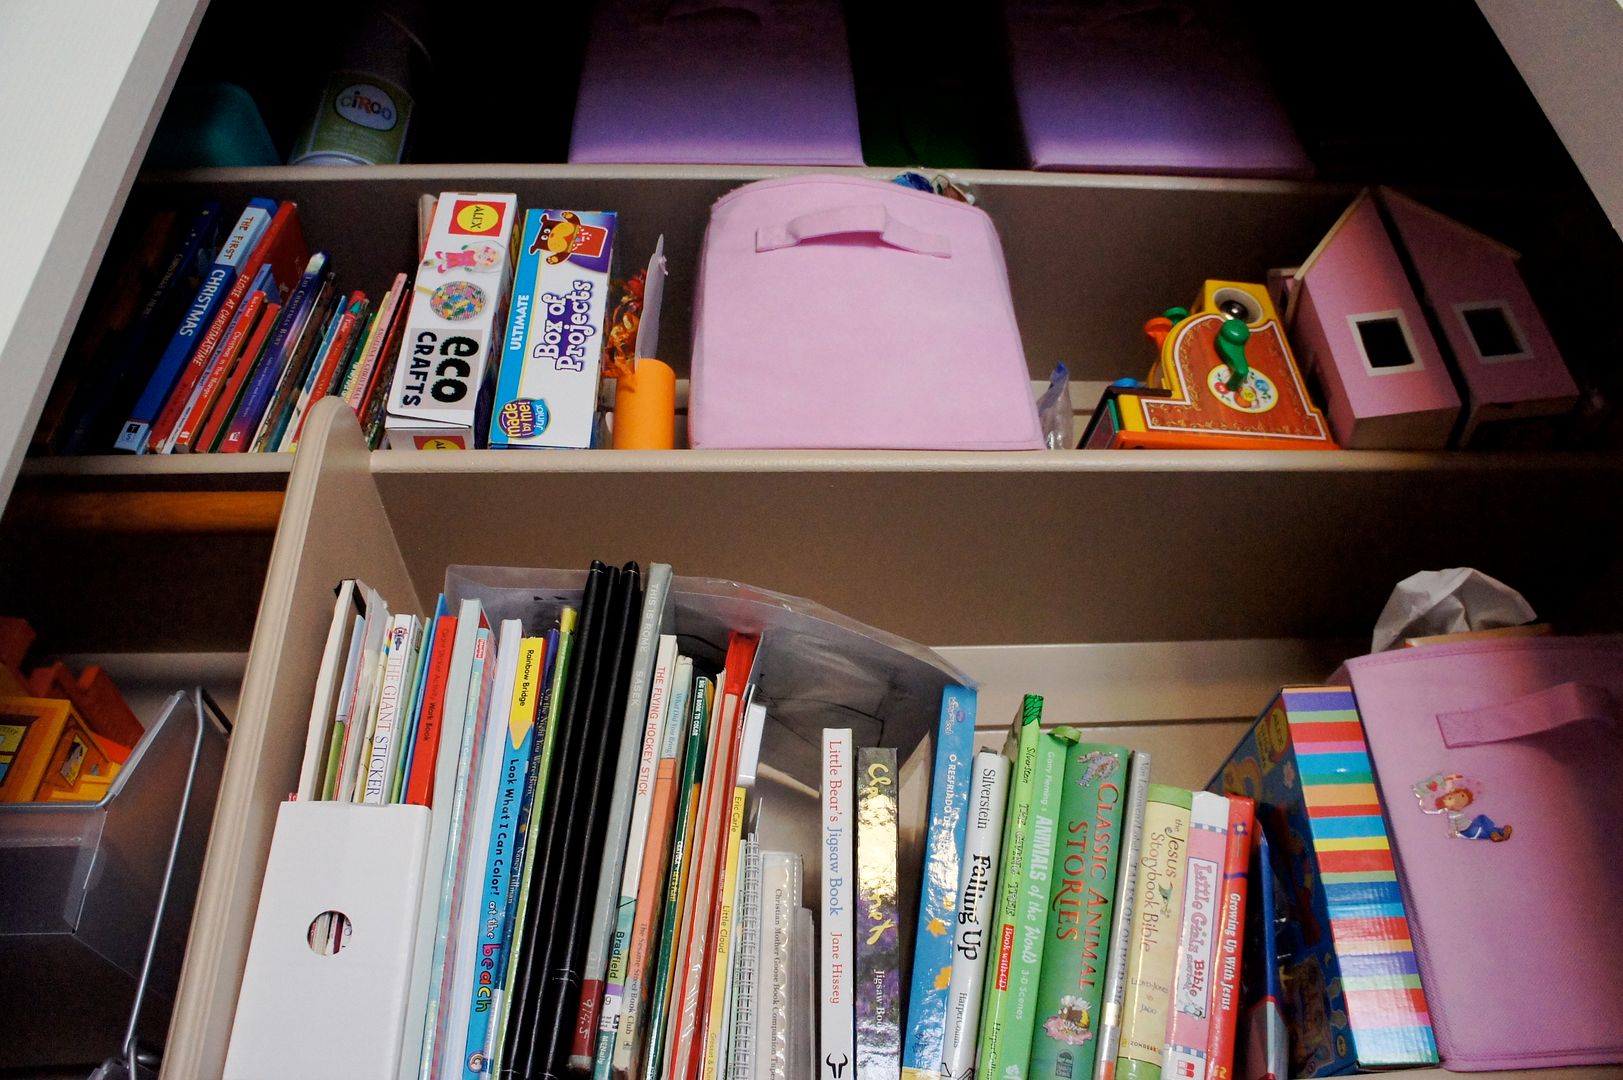
Up above in the right side are shelves all the way to the ceiling, I love that!  I used fabric box "drawers" to hold little items and toys that they haven't grown into yet.  There are a few toys, off season and odd sized books on the shelves as well.  

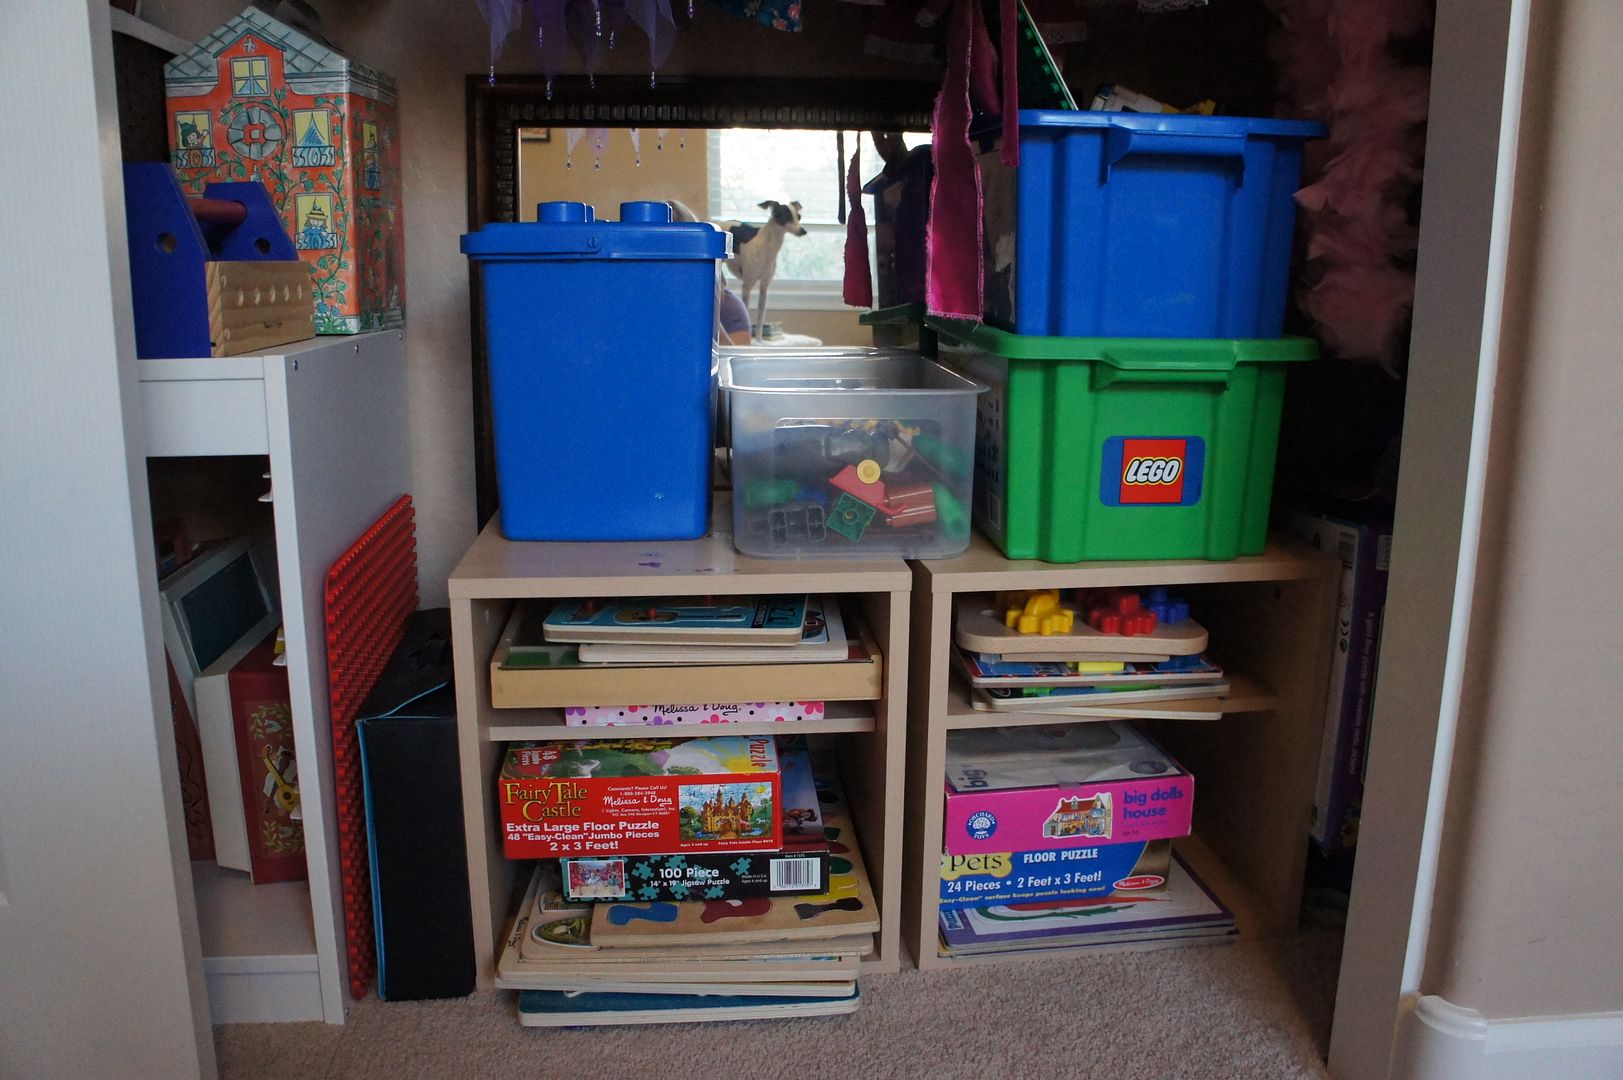
Down below on the floor I used shoe storage units to keep their puzzles.  On top are Lego boxes and tubs.  On the far right I use the space to keep odd shaped toys like a fabric tunnel and parachute.  There is a mirror behind that my daughter can use to admire her loveliness when she's playing dress up.

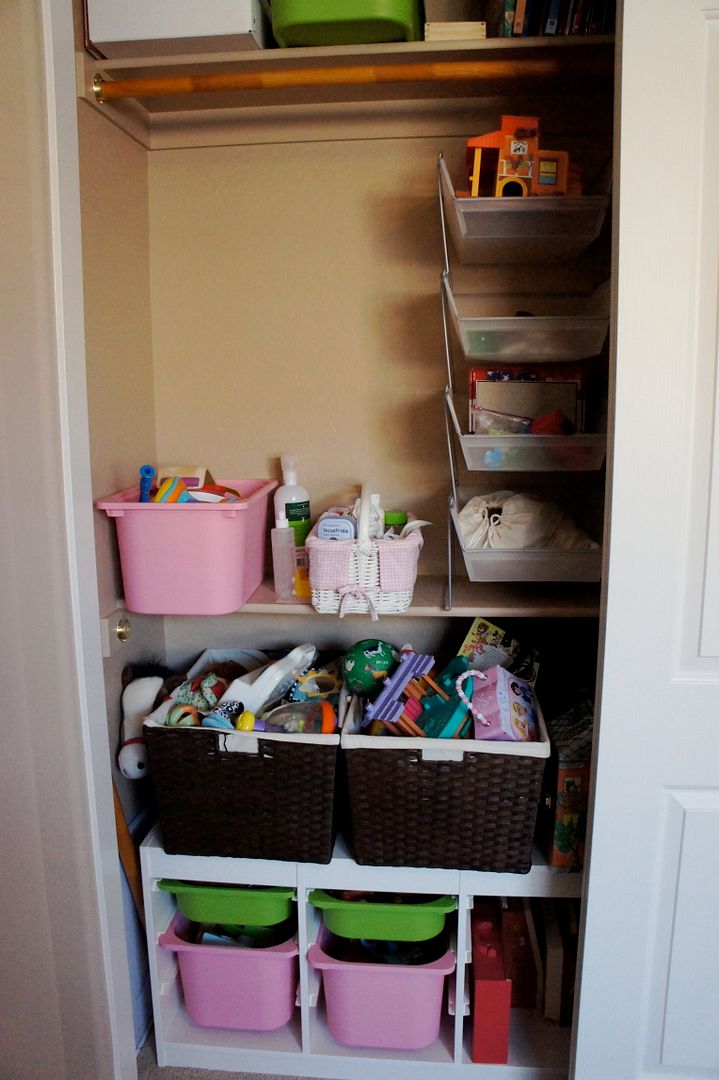
The left side of the closet.  On the floor is an Ikea organizer (wood composite) with plastic drawers.  On top I've got 2 big baskets that I picked up at TJMaxx a few years ago.  They've been all over my house for different uses.  We've considered removing the clothing bar and having another shelf put in to use the space better but haven't gotten around to it.  For now I have a lightweight metal/plastic storage system up there from the Container Store.  Up above in the closet I have off season books (Christmas, Spring, etc) and other random toys that they're either growing into or out of.


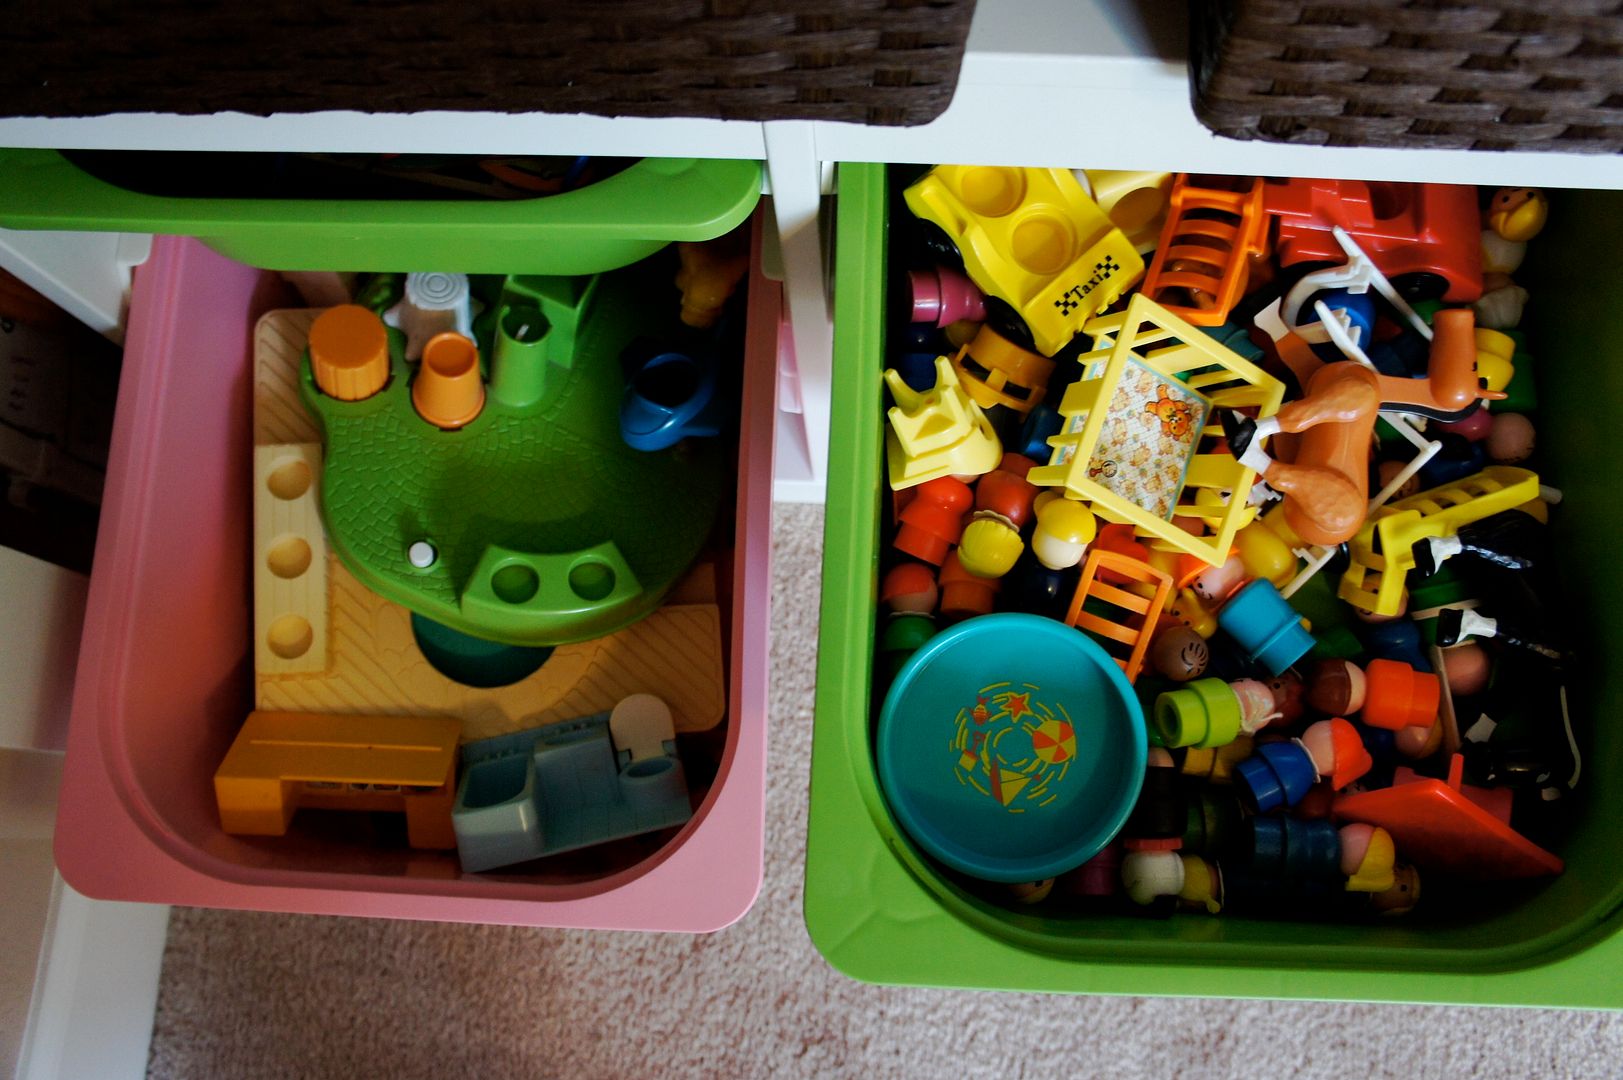
Here's a closer look at those Ikea plastic bin/drawers.  You won't be surprised to see that I keep vintage FPLP in most (3/4) of them.  :)


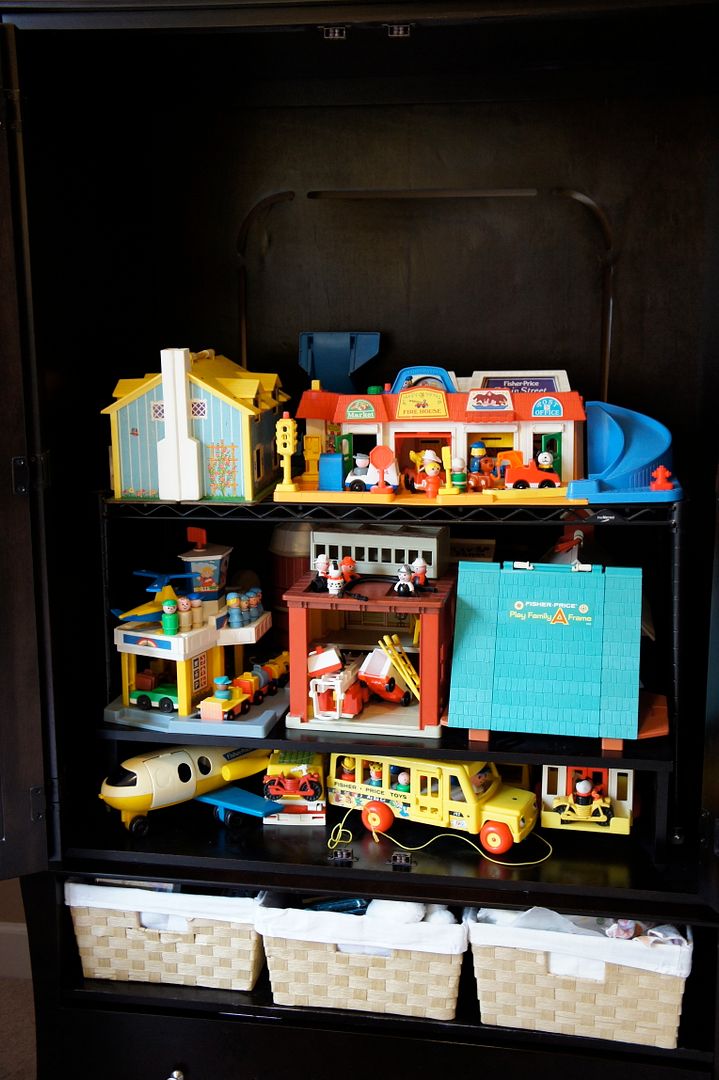
In Part 1 I showed you the armoire but forgot to show you what's inside!  Just a few of our vintage Fisher Price Little People sets.  We took a tv/entertainment armoire and made it into storage by putting wire shelves inside.  I can fit quite a few sets in there (6 big ones plus 2 smaller and a few vehicles underneath).  Also, don't forget the top, I've got a couple displayed up there as well.  

To see more of our Playroom go to Part 1
Go here to see how I use the armoire to Cloth Diaper a Toddler.

Thursday, January 17, 2013

DIY Natural "Drano"

One of my sinks has been draining slowly.  I figured it was the build up of my hair (gross I know but a fact of life) and put Drano on our shopping list.  Then I stopped and decided to see if I could do-it-myself using natural products around my house.  Sure enough, I found some great ideas online for how to get rid of sink buildup without having to use the noxious chemicals.  Hurrah!


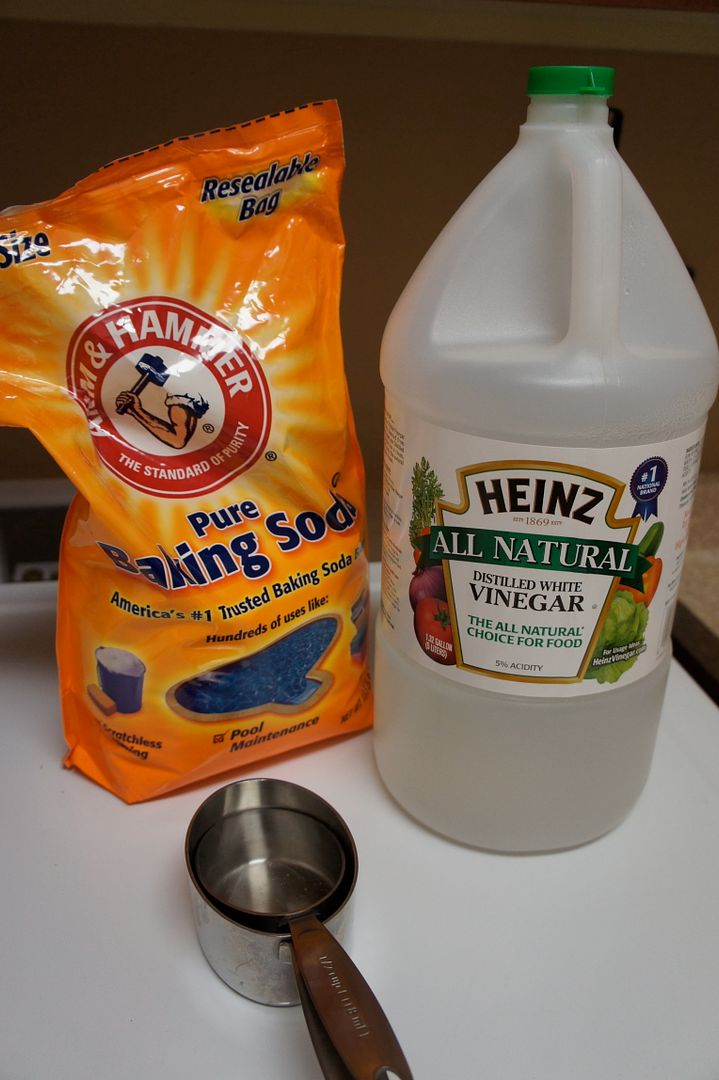
I happened to have the ingredients at home already thanks to my super-Costco sizes of vinegar and baking soda.  Yet another use for them!

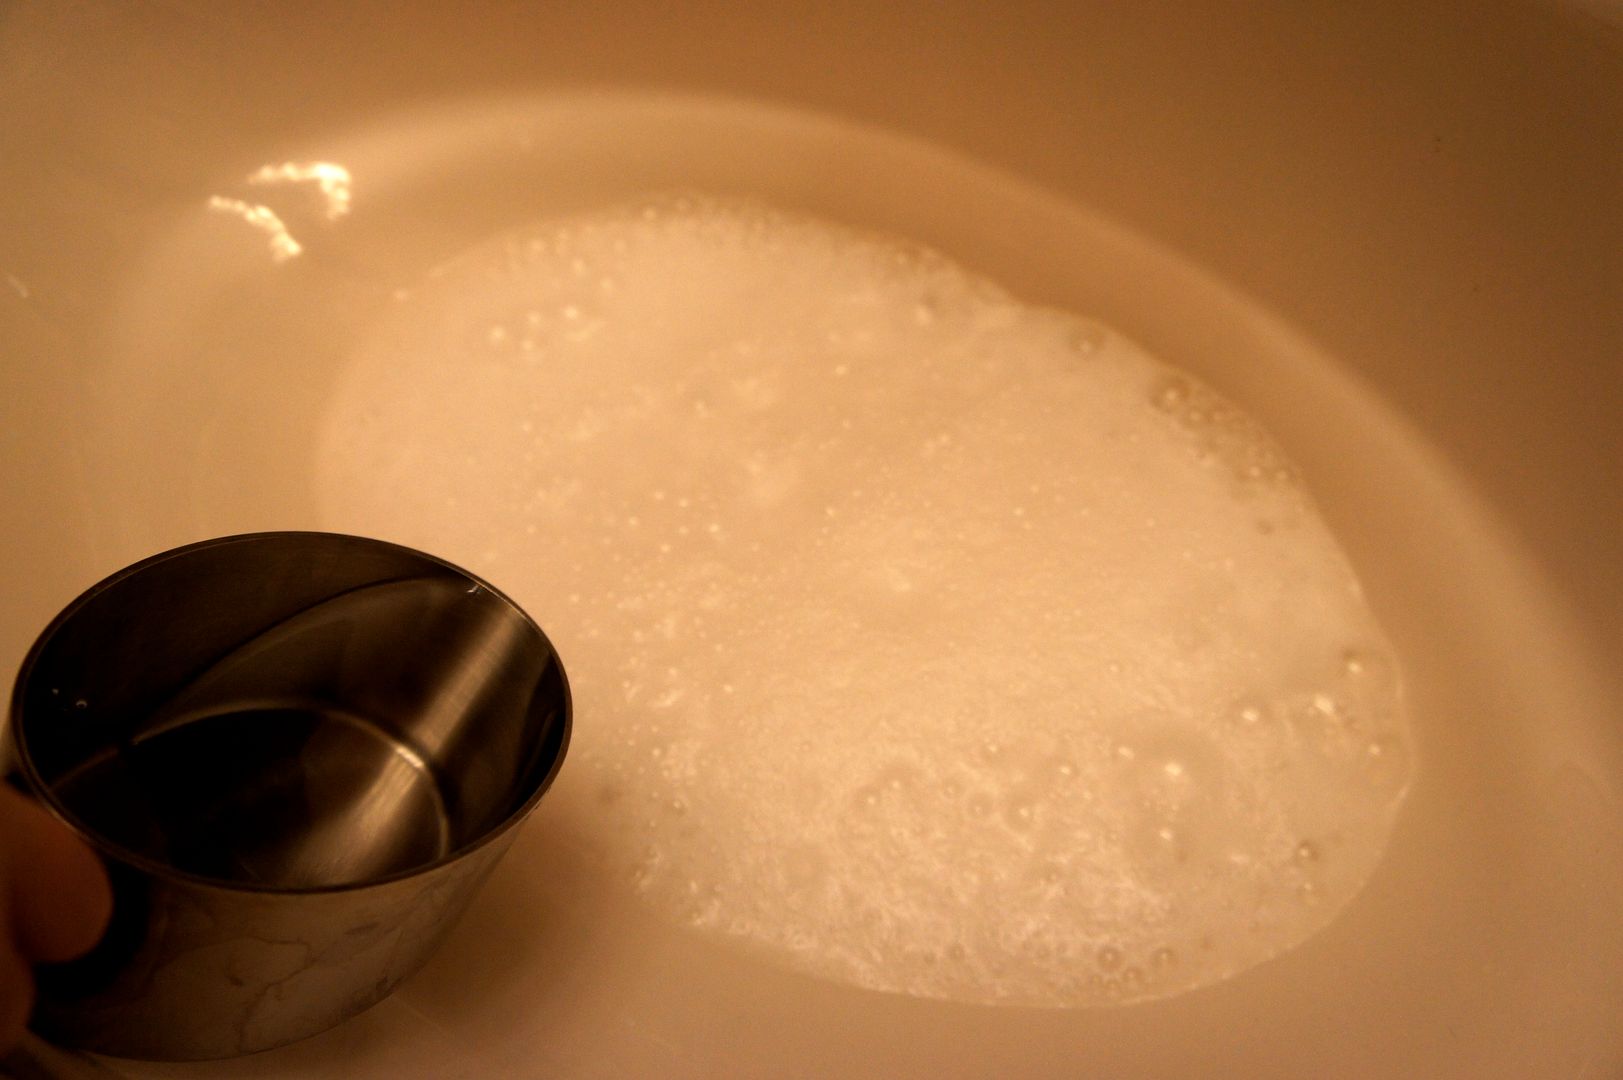
The recipe worked on my sink with only one application.  I had my 5 year old help since I figured she'd enjoy watching the bubbles fizz and she did!  It's a home-cleaning and science-experiment in one.

Natural Drain de-Clogger

Here is all you need:
1/2 cup of baking soda
1 cup of vinegar
1 qt (or so) or boiling water

1. Place the baking soda down your drain.  I unscrewed the top to help it go down and then screwed it back on.

2. Pour the vinegar over the baking soda.  It will fizz and bubble, kids love this part!  If it is staying in the sink mix it up with a spoon a bit to help it go down.  Once it's mostly down use the sink stopper.


3. Let it do its magic for at least 30 minutes.
4. Open the stopper and pour boiling water down the drain (I used 1 tea kettle full).

There you go!  The baking soda/vinegar work at the clogs and the hot water pushes it all down (including the more greasy gunk, again I say YUCK).

Happy de-clogging!

For more Baking Soda and/or Vinegar Uses look here:
10 Uses for Baking Soda
Homemade Pedialyte
Make Your Own Diaper Pail Deodorizer
Keurig Descaling

Thursday, January 10, 2013

Closet Organization - Kid's Bedroom

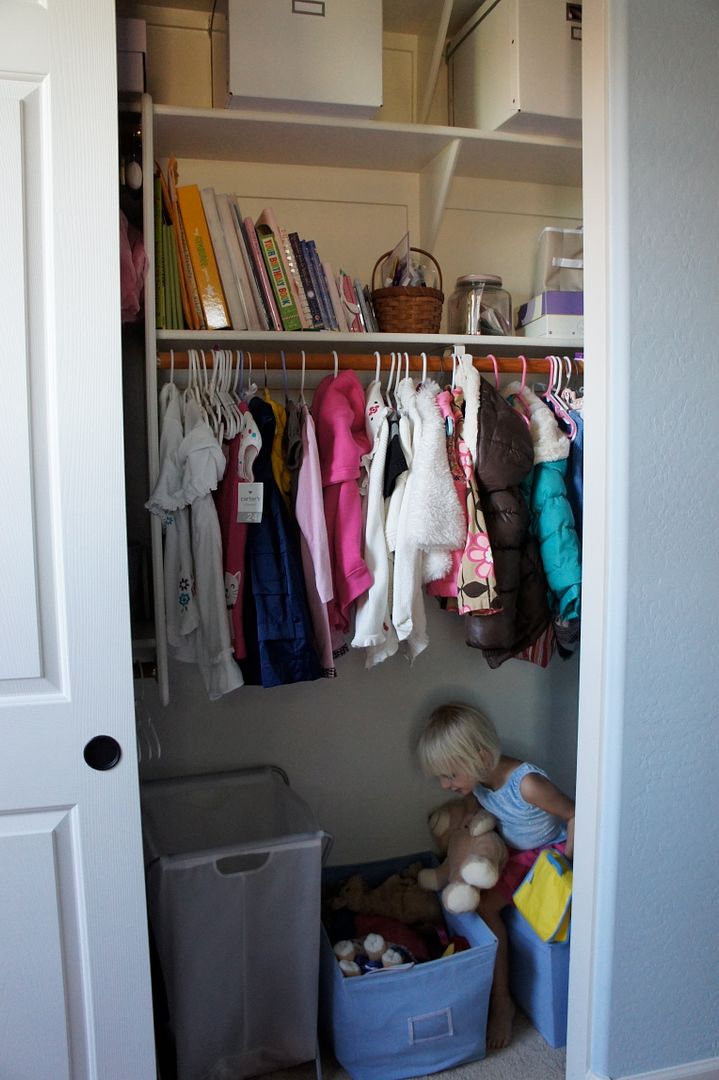
Today I thought I'd share how I organize my kid's bedroom closet.  I already shared my closet and now it is the girls turn.


My girls share a room and a closet.  Needless to say there are many many little itty bitty and adorable girl clothes to keep track of.  I prefer to have neat, organized and attractive storage spaces.  Fortunately the girl's room has a pretty big closet, so that makes it easier to tuck everything in and away.


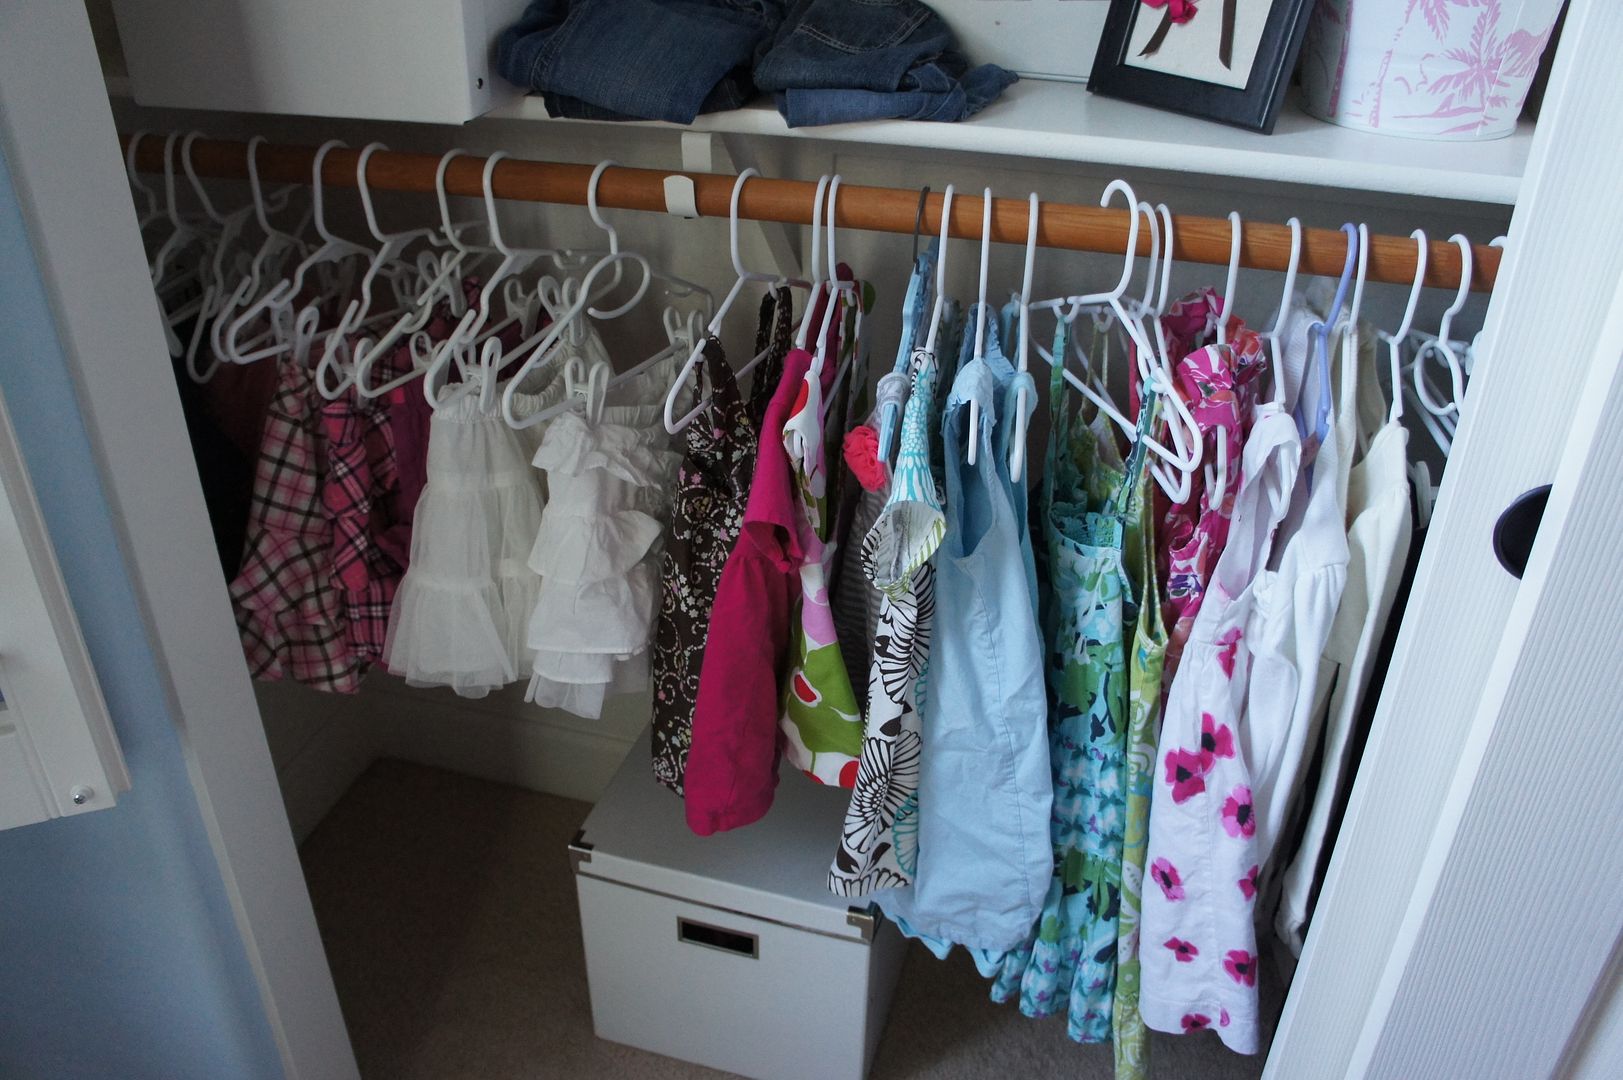
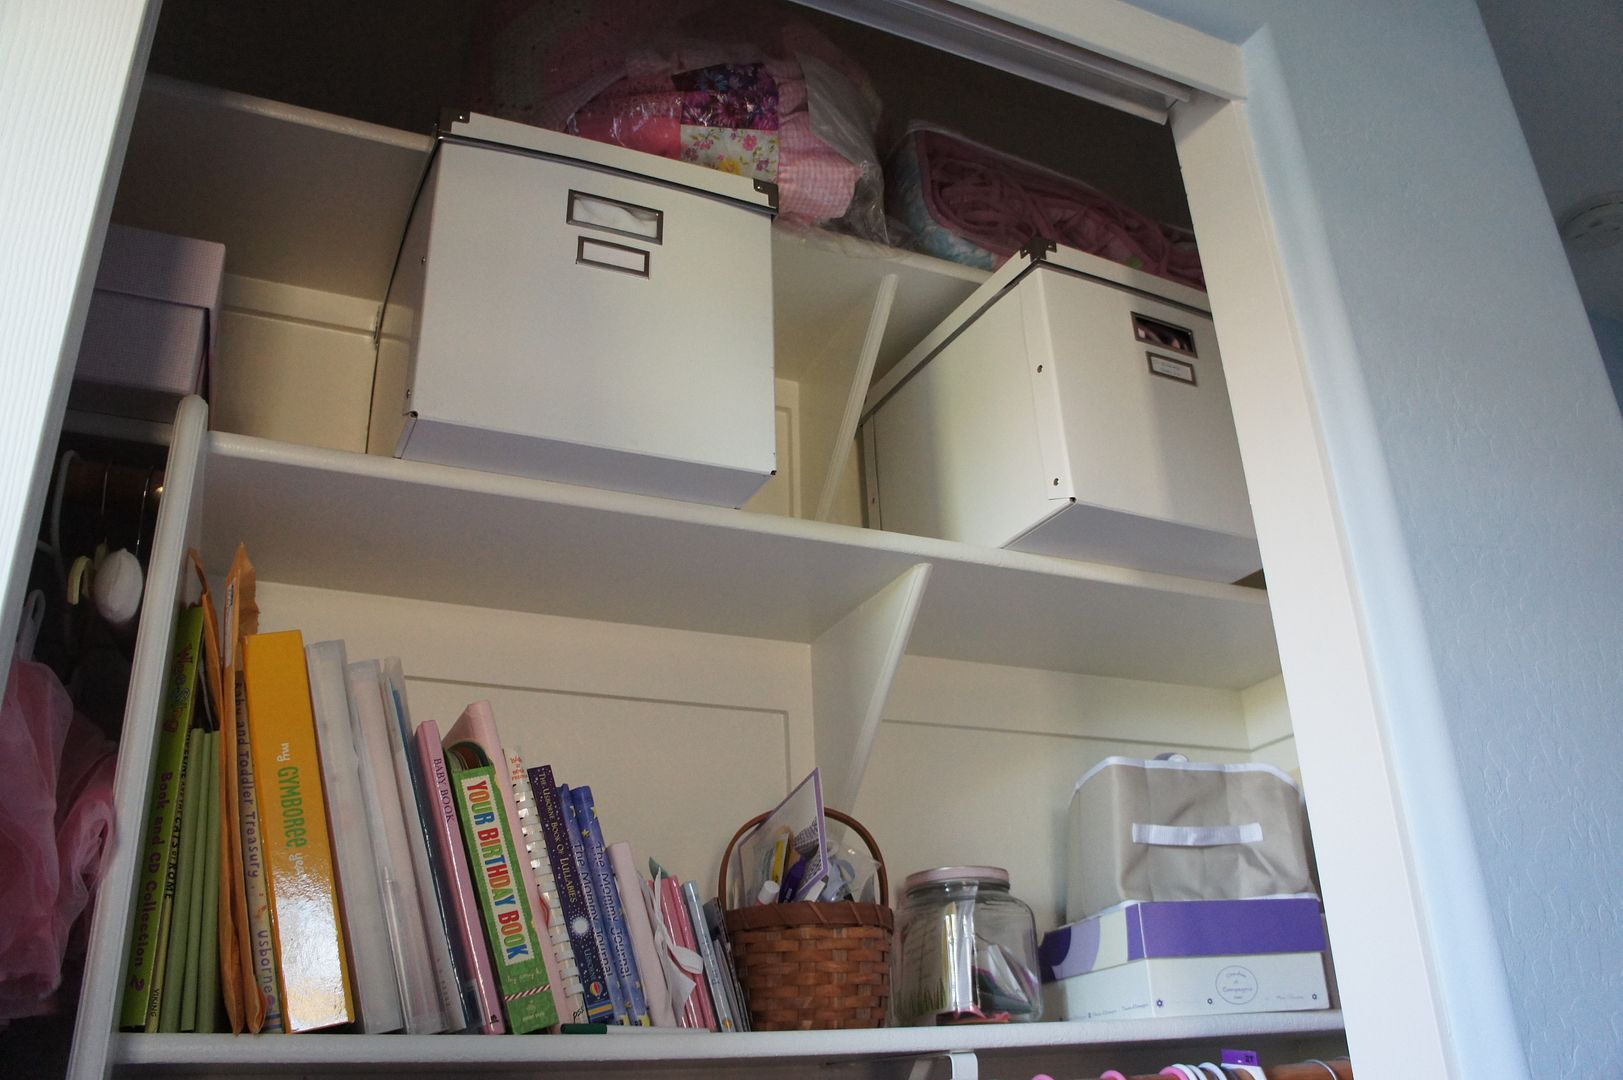
I keep baby-girls clothes on the top since only I need to reach them.  I organize them by type (dress, shirt, jumper, etc) and sometimes by color.  On the shelves above I have 3 pretty boxes to hold bigger sized clothes and baby things (a memory box).  Notice that I use (almost) all the same kind of child-sized hangers for my girl's clothes.  It makes for a more cohesive look and the smaller size keeps the clothes on better.

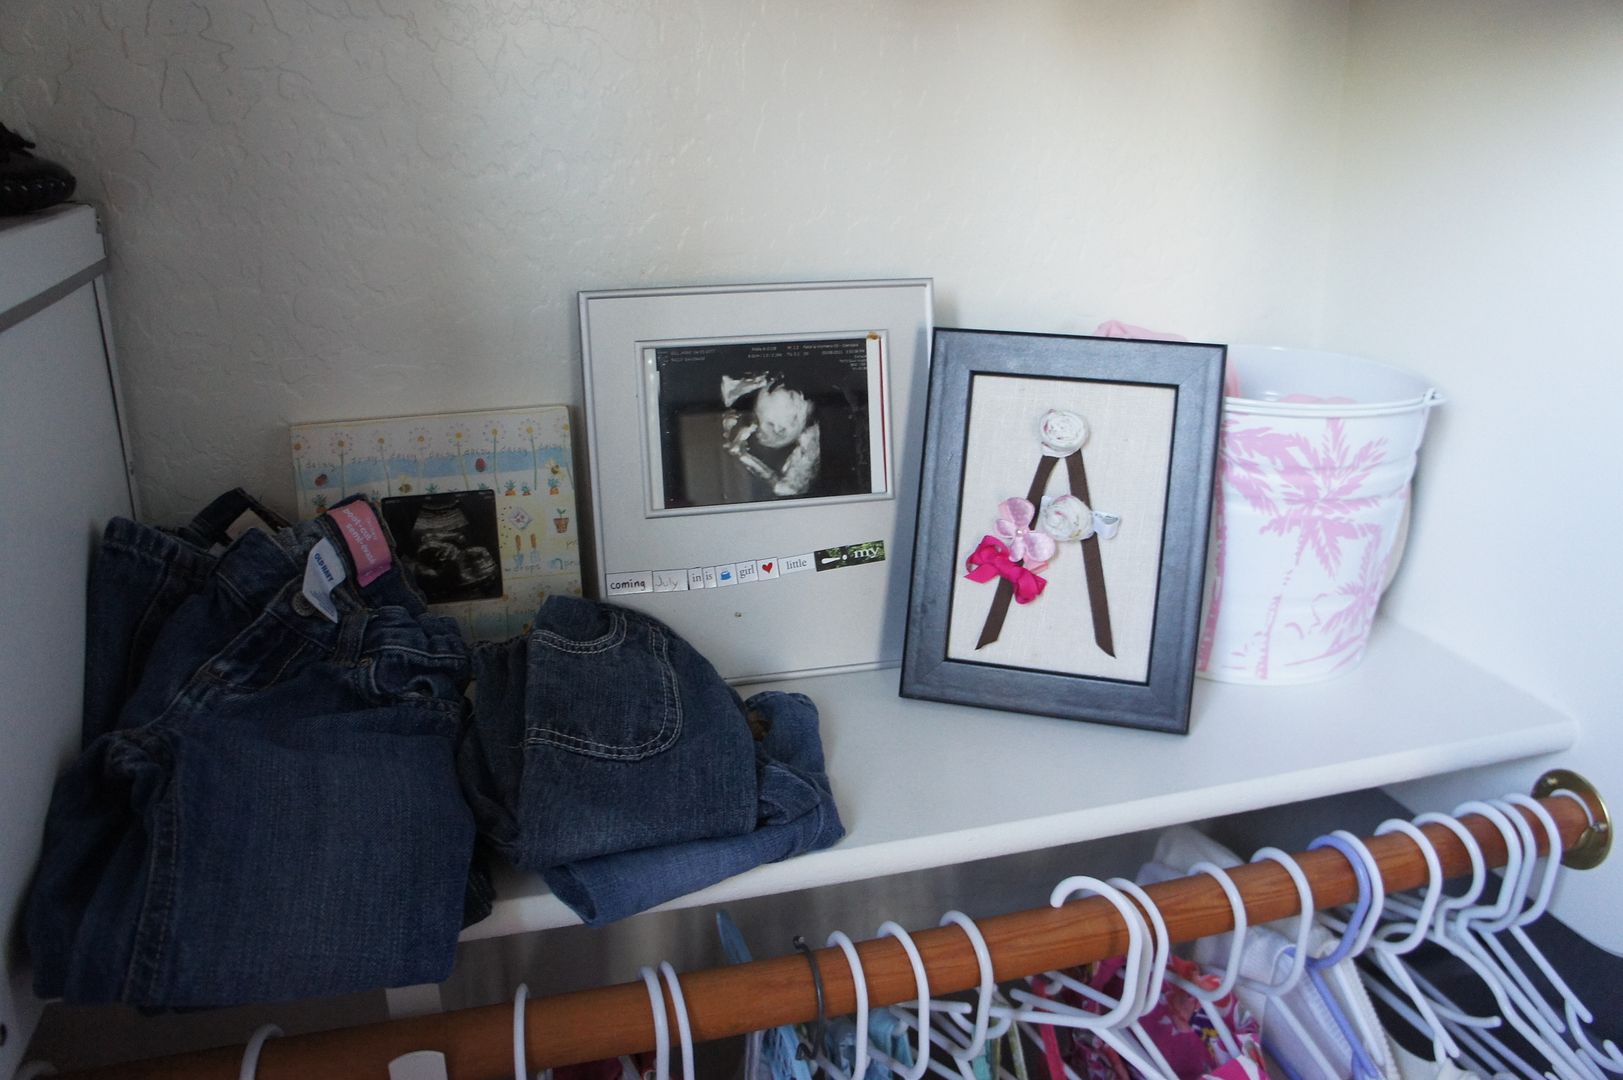
On the middle shelf I stack the girl's jeans.  We don't need many jeans around here in hot Phoenix so this one shelf fits them just fine.  I also have a hair clip holder that was made for me by a good friend.  It's perfect for baby-girl's tiny clips.  It is also a perfect shelf (kid eye level) to put sonogram photos from each of my girls.  The bucket on the far right is decorated with the same fabric as my baby's crib set and is where the 5 year old puts her dance clothes.

To the left I keep a big white (IKEA) box with the next size up or current off-season baby-clothes.  I want easy access to them so that I can keep checking to see what she may fit.  The little box on the shelf holds off-season baby hats (in season are kept in the hall where we put on shoes).

The bottom of the closet has the 5 year old's clothes.  They're at the perfect height for my daughter since she's the one that picks out her clothes and (mostly) puts them away.  I try to organize her clothes by type and color but I have to let it go a bit since she's the one that puts her clothes back.  The white box on the bottom of the closet holds her off-season clothes that are still her current size just in case we need them (for out-of-state trips usually).

The other side of the closet holds some of their off-season clothes.  Especially the big winter coats.  The floor of the closet has the laundry hamper and two big fabric "boxes" that hold stuffed animals and dolls.  This keeps them off the floor but still at easy access.

This side of the closet has extra blankets on the top shelf.  The middle has one box for the clothes the 5 year old has outgrown (once it is full I move it to my closet to save for baby-girl) and another box with the next size up clothes for baby-girl.  The lower shelf holds baby books, mother's memory books, birthday books, a baby memory box and a jar of affirmations from my baby-showers.

So that's the closet.  What do you think?

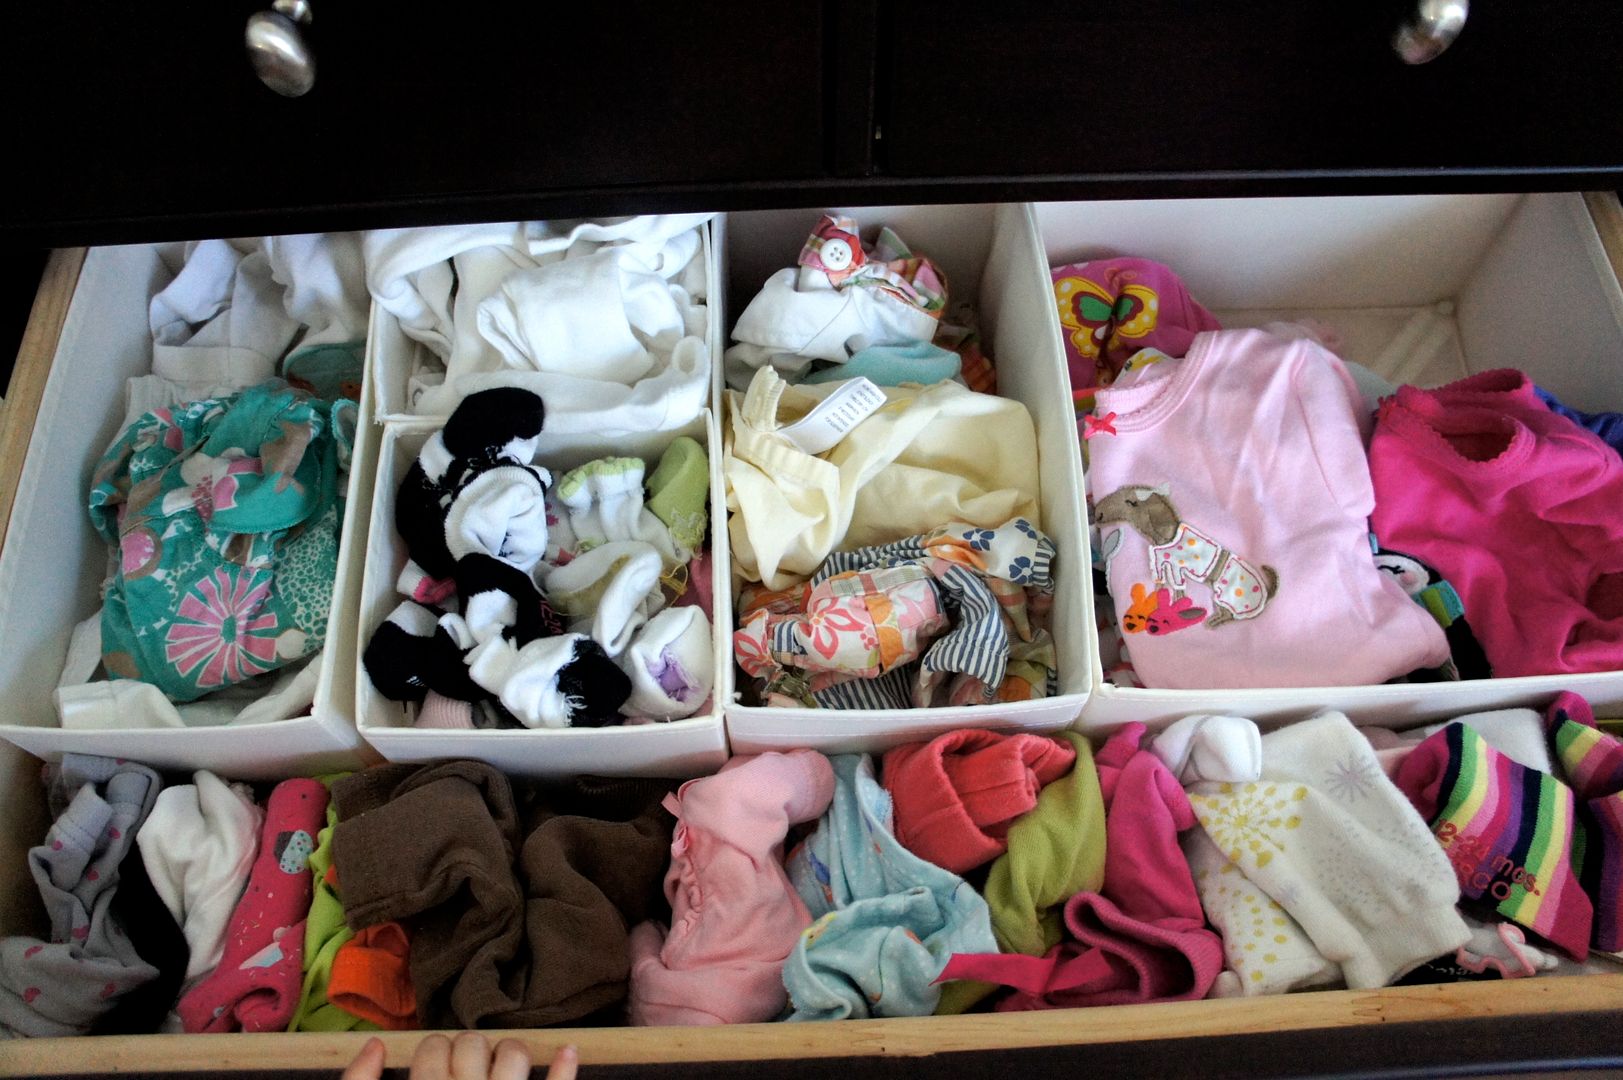
For a bonus here is a tip for organizing baby clothes in a drawer.  I use the organizers from IKEA to help keep all her itty-bitty clothes by type (including one just for socks!!).  It makes it much easier to keep it all straight even if it still looks messy in this photo, ha!