HomeVintage Fisher PriceMy Etsy ShopCategoriesAbout

Friday, July 28, 2017

Fisher Price Friday - Little People Art Print

I spend a bit of time on Etsy both as a buyer and a seller.  Right now I only sell vintage toys (mostly Fisher Price) and I often find myself looking at FPLP items too.  That's how I found this delightful print.


The shop is called Mostly Little Art and it is full of delightful original paintings and prints for a reasonable price.


My print came quickly and well packaged.  It looks fantastic in our playroom.


To get your own print check out her shop Mostly Little Art.  
To check out my shop go to Vintage Little People. :)

*Note: The adorable white house shaped organizers were decorated for me and given as a birthday gift by my daughters and a dear friend.  

Tuesday, July 25, 2017

Rubber Ducky Birthday Party - Invites & Decorations

My youngest daughter is a creative little girl that moves to her own drummer.  Months before her birthday she came up with idea after idea for a party theme.  Then she had the idea to do a Rubber Ducky party and that was it, she didn't change her mind again.


I decided to go with it and when my best friend suggested a joint birthday party with her son (who happens to be my daughter's bestie) he thought Rubber Ducky was cool too.  They are such a sweet pair of friends, born only 8 days apart to best friends; they've been close since before birth!

Once we agreed on the theme and that it should be a pool party we got to planning.  I have to say that it was MUCH more fun this year planning with my bestie.  Also less work/stress!


Invitations

Finding birthday themed Ducky invites for older kids was a challenge, they were mostly designed for 1st birthdays.  I did find this one from Etsy that would have worked, but we thought outside the box and made our own.


We had cookies made by a fantastic local cookie artist, Kim's Cookie Cottage.  She can make anything!  Originally we planned on ordering cookies to use for the goodie bags, but she was unavailable in July.  So we changed plans and had her make invitation cookies instead.  


I took photos of the cookies and made copies (on shutterfly).  My BFF added paper and voila, cute invites!

Bonus is we got to eat the cookies! :)  I froze the ones we didn't eat and used them as decorations later at the party.


Keep Calm and Rubber Ducky Tanks


We know a local talented woman who makes graphic shirts. She has a shop called Cuts & Creations on Etsy and is able to make custom designs.  I told her my idea and these adorable tank tops arrived.   

Ducky Skirt 

My daughter requested a ducky fabric dress or skirt.  I had intended on making a dress but I waited until the last minute (night before) and a skirt is all I could pull off.  I didn't have a pattern so I chose a Pinterest skirt called "20 minute easy skirt" described as so easy her 5 year old had made one.  

Well....I'm not very good at sewing.  I had some lessons a few years back but since then I only occasionally wing it on making things.  So that "20 minute" skirt took around 2 hours and looks best far away. Ha!  But my daughter was thrilled and it worked for the party.

Ducky Necklace

Last but not least I found my daughter a cute little Rubber Ducky Necklace.  A sweet gift and souvenir from the party theme!  She was thrilled.  

Moving on to the....

Party Decorations

This was probably my favorite part, there are so many ducky items out there!  I was on a budget so I focused on these 4 ducky items.

1. Teeny Tiny Rubber Duckies (1.5 inches)  I ordered 100 of these cuties and scattered them around the party.  I put them on tables, in with the water bottles and of course in the pool!  The kids loved playing with the duckies: throwing, sorting, gathering.  I saved out enough to put them on the cupcakes as well.

2. Yellow Ducky Beach Balls  A pool party has to have balls and these cuties looked great in the pool and were fun to play with too.

3. Really Big Rubber Ducks  (8.5 inches).  We had two of these ducks, used for table decorations/balloon holders.  The birthday boy and girl each got to keep one.  They are super fun in the pool too!

4. Duck Pool Float Naturally this pool party needed a huge duck float.  This beauty had handles and easily fit 3-5 kids!  It doubled as a photo prop. 


5. Balloons: I bought a bunch of green/blue/white stars to decorate but our big winners were these huge ducky mylar beauties.  I bought 3 of them (they were on sale!) and had two weighted for the ground and one in the air. They were fun for photos although one of them (a weighted one!) took to flight like a kite and was never seen again.   


6. Plates/table Cloths/Etc: We had yellow and blue tablecloths, plates and cups.

Many of our decorations were used as party favors, there were plenty to go around!


I'll be back soon with details on the food and games.  For more details on the ducky decorations check out the links below.


Sunday, July 23, 2017

Chicken Quarters (or 1/2 Chicken) Roasting Recipe

We are having a busy week around here; someone turned 6 and had a Rubber Ducky themed party (more on that soon), and my husband and oldest daughter are currently in Alaska on a father/daughter fishing trip!  If that wasn't enough my big 6 year old had too much excitement/sugar/pool water at her Rubber Ducky Party and ended up sick the next morning.  So we spent the last 36 hrs at home.  

With the extra time I've been working on my overdue blog posts. :)  Here is a yummy Chicken recipe I made a couple weeks ago!


In my effort to scoop up deals on organic poultry and meat products I sometimes purchase out-of-my-comfort zone cuts.  I'm usually a boneless chicken breast girl so when I picked up some chicken quarters I had to look around for the best way to prepare them.

I adapted a recipe for 1/2 chickens and it worked quite well. 

Roast Chicken Quarters

Ingredients
2 quarter chickens
2 tablespoons oil
2 teaspoons Sea Salt Seasoning (I used Johnny's Seasoned Organic Sea Salt)
1 whole lemon: 1/2 sliced
2 sprigs rosemary (or 1 tsp dried)

Instructions
1. Rinse the quarter chickens and dry them completely with paper towels. Place them on a sheet pan and coat the whole outside surface with olive oil. 
2. Heat a skillet over medium-high heat. Liberally sprinkle the seasoning blend all over the skin of the chicken, making sure to get under also. When the skillet is hot, add 1 tablespoon oil, swirl it around to coat the pan, and add both of the quarter chickens, skin-side-down and cook for 6-7 minutes until good and browned. The heat on the skillet may need to be turned down to medium during cooking to prevent excessive smoking. When browned, return the quarter chicken to the sheet pan.
3. Roasting: Preheat oven to 350. Squeeze 1/2 of the lemon over the chicken. Place a few sprigs of rosemary on the sheet pan as well as the sliced lemon. Place the sheet pan into the oven and roast for 40-50 minutes, until the internal temperature reads 165 on an instant read thermometer. Remove from the oven and let sit at least 10-15 minutes before cutting and serving.

Monday, July 17, 2017

A familiar childhood treat is now (sort-of) Natural - Hello juice Otter Pops!!

This summer we discovered a treat that my kids love and I don't mind saying yes to.  A mommy friend brought a box of these juice treats to a pool party and I was surprised to see that they were Otter Pops!  

They had the original looking box and familiar flavors but without the old-school artificial dyes, sugar and general junk.  

Now I'm not saying they are healthy exactly, but they are made with water, apple juice and sugar (not HFCS).  And your kids won't end up with blue, red or green mouths! Which may be a drawback for some, ha!


The only trick was trying to find the juice version.  I went to a few major stores and grocery stores but no luck.  I finally found them at Costco (which by the way my friend had initially informed me they were from....whoops).  A big box of 80 pops for only $8, it's a steal!  

We are enjoying them at home and also with friends.  If we're having a pool play date I bring a bunch to share.  Lets just say they're a big hit!  And I love that any leftovers just go back in the freezer, no muss no fuss.

So go find some and don't forget to take a pair of scissors if you bring them to play dates, so much easier than using teeth...!

Friday, July 14, 2017

TOP SECRET: Fisher Price Birthday Present

Can you keep a secret?  My youngest is turning 6 next week and I wanted to share one of her birthday presents today since it's Fisher Price Friday.  On the top of her wish-list were the Fisher Price My Friend Dolls Jenny and Becky.  She already has Nicky and Mandy, presents for her last birthday and Christmas.

She's in love with these little girl dolls and has NO idea that they're from the 1980s.  In fact when she requested Jenny (numerous times) she asked me to go to Target to look for her.

So we did. ;)  We went to Target this week but she wasn't there!  She then asked where I bought the other two dolls and I told her the Internet, ha!

But she need not worry, I already had Jenny wrapped up and ready to go.  I also found a Becky but she'll be hidden until Christmas.

Jenny is new-in-box, not an easy feat for a 1984 doll!  But here she is in her aerobics outfit glory (including leg warmers!!).

I'll be back with more details after the birthday girl opens her up.

I've also found some more My Friend Doll clothes to give her, a few odds and ends that I found on eBay.  My mom got her an almost complete ballet outfit (#228 Ballerina Outfit).  She'll be thrilled.


Here is her current collection of #204 Baby Ann (a soft doll), #206 Nicky and #4009 Special Birthday Mandy.  She's excited to have one more doll to love. :)

So stay tuned and Shhhh, don't tell!

Thursday, July 13, 2017

Minimizing - My childhood edition :)

I've continued my process of de-cluttering and minimizing our house and life.  Although I accomplished a lot this winter I'm still trying to get into the daily habit of giving away, throwing away and buying less.

My project had a fun/challenging twist when I visited my mom this month and looked closer at the boxes of my childhood treasures/collections in her garage.  I enjoyed the process of minimizing; I had saved the craziest things!  I'm talking VHS tapes of my dance recitals/graduation, printouts (???) of emails from college (on matrix dot paper), and even my baby teeth.  Yes.  My teeth.  I have NO idea what I was saving them for?

Most of my papers, notes, greeting cards, letters and scrapbooks went into the recycling bin.  I ended up filling my mom's container!

College text books, novels, tourist souvenir books from Europe (did anyone else buy those on trips in the 90's?) and children's books were given away.

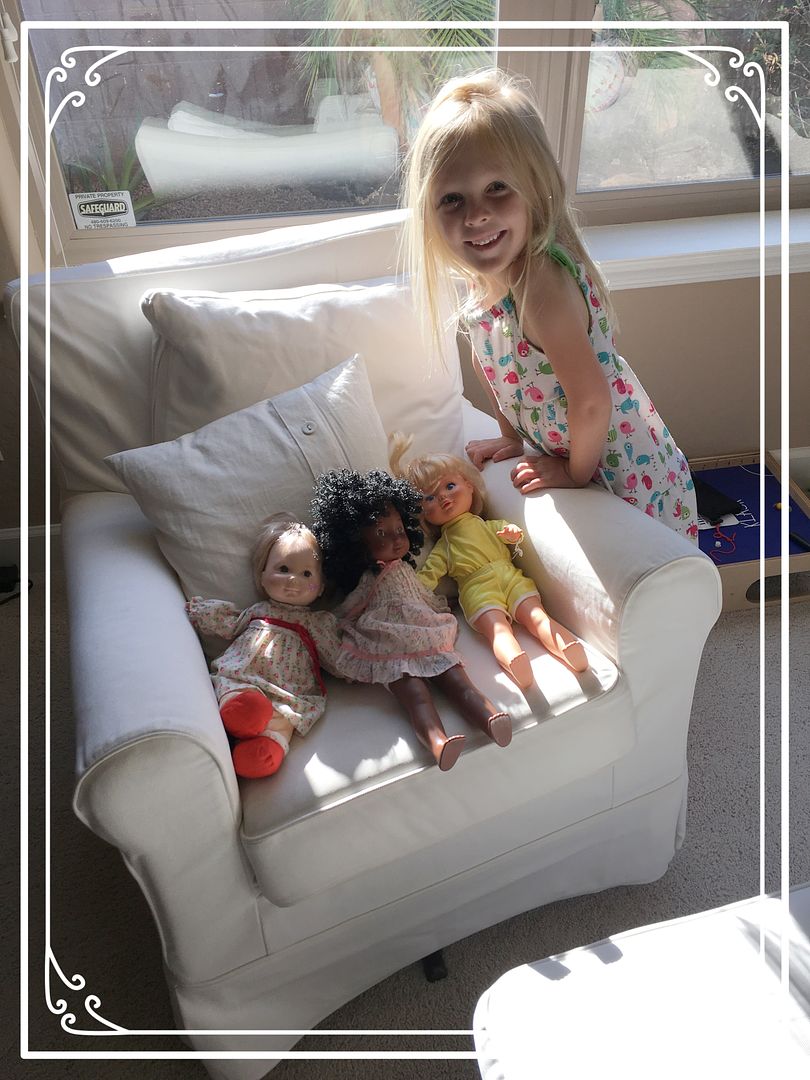
My remaining costumes, school dance dresses, ballet costumes and vintage clothing (hats, gloves) went on Etsy, for the girls to wear or given away.  My oldest daughter wore my 9th grade lavender dyed kitten heels whenever possible that week!

A couple VHS tapes went into the trash (taped Oprah shows???) and the rest to Costco to be turned into DVDs.  Fortunately I was able to preview the tapes ahead since my mom *still* has a VHS player. Ha!

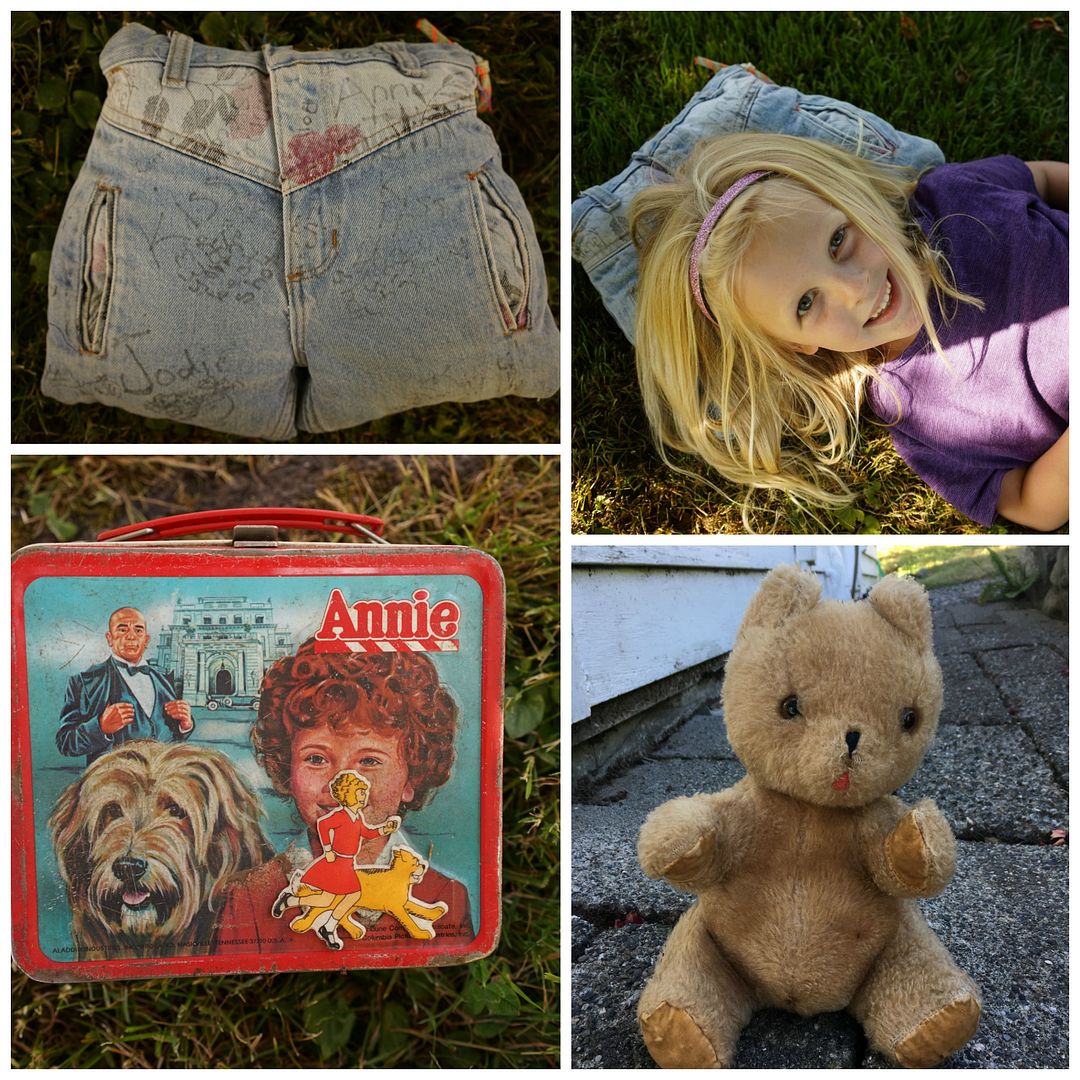
Last but not least were a few random things shown below.  My "butt pillow", Annie lunch box and my music box bear.


I wanted to toss my "butt pillow" but my children demanded that we keep it.  This little beauty was made for me by my sister out of an old pair of jeans.  It has friendship bracelets tied on top (*love*), and names of friends and favorite song lyrics written on it in black pen (classy).  The back has decorations including some 80s studs!

I digress. So although I would have liked to de-clutter that sucker into the trash it is now in my daughter's playroom and they love it. 

The lunchbox was given away after I took photos of each side. And the teddy is still at my moms since it belonged to my older sister too.  The wind up mechanism still works!

I had been feeling pretty good about my progress, getting rid of a few boxes and minimizing down to just a couple boxes (hello yearbooks from pre-school to college!).   

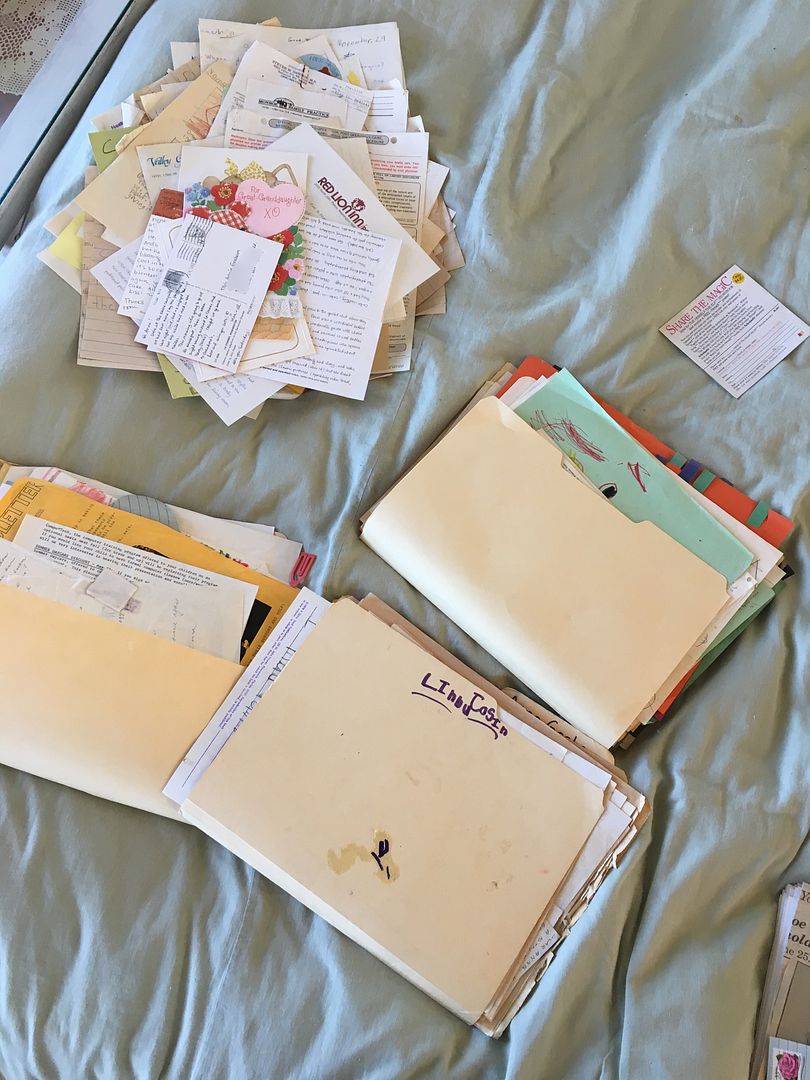
Then mom brought me 4 folders full of my childhood drawings, letters, report cards, assessments, student of the month photos and class assignments that she had filed away for me all these years.  Sigh.  

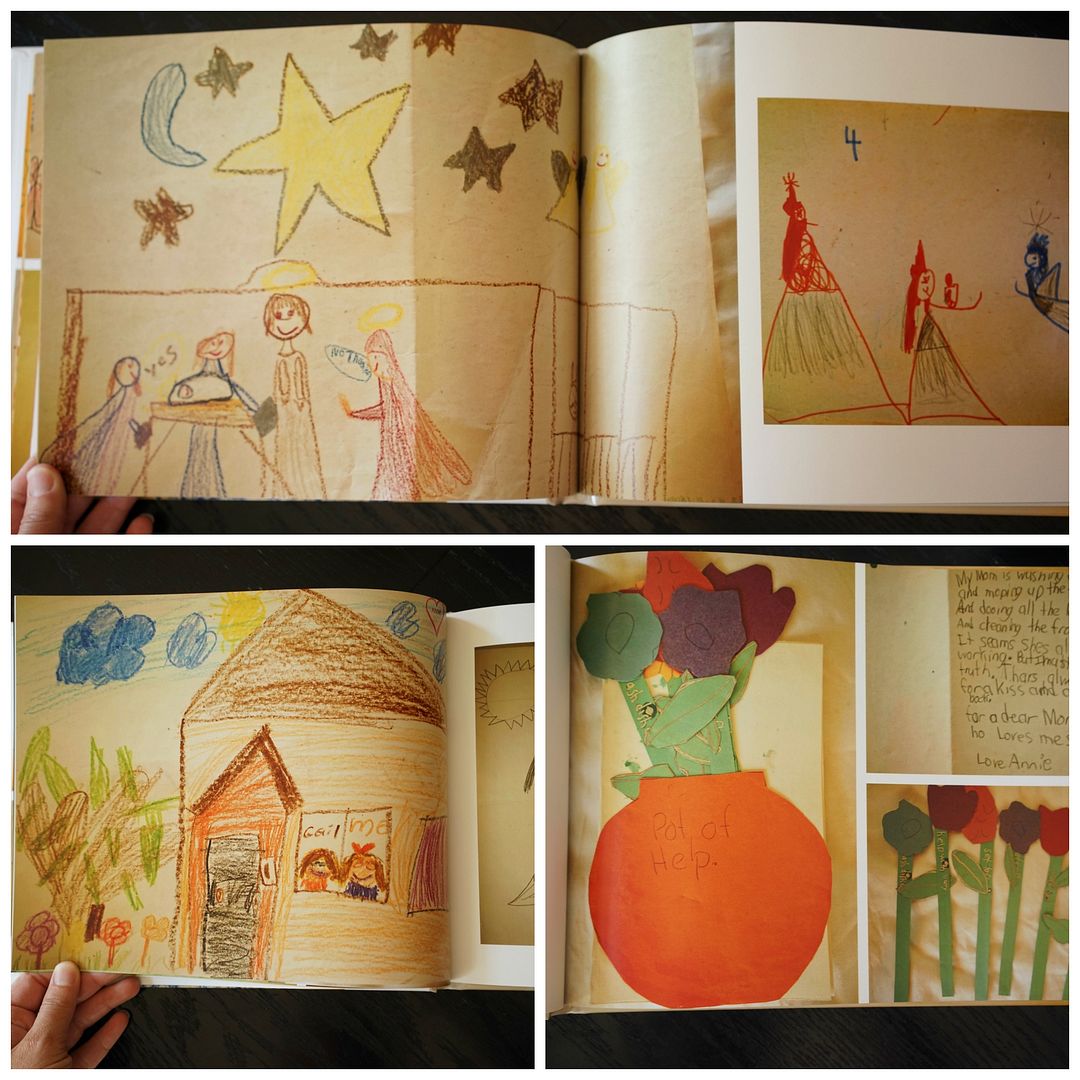
Most of these gems were from my early childhood and I hadn't seen them in decades (or ever).  I enjoyed looking at them at first but became overwhelmed by the amount and felt bad about simply tossing them all.

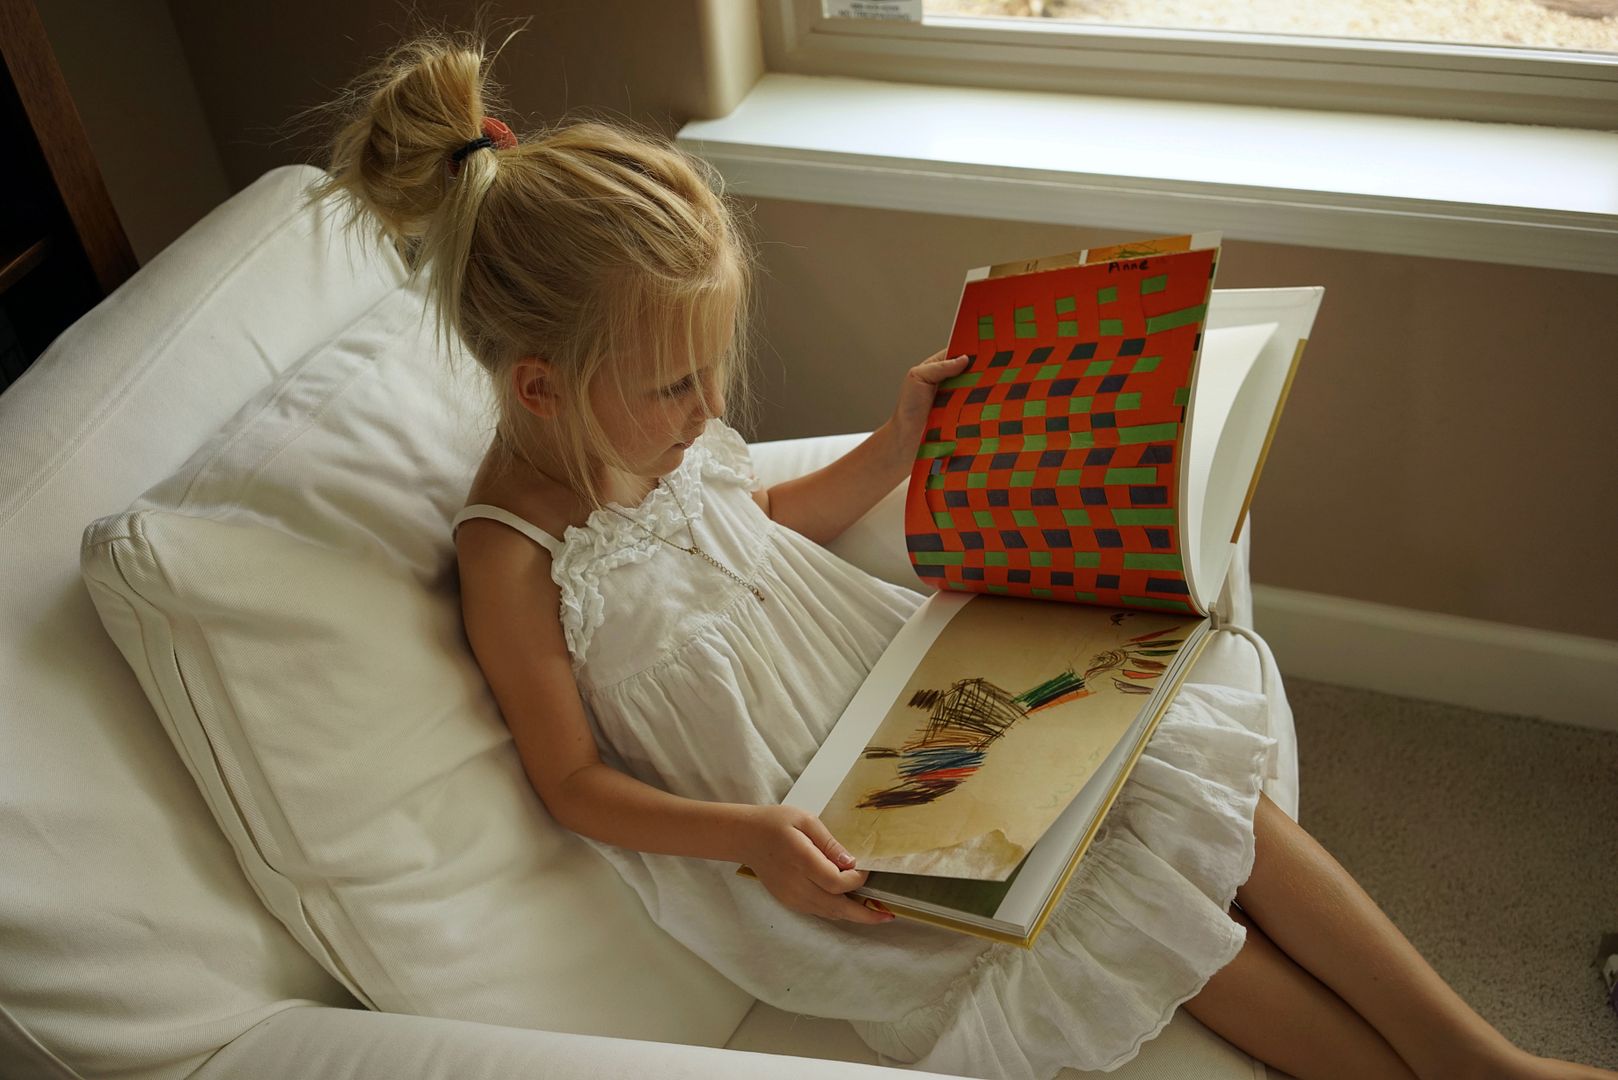
So I decided make a photo book similar to the ones I create for my own kids.  Of course this book would need to be MUCH bigger since it was so many years worth of memories.

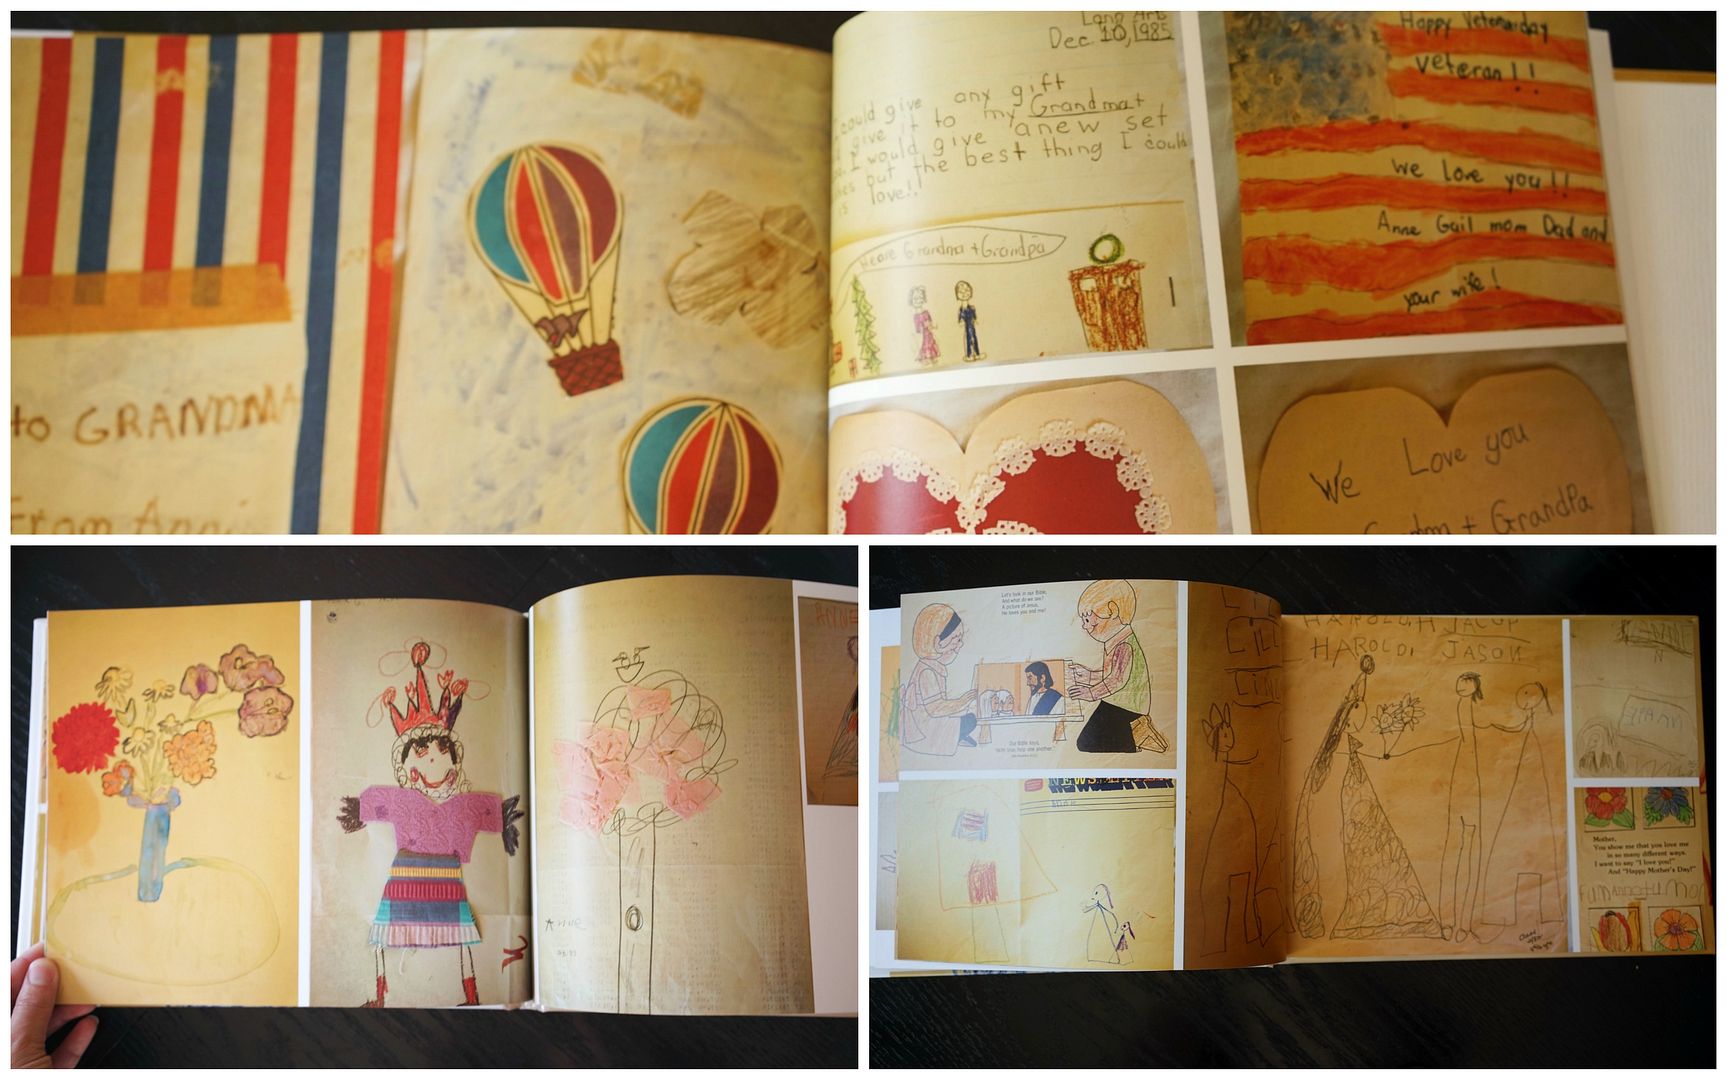
I spent a couple hours photographing the many many papers in those files.  Some to use in a book and others to just have a record of (letters of acceptance to college, assessments, etc).  Then I uploaded the 200+ photos to Shutterfly.


That particular weekend was kismet as I had a code for a free book and they were running a 1st-time ever promotion of unlimited additional pages for no extra cost!  So I ended up getting a 80 page 8x11 hardback book shipped to me for only $20.  Yes that's right, $20.  It would normally have cost almost $200!  


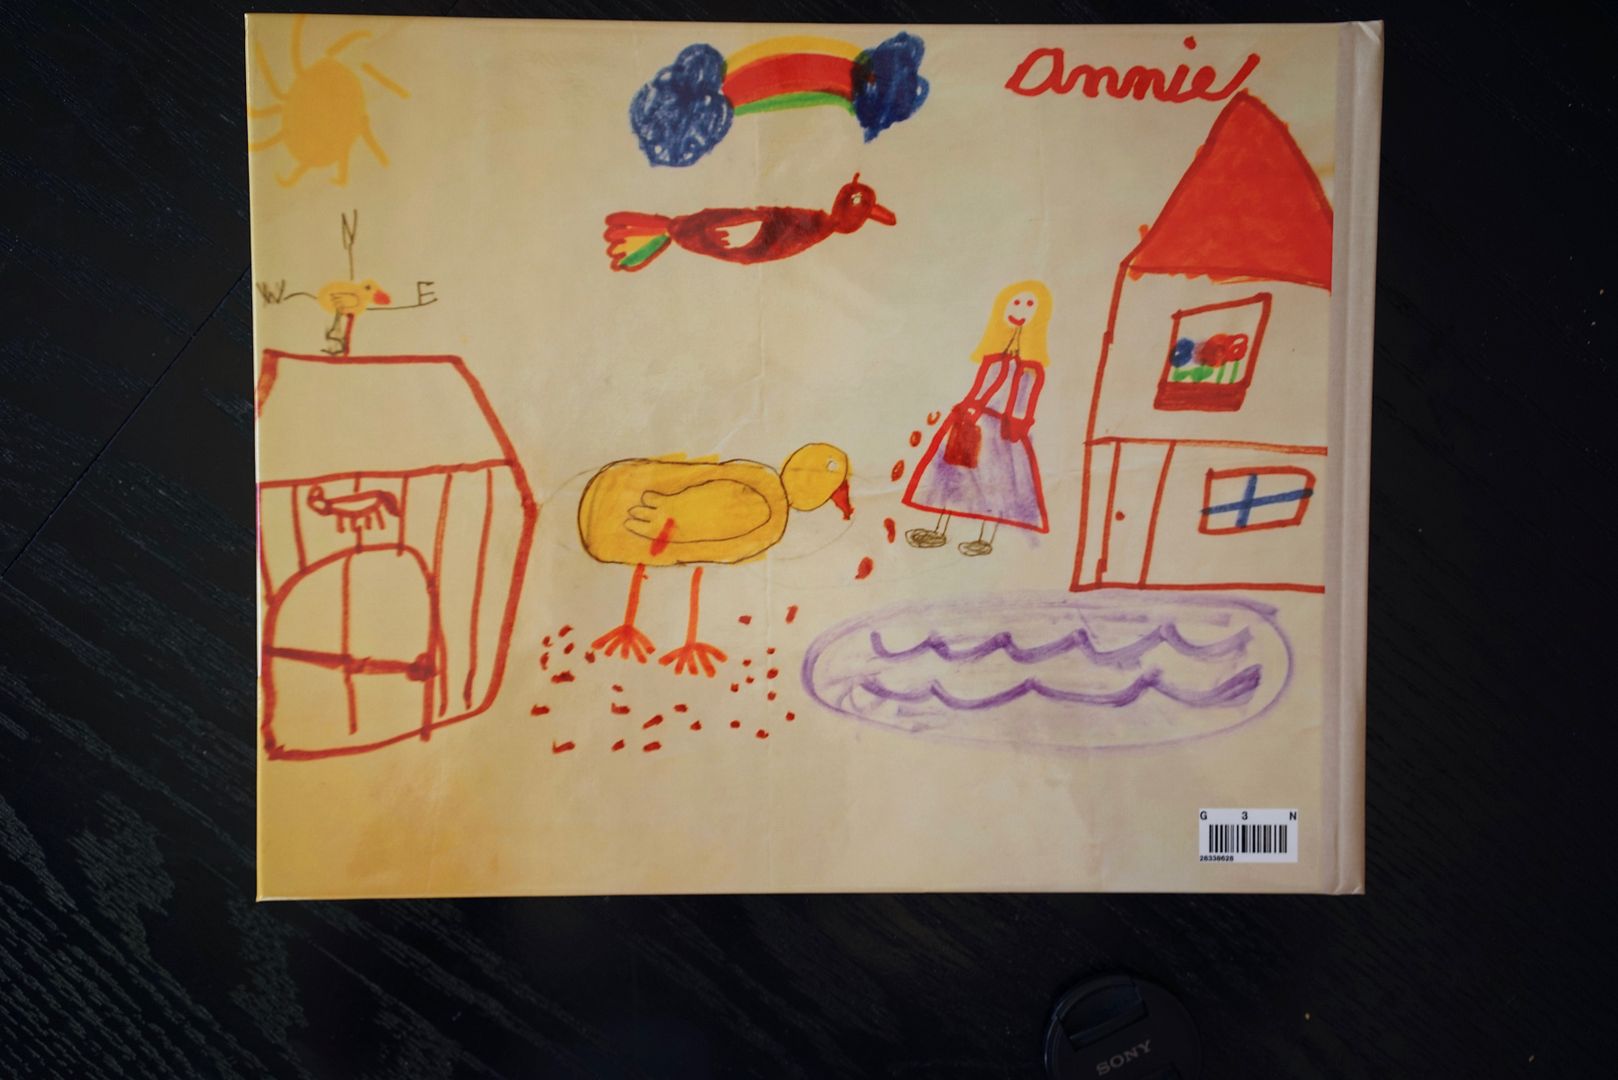
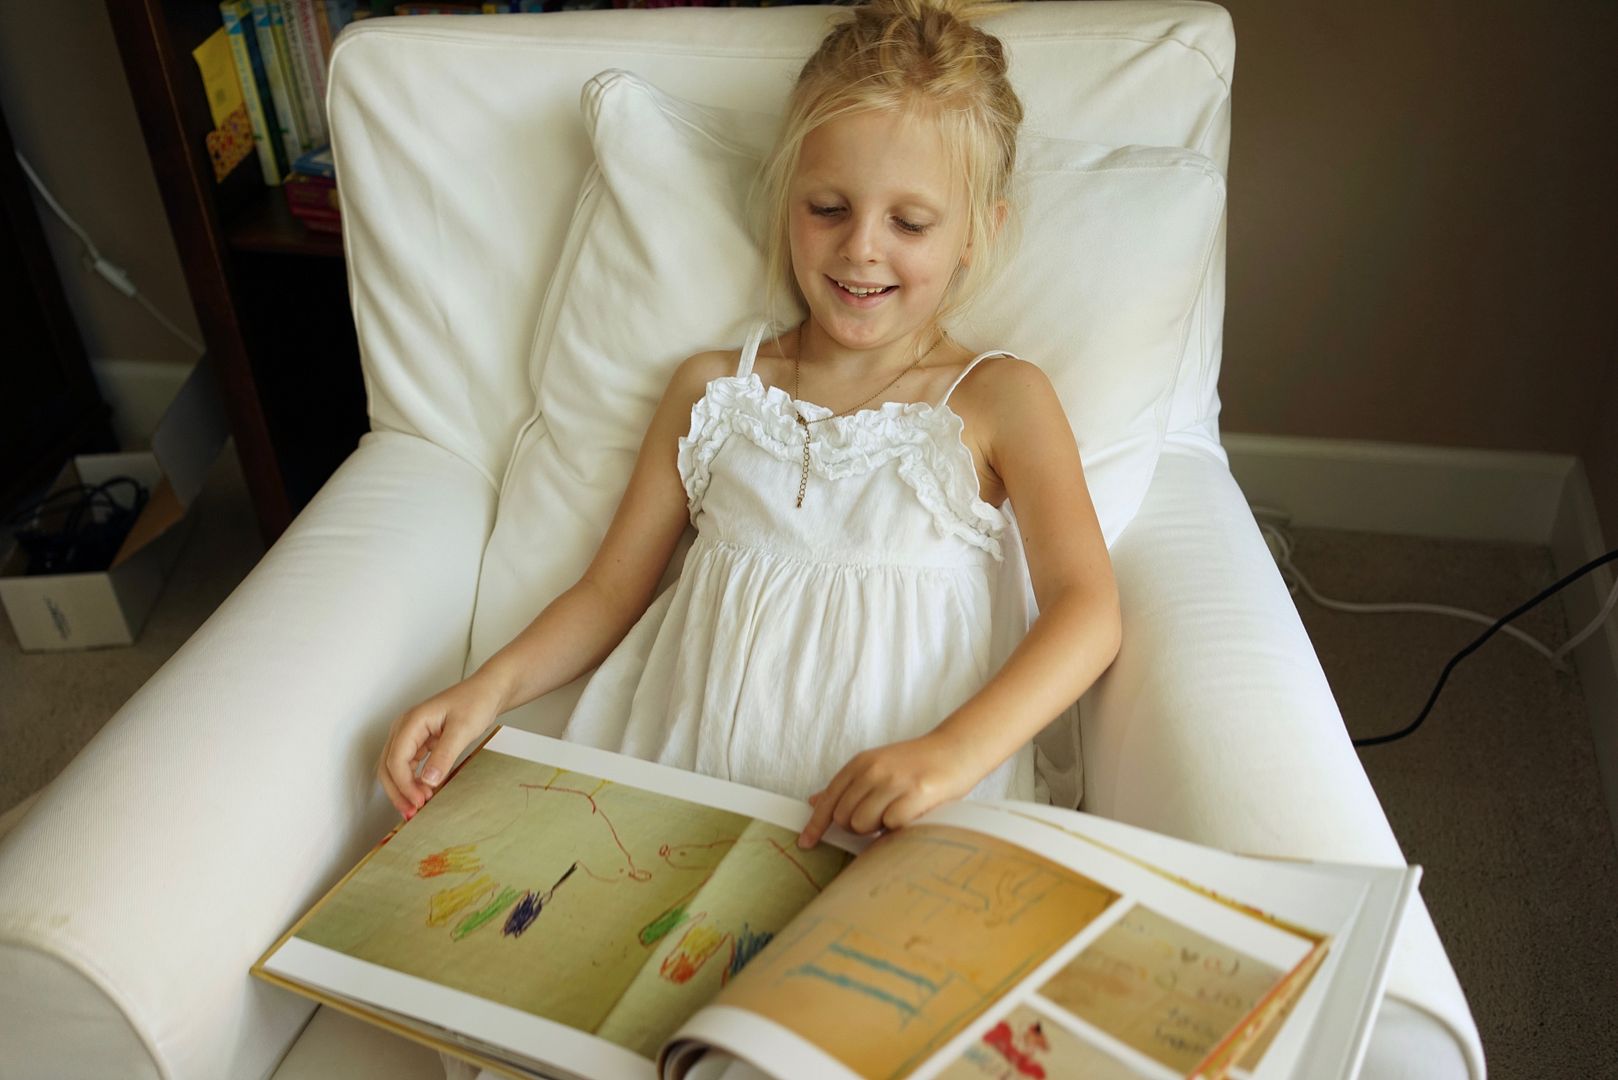
The book arrived this week and I am *in love*.  The finished product is amazing, the pages look just like my drawings (which have darkened with age) but are all tucked into a neat book.  I'm thrilled!  My kids think it's pretty cool too and enjoyed looking at mommy's drawings from when she was little.


"Look mom you made a turkey hand too". 

A few tips
  • Take photographs in a light room during the day.
  • Try to put them in chronological order if possible.
  • Put the papers on a white background, I used a pillowcase.
  • Don't forget awards, newspaper clippings or 3 dimensional projects.
  • In Shutterfly use a 8x11 book so you can spread out, especially with their "spreads layout" option; visually it's more powerful and true to the original art.
  • Make your book ahead and then wait for a FREE code or fantastic sale.
  • This would make a wonderful gift for a grown-up child! 

For more information on De-Cluttering/Minimizing


I may have to post more about my "butt pillow" someday, it is pretty 1980s awesome.  

Monday, July 10, 2017

A little Magic Trick (removing metal marks from my Fiesta)


I have a magic trick to share with you today.  Although it might not be *real* magic the results are pretty close!

We are a Fiestaware family, our primary dishes are Fiesta, a mixture of vintage (my grandmother's) and modern from our wedding registry.  Our main color is white, which after nearly14 years of holy-matrimony/use have changed to look more.....silver.  A result of hundreds of utensils scratching across their surfaces (yikes!).


I did some research and found that wenol is the recommended antidote for this problem.  Although it is a metal polish it does wonders to remove metal from dishes.


Just look!  Isn't that impressive?  It only took a little elbow grease, for the most part it was like magic!

You only need:
  • Metal scratched dishes.
  • wenol tube
  • Rag (you'll want to toss it when you're done)
  • Gloves (otherwise your hands will be stinky from the chemicals)
  • A well ventilated space.
That's it.  Since we have so many dishes I decided to just do a few at a time.  I'd take a dish after we used it; give it a quick hand wash then use the wenol (don't forget to do the bottom).  After that I put it in the dishwasher for a regular wash to remove all the chemical before we used it again.

*Another tip, it works best to have a dry dish and a dry rag.

So satisfying to have our dishes look like new with minimal effort!


For more entries on my Fiestaware check out:

Vintage Fiesta Relish Tray

Monday, July 3, 2017

Family UTV adventure near Zion Park


A big highlight of our family vacation to Zion National Park was a UTV tour as a family.  The girls and I had never been on a ATV or a UTV so this was extra exciting for us.  


After researching the options my husband chose UTV Adventure Tours.  Located about 45 minutes from Springdale (Zion) this company had good vehicles, prices and reviews.

Our vehicle fit all four of us and we were securely strapped/buckled in.  The tour company provided snacks, water bottles, goggles, a booster (for my little) and offered helmets.  Note: We chose to skip the helmets but in hindsight (and at the advice of my UTV rolling nephew) this was perhaps unwise.  Next time safety first!

My husband and I took turns driving the UTV, although I had just as much fun being a passenger.  Our tour was led by a UTV Adventure Tours guide, we just followed his UTV after a quick lesson on how to drive the vehicle.  

We scheduled a 3 hour excursion but ended up extending it to 4 because we were having so much fun!


Our 4 hours were spent in the Hurricane Sand Dunes.  We used those hours to race up and down sand dunes, climb over rocks, stop at the shore of the Sand Hallow Reservoir and visit/explore rock formations.  Fantastic!  

The girls loved the ride and squeeled with delight.  By the end my youngest had actually fallen asleep!  Kids.


By the time the tour was over we were covered in a fine film of red sand.  Our guide said it was a free facial. ;)  I found dust in my hair, teeth, ears and inside my socks.  This was due to a couple quick turns in the dunes where a shower of dust came into the vehicle. Oops. Totally worth it though!

Remember:
  • Put on sunscreen ahead (NO fun once you're sandy/dirty).
  • Bring sunglasses and hats.  
  • Bring a washable dark colored bag to hold your extras/valuables.  I used my handy-dandy packable backpack and although it was completely covered in dust by the end it washed clean.
  • Make sure your camera is in a zip tight bag or you'll be sorry.
  • Consider wearing tighter shorts.  I had jean cut offs and my iphone fit perfectly inside my shorts leg while we were driving.  Easy to get access but kept dust-free and didn't slide around.

For more information:

UTV Adventure Tours
1430 East Washington Dam Road #3
Washington, Utah 84780-2154
Phone: 435-313-4040
https://utvadventuretours.com 


More about our Zion Trip:

Where to stay and eat in Springdale/Zion with Kids
Zion Hikes with Kids