HomeVintage Fisher PriceMy Etsy ShopCategoriesAbout

Wednesday, October 31, 2012

Happy Halloween

The FPLP like to dress up and Trick-or-Treat.  This year they went as a western cowboy, queen, knight and a ghost.  


Have a safe and fun Halloween!

Tuesday, October 30, 2012

Chicken Soup with Rice Recipe


My daughter turned 5 yesterday and for her birthday dinner she requested Chicken Soup with Rice thanks to a favorite book of hers.  Have you heard of it?

It is a lovely little book about how chicken soup with rice is great all the months of the year and it says things like:
I told you once 
I told you twice
 all seasons
 of the year
 are nice
 for eating
 chicken soup
 with rice!
My daughter has been talking about having Chicken Soup with Rice for her birthday for months now even though I have never actually made this soup before.  Ha!  So how could I refuse?  I found this easy recipe on pottery barn kids of all places.

Chicken Soup with Rice
Ingredients 
4 cups chicken broth
1/3 cup long-grain white rice
2 halves skinless, boneless chicken breasts
1 carrot, peeled and diced
1 celery stalk, diced
1 cup frozen peas
1 clove garlic, sliced
1/2 teaspoon thyme, dill, or parsley OR 1 teaspoon minced fresh

Directions
Combine the broth, rice and 2 cups water in saucepan. Place over medium heat and bring to a boil. Add the chicken to the saucepan and reduce the heat to low.  Simmer the chicken, uncovered, until cooked through about 10-12 minutes. Using tongs, lift the chicken pieces out of the broth and put them on a plate. Set aside to cool. Stir the carrot, celery, peas, garlic, and thyme into the saucepan. Raise the heat to medium and cook until the vegetables are softened and the rice is tender but not mushy, about 10 minutes (15 for me). Taste the broth and season with salt and pepper, and a squeeze or two of lemon juice. Shred the chicken or cut it into bite-sized pieces, and add it back to the simmering soup. Cook until heated through, about 5 minutes.

I doubled the recipe as we were having a family dinner and so it fed 4 adults, 1 big 5 year old and had enough leftovers for lunch today.


The soup was a hit!

Oh and in case you missed it I also made her a Chocolate Cake with Salted Caramel Frosting.  Fortunately there was enough of that for leftovers today too!

Monday, October 29, 2012

Chocolate Cake with Salted Caramel Frosting


My oldest daughter turned 5 today.  Sigh.  They grow so fast!  It seems like yesterday that I took her home from the hospital.  Yesterday I asked her what she would like to have for her birthday dinner.  This included the main dish, a drink and a dessert.  She requested Chicken Soup with Rice (more on that later), Lemonade and Chocolate Cake.  Being the great Pinterest loving mommy that I am after I put the baby to bed last night I hopped online to look for a chocolate cake recipe.  I figured I'd whip something up from scratch rather than using a box.  I saw this recipe and got started.  Little did I know that I would be spending the ENTIRE evening on this 3 part recipe.  Yes that's right, I made a gourmet cake for my 5 year old that took me 3 hours to complete.  Sigh.  By the time I realized I was in over-my-head I was invested.

Now this cake isn't actually difficult to make, just a bit time consuming.  I had never made caramel before, so I didn't realize that it needs to slowly cook to be just right.  Fortunately for me everything turned out great (I had an idea after licking all the bowls last night) and the cake was a huge hit at her celebration tonight.

She is worth it.  Hey, it wasn't as long as her labor so it wasn't that bad.  Ha!

Chocolate Cake
adapted from Ina Garten

Ingredients
12 tablespoons (1 1/2 sticks) butter, at room temperature
2/3 cup granulated sugar
2/3 cup light brown sugar, packed
2 extra-large eggs, at room temperature
2 teaspoons pure vanilla extract
1 cup buttermilk, shaken, at room temperature
1/2 cup sour cream, at room temperature
2 tablespoons brewed coffee
1 3/4 cups all-purpose flour
1 cup good cocoa powder
1 1/2 teaspoons baking soda
1/2 teaspoon kosher salt

Instructions
Preheat the oven to 350 degrees F.  Grease your cake pans (I used coconut oil). In the bowl of an electric mixer fitted with a paddle attachment, cream the butter and 2 sugars on high speed until light and fluffy, approximately 5 minutes.  Lower the speed to medium, add the eggs 1 at a time, then add the vanilla and mix well. In a separate bowl, whisk together the buttermilk, sour cream, and coffee. In another bowl, sift together the flour, cocoa, baking soda, and salt. On low speed, add the buttermilk mixture and the flour mixture alternately in thirds to the mixer bowl, beginning with the buttermilk mixture and ending with the flour mixture. Mix only until blended. Fold the batter with a rubber spatula to be sure it’s completely blended. Divide your batter between your cake pans.  I had just enough to fill my two 8 & 1 1/2 inch pans 2/3 full.  The directions say to bake for 20-25 minutes, until a toothpick inserted into the middle comes out clean.  My pans took 35 minutes to bake completely.  Let cool for 10-15 minutes and then remove to a cooling rack to cool completely.

Salted Caramel 
1 cup sugar
4 tablespoons water
2 tablespoons light corn syrup
1/2 cup heavy cream
2 tablespoons butter
1/2 teaspoon lemon juice
1/2 teaspoon salt, kosher or sea

1. Combine the sugar, water, and the corn syrup in a large saucepan and stir with a wooden spoon over medium heat until sugar is dissolved.
2. Cover the saucepan and let it cook over medium heat for 3 minutes.
3. After 3 minutes, remove the lid, increase the heat to medium-high, and bring to a boil.
4. Do not stir from this point on, but instead swirl the liquid around the pan so that the caramel doesn’t burn.
5. Continue to cook until the caramel turns an even amber color (took me about 10-15 min) then remove from the heat and let stand for about 30 seconds.
6. Very carefully pour the heavy cream into the mixture. The mixture will bubble up significantly and is very hot.
7. Stir the mixture, again being careful. Add the butter, lemon juice, and salt. Stir until combined.
8. Measure 1 cup into a Pyrex measuring cup. Stirring occasionally, allow to cool until thick like molasses and warm to the touch, about 20 minutes. Save any extra in a sealed container in the refrigerator. It is delicious on ice cream.

Salted Caramel Frosting 
2 sticks butter at room temperature
8 ounces of cream cheese
3-4 cups sifted powdered sugar
1 cup salted caramel (recipe above)

1. Beat butter and cream cheese at medium speed until creamy.
2. Add 2 cups of the powdered sugar into the butter/cream cheese mixture and beat to combine.
3. Add 1 cup of the salted caramel and beat to combine.
4. Add additional powdered sugar until the frosting is the sweetness and consistency you desire.

You will be able to frost your cake right away because by the time you've made the caramel and the frosting it should be cool to the touch.


Friday, October 26, 2012

Fisher Price Friday - Ghosties vs Whoops

Today on Fisher Price Friday I thought it timely to look at a FPLP debate.  Oh yes, another debate but no worries, we won't have any long speeches on this topic. :)  It's the classic Ghostie (aka Whitie) vs Whoops debate.


White colored FPLP.  Do you have any?  They are the pale cousins of the FPLP world.  They look the same as their regular flesh colored cousins, but with a vampire-like skin tone.  The white colored FPLP can be either plastic or wood.

So what gives?  Here's how the experts explain these special little people:

From FPLP World
Whities (aka Ghostie) - Figures with ghostly white or faded faces due to lengthy sun exposure. The myth is that "whities" are factory made errors - this is false! If you were to disassemble a whitie you would find the pink outlined remains of the head under the hair or hat.

From This Old Toy
Whities -Little people with white heads/faces look sun-bleached, but they really came from the manufacturing plant like this! When mixing the dyes to make these Little People, the manufacturer didn't ALWAYS get the dye mixed correctly.

Hmm, so they either faded over time or came out of the plant looking white.  That would mean it was a whoops or variation.

Whoops: A factory made error.  Basically a toy that was not made the way it was designed to look.  Like a cow with backwards legs, a boy with girl hair, an upside down face, a horse head on a cow body, or a face that wasn't painted.  These could have been unintentional errors or perhaps by factory workers as a way to have fun!

Variation: Often described as a whoops variation figures look like regular figures but have different colors than originally designed.  This was usually in order to use up leftover pieces.  For example, a regular mom with a queen colored body.


All wood Whities/Ghosties.
So what do I think?  Glad you asked.  I think they're both right.  I think some are factory dye errors (whoops) and some are faded over time (ghosties).  I've decided this after looking at my own collection of white LP.  Let me show you some examples.

Whitie on the Left, regular color on the right.
I think this little bearded captain (from the Floating Marina #2582) is a whitie due to a whoops or variation.  The color is uniform on the white colored captain.  When peeking under his beard (just a little) I could still only see white.  I think he came from the factory this color.  Either a dye lot mistake or perhaps they were using up a white (clown) colored face.

From L-R: Ghostie (in progress), regular, Ghostie/Whitie
Now these lovely flight attendants give us a great view of a whitie vs a ghost.  The one on the left is a regular colored FPLP for comparison.  The lady in the middle is a ghostie who is in the middle of fading away.  She still has some color here and there, but is turning white.  The little lady on the right is most likely a whitie, but it's possible that she's a completed ghostie, I would have to check under her hair to be sure. :)

So what about this guy?  These are all wood dads.  Whoops or whitie?  I'm not sure.  Here are my theories, either the paint lot was whiter than normal (whoops) or it faded over time (whitie) perhaps due to a wood variation?  Maybe they used different hardwoods for the heads and some aged better than others.

What do you think?

One more bit of information on value.  A Whoops is more valuable ($$ costly) than a regular piece, since they are more rare.  However, a ghostie would be less valuable since it would be comparative to a torn/faded lithograph or broken piece from wear and tear.  I initially thought my ghosties were less valuable and sold them that way.  Now I'm not so sure.  Maybe I have some whoops/variation pieces?  I guess value is all in the eye of the beholder. :)

Wednesday, October 24, 2012

Vegetable Quinoa Soup Recipe


Ah fall, time to bring on the soup recipes.  This soup is light, flavorful and full of vitamins and protein!  I made a big batch for dinner last night and am glad we have leftovers for lunch today.  I served it with some fresh baked bread smothered with butter.  Are you hungry yet? 

Vegetable Quinoa Soup 
adapted from two peas and their pod
Ingredients
2 tablespoons olive oil
1 medium onion, diced
2 cloves garlic, minced
2 medium carrots, chopped
2-3 small zucchini, chopped (or 1 each zucchini and yellow squash)
1 1/2 cups fresh green beans, broken or cut into 3/4-inch pieces
1 box (32 ounces) broth (I used chicken b/c we prefer the flavor)
1 (15 ounce) can diced tomatoes
2 bay leaves
1 teaspoon dried thyme
1/3 cup chopped fresh basil
2 cups cooked quinoa
Salt and black pepper, to taste

Directions
1. Heat the olive oil in a large stockpot over medium-low heat.  Add the onion and cook until tender about 5 minutes.  Add the garlic and cook for another 2-3 minutes.  Add the zucchini (and squash), green beans and carrots and cook for another 5-7 minutes, stirring occasionally.
2. Add the broth, diced tomatoes, bay leaves, thyme and basil.  Reduce the heat to low, cover and cook until the vegetables are fork tender, approximately 25 to 30 minutes (for me it was 40 minutes).
3. Stir in the cooked quinoa and season with salt and pepper to taste.

Note: To cook the quinoa rinse 1 cup of quinoa under cold water.  Add quinoa and 2 cups of water to a rice cooker or medium saucepan and bring to a boil over medium heat.  Boil for 5 minutes then turn the heat to low and simmer for about 15 minutes or until the water is absorbed.  Remove from heat and fluff with a fork.

Tuesday, October 23, 2012

Confessions of a diaper swisher.

Yes, it's true.  I must confess that I have become a dreaded (cloth) diaper swisher.  Not just here and there but pretty much everyday, sometimes multiple times a day.  Sigh.  Remember when I said that I would never swish diapers and even added a proud "yuck".  Well those days are over.  Turns out kids are different, who knew?

Warning: Don't read any further if you aren't interested in cloth diapering or poop removal.  Ha!

With Baby #1 I never ever needed to swish.  She had these lovely little poops that just fell into the toilet and in which my oh-so-tidy disposable liners worked fabulously with.  Baby #2 is a different baby.  I had no idea!  She is a pooper, many times a day and let's just say not-so-tidy.  I think it's because she is a super eater and eats everything, including lots of fruit and beans.  Anyway, this equals more of a diaper mess if you know-what-I-mean.  Those disposable liners help but don't help it all.  And wouldn't you know the times I don't put one in is when she poops.

Sigh.  So here's what I'm doing to adapt.  First, I toilet swish.  It's not so bad, especially if I'm just swishing the snap in liners (or covers) in my goodmama fitteds or the snap in liners in my Best Bottoms.  It gets a bit more complicated and hands-on when it's in a AIO.

I've found that my homemade micro fleece liners are VERY helpful.  I used them in almost every diaper now while before I saved them for when we used diaper cream, or for overnights (to keep her feeling more dry).   I highly recommend purchasing or making your own washable fleece liners.  They are a lot easier to swish then the entire diaper. :)


I spray each diaper with Bac Out before putting it in the diaper can.  I also sprinkle my homemade diaper pail deodorizer in the can on a more frequent basis these days.

Whew, glad I got that off my chest.


Baby girl wearing a goodmama fitted.

Keep Calm and Diaper On!


For more Info on Cloth Diapering check out:

Diaper Liner Reviews
and make your own diaper pail deodorizer

Sunday, October 21, 2012

Black Bean Vegetable Soup Recipe (and cheesy bean veggie dip for the kids)

We've been getting lots of dried black beans in our CSA box.  We are a bean loving family so this is good news!  I usually buy my beans in a can but dried is even better because it reduces sodium and of course packaging waste.  I found an easy way to make the beans using a crock pot.

Cooking Dried Beans:
1. Measure out 1 pound of beans.  Pick out any stones from the beans and give them a quick rinse.
2. Put beans in a crockpot (slow cooker) with 6 cups of water for each pound of beans.
3. Put the crock pot on high for 4-6 hours.
4. When the beans are done cooking (tender) give them a quick rinse in a colander.  Separate in two cup portions which is about the equivalent of a can of beans.  Freeze to use later.

So easy!  Now onto the soup.  This recipe is also relatively easy and can be adjusted to use whatever veggies you have on hand.


Black Bean Vegetable Soup
Ingredients
1Tbsp Olive Oil
1 onion
red or green peppers (3 small)
1 cup mushrooms
3 cloves of garlic
handful plum tomato or a few cherry/grape tomatoes
3 green onions
3 cups of black beans (1 or 2 cans worth)
3 cups stock (chicken or vegetable) or water
fresh: cilantro, oregano, and thyme
spices:
1 Tbsp cumin
1/2 tsp chili powder
dash red pepper flakes
1 tsp paprika
coriander (to taste)
Salt
Pepper

Directions
1.  Heat the olive oil over medium heat in a pot.  Dice the onion, mushrooms and peppers and add to the pot.
2. While those veggies are sauteing chop the tomatoes and slice the garlic.  Add them to the pot.
3. While those veggies are sauteing chop green onions and fresh herbs.  Add them to the pot.  Add and blend in the spices.
4. Add the black beans.  Add the stock (or water) and simmer for 10 minutes.  We added a lot of stock because we prefer more of a soupy soup.  If you like it thick add more beans and less stock.
Eat!

My daughter is not a fan of spicy and this soup was about medium because of the seasonings.  Instead of making our soup weak I added lots of cheese to hers and made a dip.  Gave her some tortilla chips and she LOVED it.  So we had black bean vegetable soup and she had black bean veggie dip.  Worked great!

Friday, October 19, 2012

Fisher Price Friday - Pop Up Camper

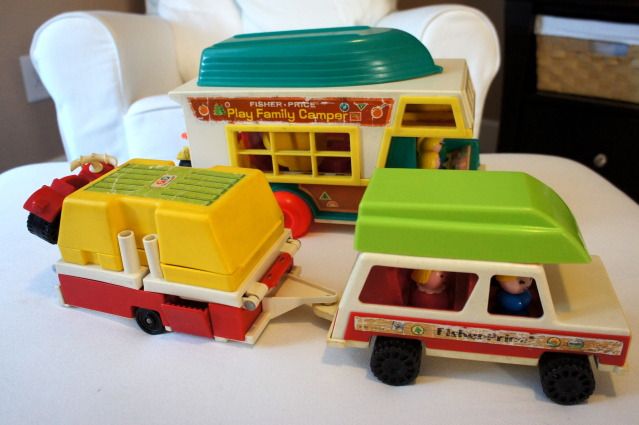
Today on Fisher Price Friday I'd love to share the #992 Play Family Car and Camper.  This popular set was made from 1980-1984 after the #994 Play Family Camper was discontinued.  

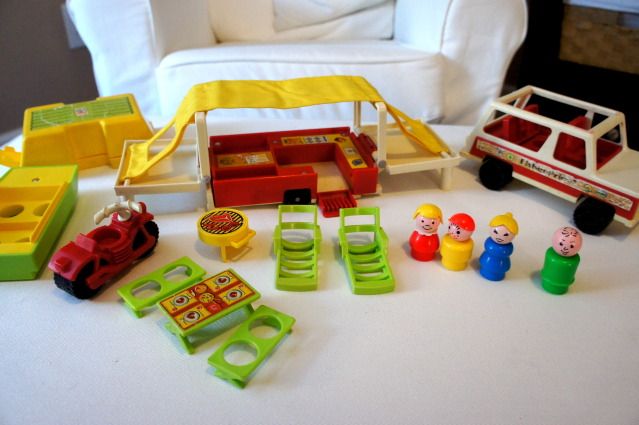
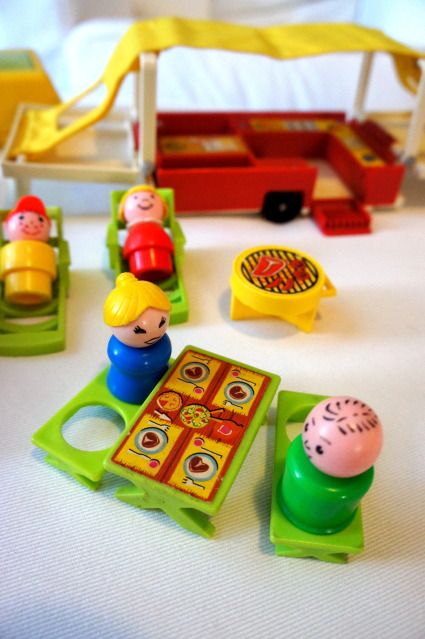
The set has fifteen pieces including 4 people, a picnic table and benches, motorcycle, grill, boat, camper top, pop up camper and family jeep.

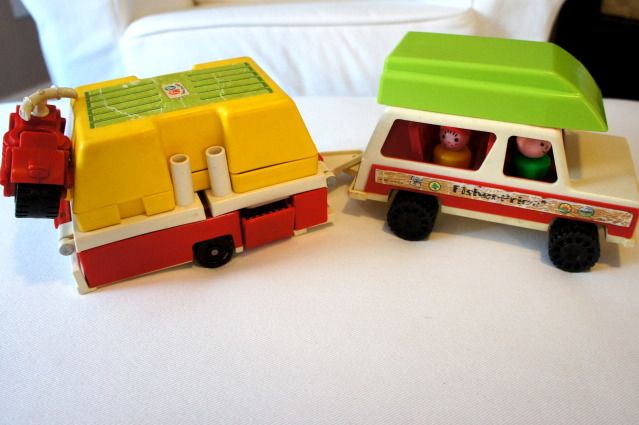
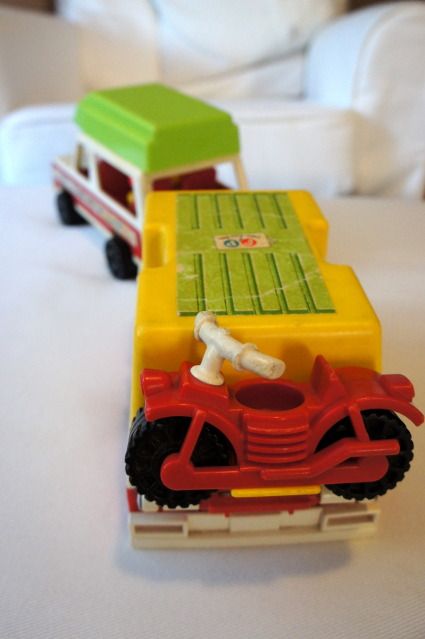
The red motorcycle fits nicely on the back of the camper resting on the camper top.  I read that it is referred to as a "red trail bike" but it looks just like a motorcycle to me.  The yellow camper top has a green lithograph with "f" and "p" and "fisher price" on it.

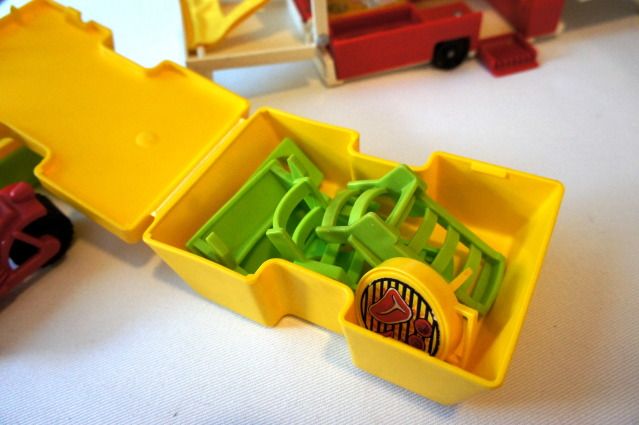
The camper top opens on the bottom and has enough room to fit all of the extra furniture.  The top is frequently missing from sets and is a tricky piece to find on its own.  I was fortunate to have a fellow FPLP friend help me complete my set (I bought just the camper and jeep together).

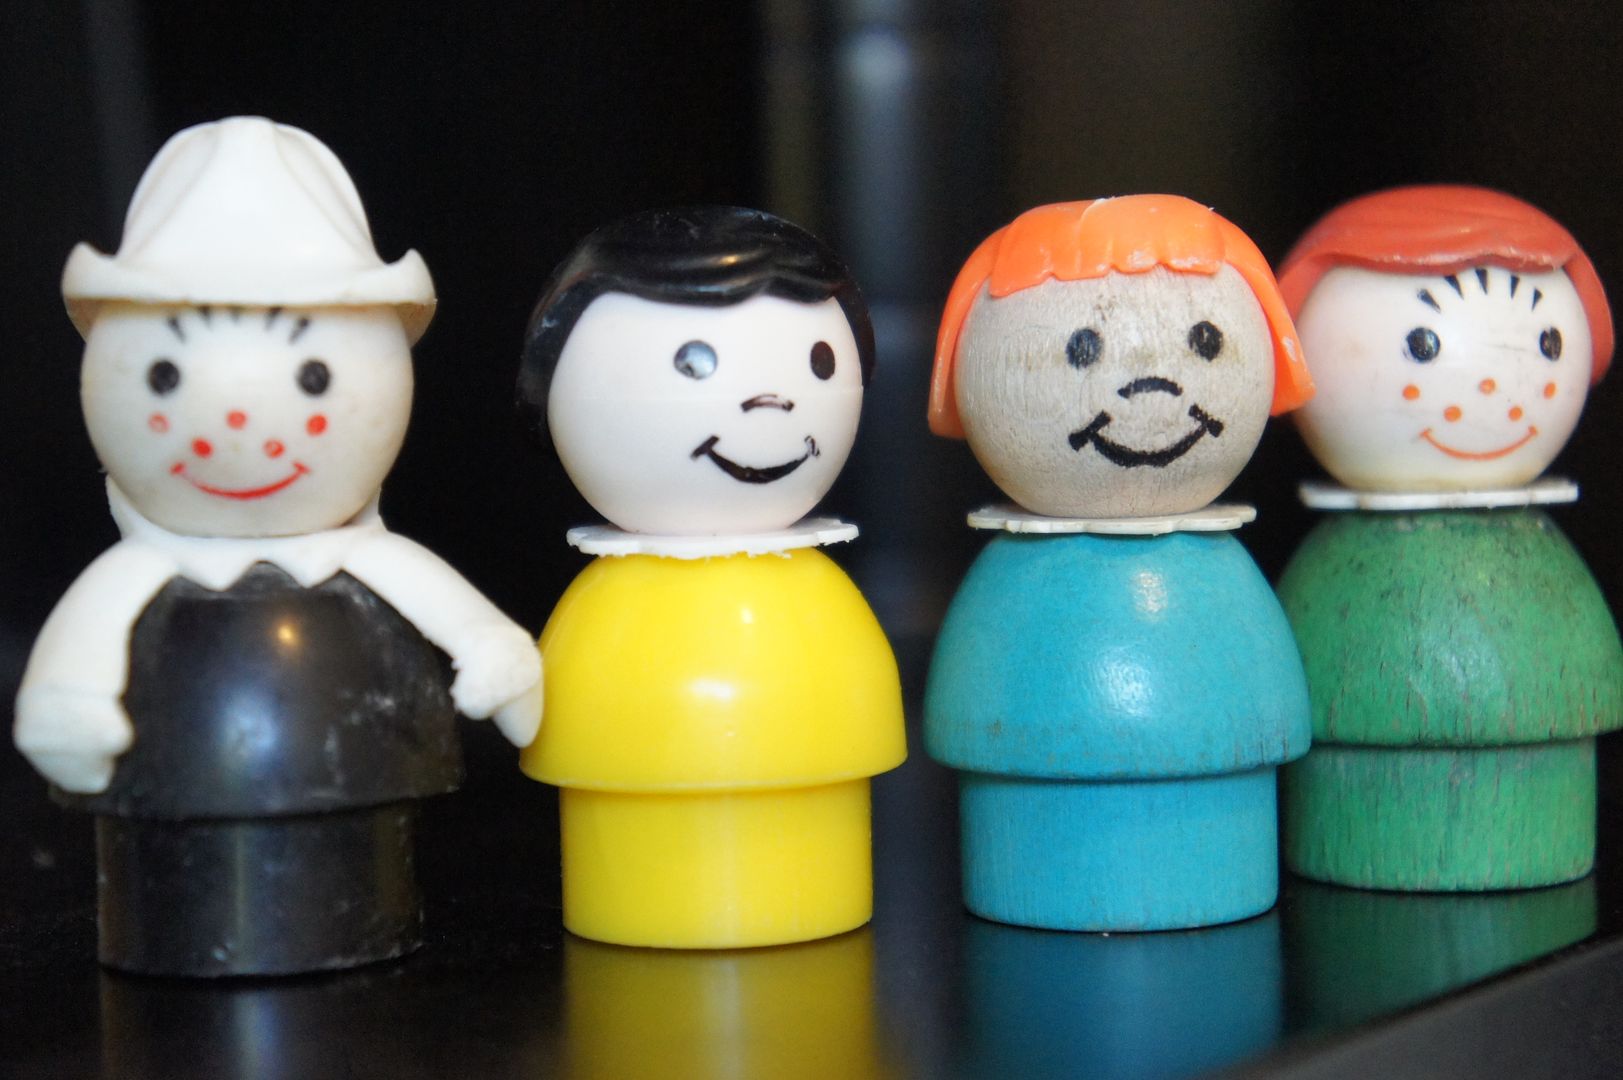
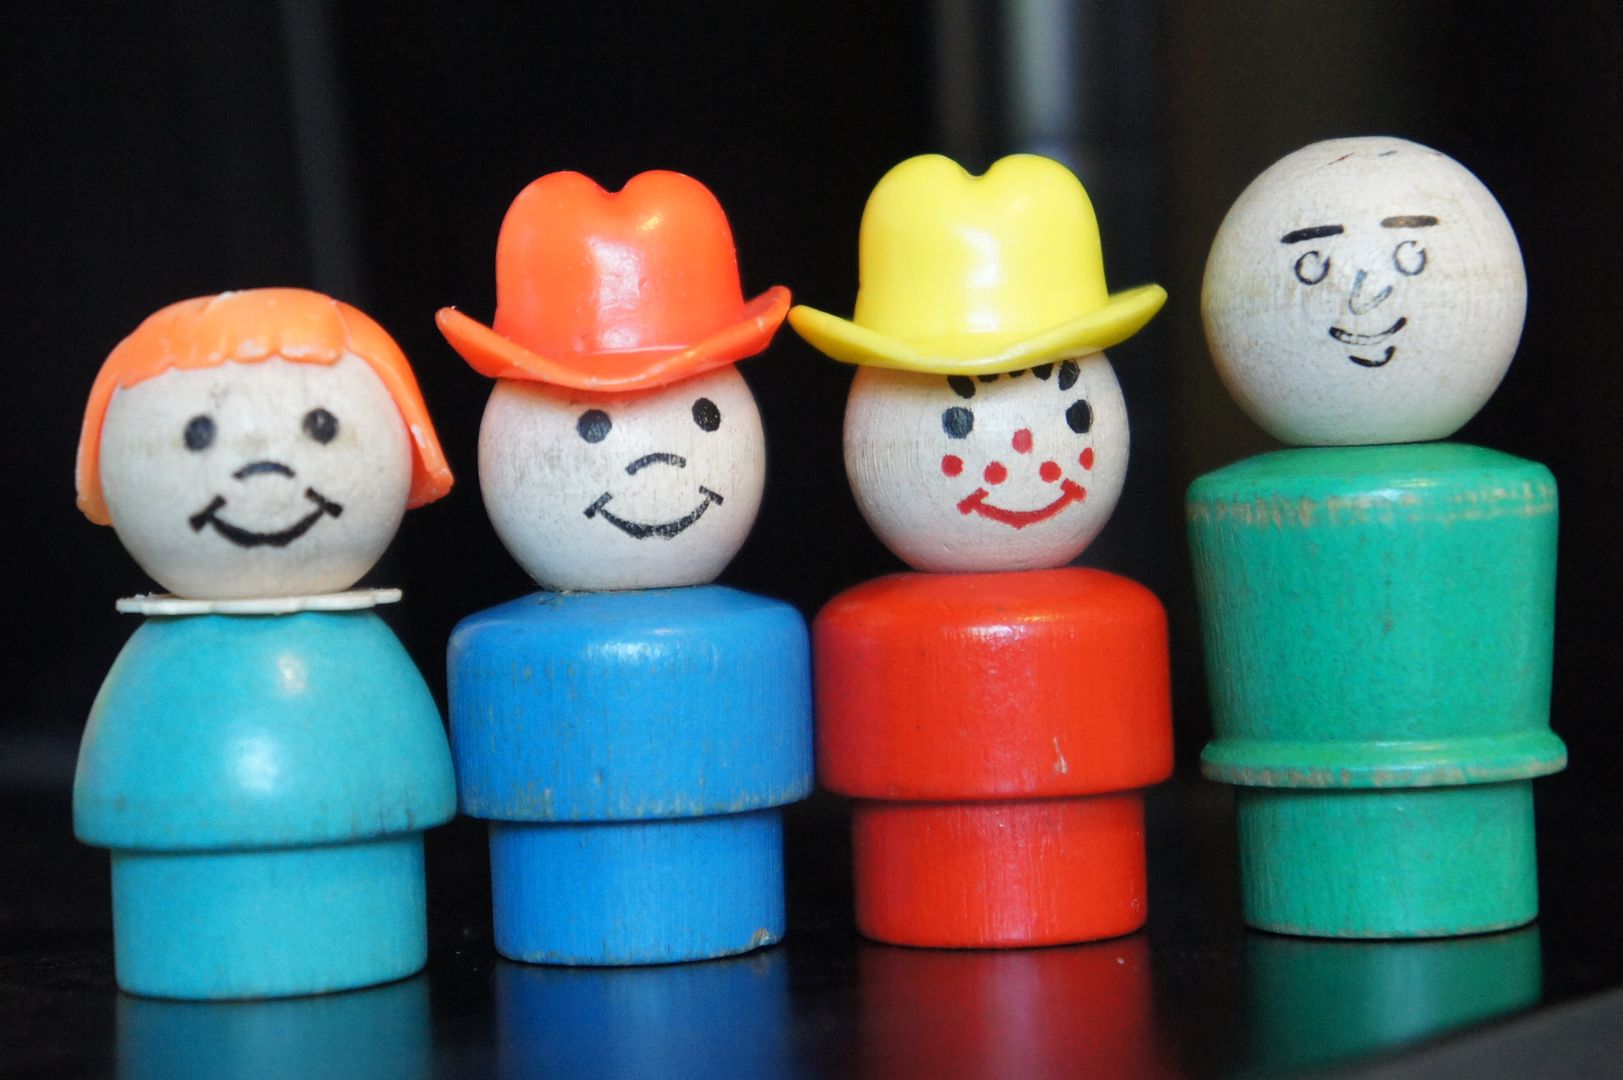
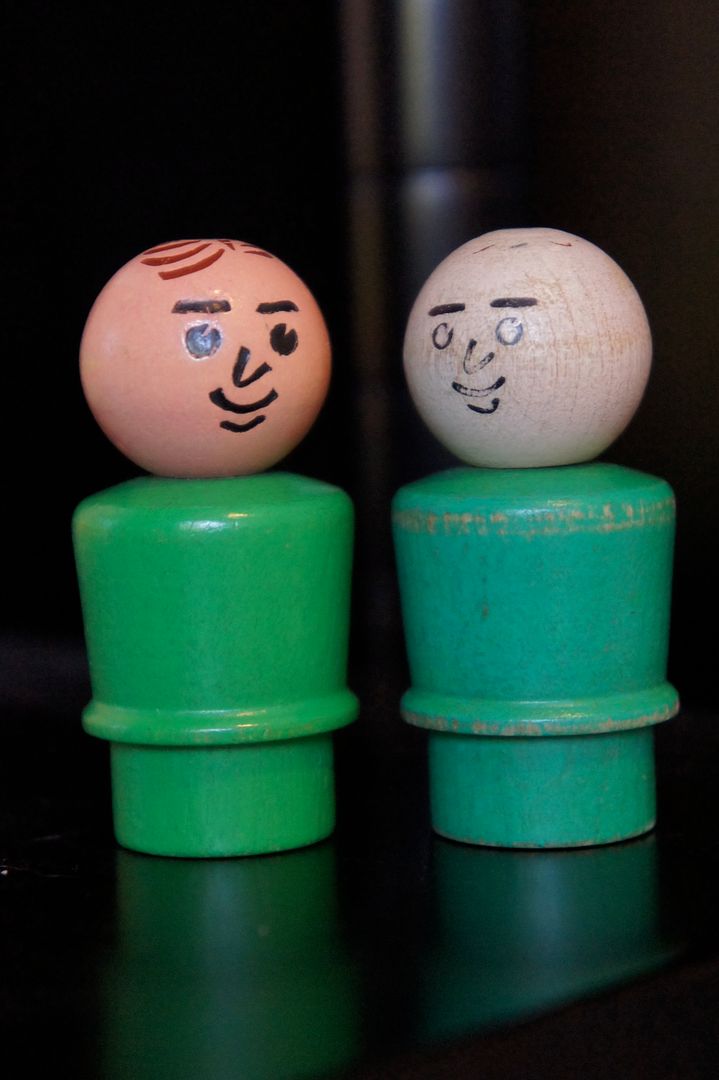
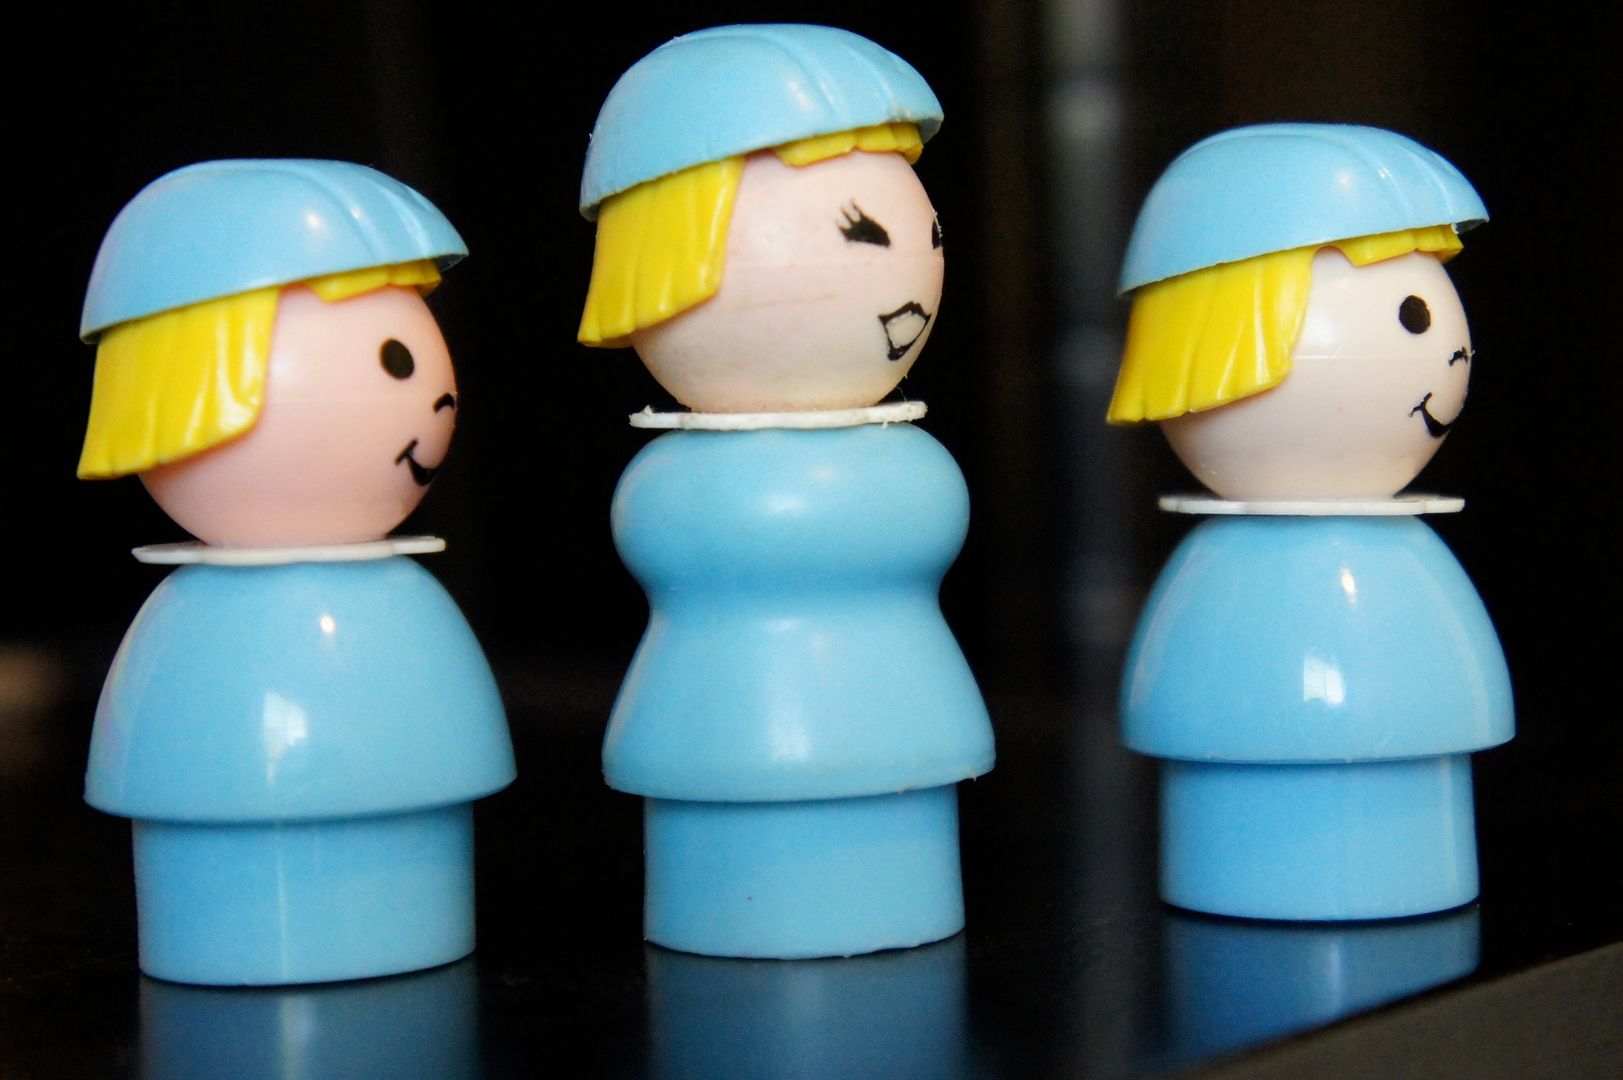
The family pieces are all plastic and as pictured.  The girl could also have a light red body or be a brunette.  The boy has a red cap, freckles and is smiling.  The set included two green lounge chairs  

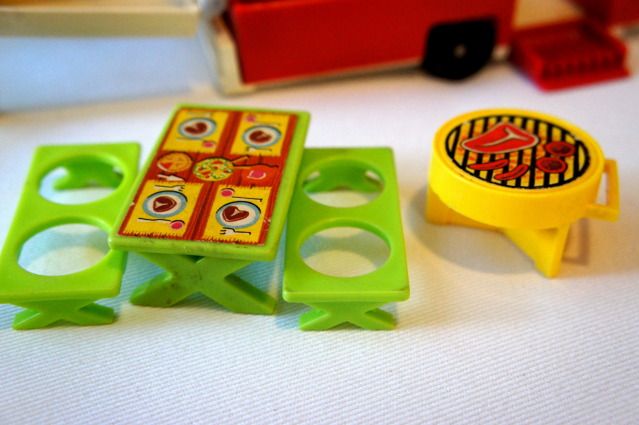
The green picnic table includes a lithograph of place settings.  Everyone is eating steak for dinner!  The yellow grill is unique with x-shaped criss-cross style legs instead of the more typical spindle (separate) legs.  The yellow x-shaped grill was made from 1982-1984, from 1980-1981 it had spindle legs.  This was the only set that the yellow x-shaped grill was produced for and the first set to have this leg design.

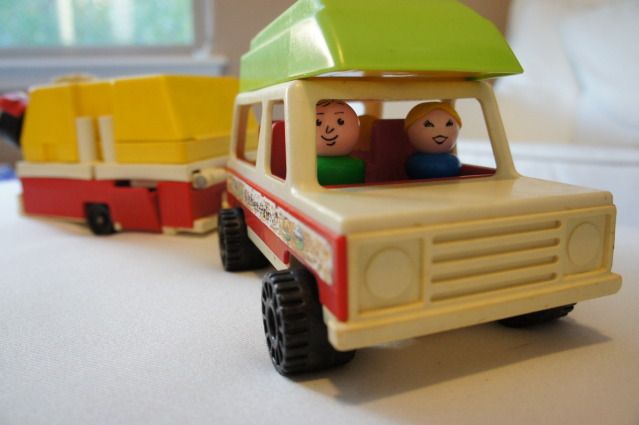
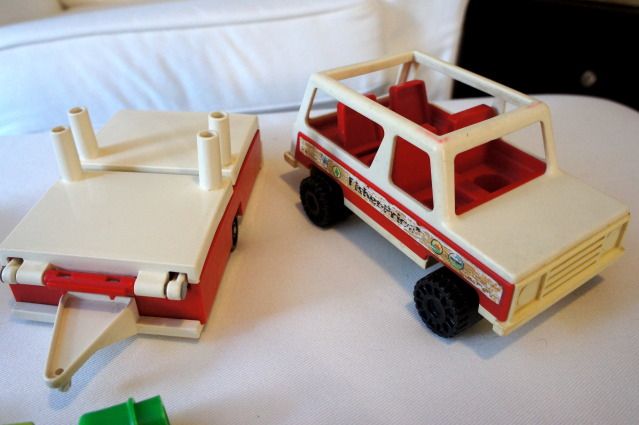
The camper is pulled by a hitch on the family Jeep.  

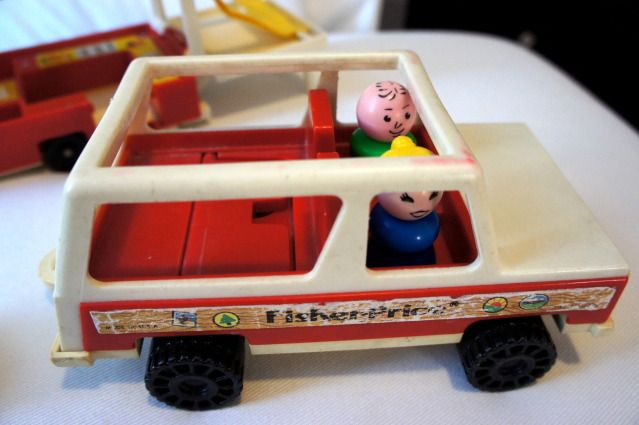
The Jeep sits 4 but the rear seat folds down for storage.  How cool is that?  The Jeep has lithographs of simulated wood on each side (matching) that have Fisher Price on it and camping stickers. 

A cute little green and yellow boat rests on top of the Jeep.  It holds 4 people.

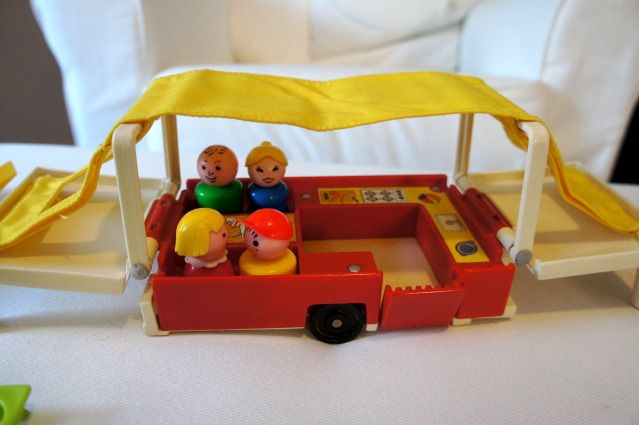
The camper has a white plastic top that folds open to show the yellow fabric pop up tent. 

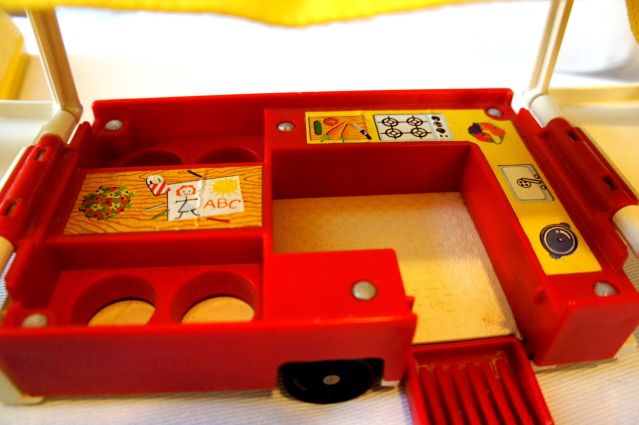
Inside the camper is a dining table that seats four, a kitchen and fold out entrance steps.  The lithographs on the table include a bowl of flowers, and a child's drawing and crayons.  The kitchen counters include a cutting board with vegetables and a knife, a four burner stove, kitchen sink, coffee pot and a fruit bowl.  The camper floor is a lithograph of linoleum.

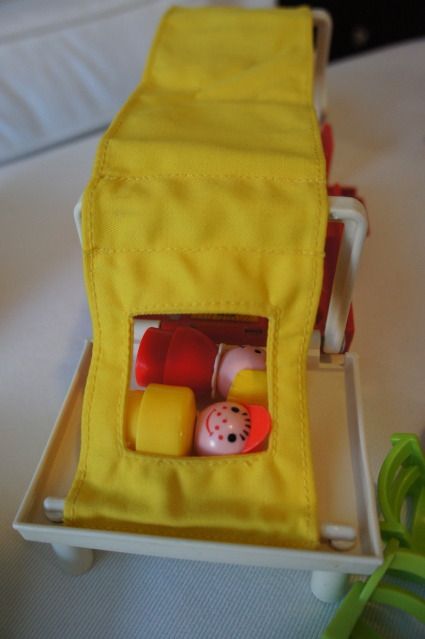
Each side of the camper has sleeping areas (sleep two) and windows cut into the yellow tent fabric.

This is the camper folded down and without the storage container on top.  Many pop up camper sets are sold online looking just like this.  They are still fun without the camper top, but trust me, you'll be driven to find one if you buy it this way. ;)

For comparison here is the Pop Up Camper #992 next to the Play Family Camper #994.  The Pop up Camper has a much more realistic profile.  To read more about the Play Family Camper look here.

Happy Camping!

Thursday, October 18, 2012

How to Bake a Pumpkin (it's easier than you may think)

I have something to confess.  Until this week I've never ever "made" a pumpkin before.  Until now pumpkins were strictly for decoration and if I needed pumpkin for a recipe I'd just get a can from Trader Joe's.  Am I the only one?


Well, after receiving 3 lovely baking pumpkins from our CSA box last week I decided it was time to figure out how to make pumpkin from scratch.  Instead of my usual google search I decided to ring up my mom.  She just happened to contribute to a cookbook back in the 70's on this very subject!  She gave me the following directions that worked quite well.  All in all it was a much easier process than I'd expected and I ended up with something extra that you cannot get from a can. Pumpkin seeds!

Flipped over after they finished baking.  

Pumpkin Baking 101

Wash pumpkin(s).  Cut in half (across the middle not top to bottom).  Scoop out and save seeds.  Place in a large shallow baking pan.  I recommend putting some parchment paper on the bottom first as it makes clean up easier.  Bake uncovered at 350 until flesh is very tender (about 1 hour).  Cool for a few minutes then scoop out the flesh.

Puree the pumpkin in a blender or food processor.  Add a little water if it is too thick to blend.  Measure out and put 1 cup servings in individual plastic bags.  Freeze and you're all set for recipes!

I set some of the puree aside for my baby who LOVED it with a little cinnamon and yogurt (plain) added.

Lovely pureed pumpkin!

Other ways to cook Pumpkin

If the oven isn't for you here are two other ways to cook pumpkin.

Microwave - Pierce the pumpkin with a knife or fork several time.  Cook on high for 6 minutes or until tender.  Cut in half and scoop our the flesh. (note: this part was not included in the original 70's cookbook as there were no microwaves back then, ha!).

Stove  - Cut the pumpkin into 3-4 inch chunks.   Don't peel off the skin as it will fall off on it's own. Add a little bit of water and bring to a simmer.  Simmer until tender about 50-60 min.

So there you go, three different ways to cook up a pumpkin.  Looks easy right?  I'll be back with some recipes to use all of the lovely pumpkin puree soon.

The pumpkin seeds from just 2 of those medium pumpkins!
Pumpkin Seeds
But wait, we can't forget the pumpkin seeds!  They are easy to make, especially if you are baking the pumpkin.  Just separate from the pulpy strings, rinse a little (be careful, they're slippery little buggers) and place on a baking sheet.  I prefer to use parchment paper on the sheet to minimize clean up.  Spray with some olive oil and sprinkle sea salt on.  Bake for about 45 minutes in the same oven as the pumpkin (350 degrees).  Remove from the oven and let cool a little bit.  Try to resist eating them all at once! 

Wednesday, October 17, 2012

(semi)Wordless Wednesday - WeeRide with my wee ones

It's starting to look like bike-riding weather here in Arizona.  So we pulled my bike from the way back of the garage, dusted it off, pumped up the tires and strapped the baby in.  Yes, baby-girl comes along with me thanks to the WeeRide Kangaroo bike seat.

Baby-girl wasn't too sure about the whole bike riding but once we started she had a great time.  I kept hearing her laugh as we rode along.  

Here is big sister at the age of 2 in the WeeRide.  How cute is she?  Yes, my girls look a lot alike. :)

Big sister was a big fan of the bike seat and was sad when she outgrew it.

So now it's baby-girl's turn for a spin.  Here's a little smile.  What can I say, my wee babies love to ride.

Monday, October 15, 2012

Closet Organization - Master

Can we talk about organization a little bit?  I can't be the only one who enjoys looking at other people's closets.  You know, to see how they organize. ;)

Well, I am a bit of a organizing freak.  At least I was before I had my 2nd child.  Now I can hardly find the time or energy.  Fortunately I pretty much had my system set up before her arrival.  Now I just need to put everything in it's place.  I try to arrange my (and my husband's) clothes by type, season and color.  It's not a perfect rainbow but I try!


I will admit that my master closet is a bit on the large size. ;) This helps to keep it organized, but I also added boxes and baskets to find a home for everything.  I also need to get out of the way that yes, my baby's pack-n-play is STILL in my closet.  Yes, she still sleeps in there, but I am happy to say that it is only for naps and the early morning hours.  The rest of the time she sleeps in her big-girl-crib.  Progress.


Now back to the closet.  I also want to say that it is a bit messy.  I literally just went in there this afternoon and snapped a few photos.  I could have straightened it up a bit but who has the time?  I was borrowing baby-nap-time to take these photos as it is!


Here's what I've done:

Except for the permanent wood shelves pretty much all of my organizing is thanks to IKEA products.  The baskets, boxes, shoe holders and even the hangers are IKEA.  The large boxes on the very top shelf hold off-season clothes.  The next shelf holds seldom used items like hats and hose (this is AZ, nylons are rarely used).

I highly recommend getting all matching hangers.  This is an easy and relatively inexpensive way to have a cohesive look in your closet.  And NO WIRE HANGERS.  Those things are horrible (looking), bad for your clothes (makes them misshapen) and can encourage overcrowding.  I prefer wooden hangers myself, but even all one color plastic are better than mismatched or wire.

The smallest boxes on top are more seldom used items (one is a sewing stuff box) and all have labels on them to remind me what's inside.  The next two shelves hold things like scarves/hats and not often worn t-shirts.  On the open shelves I fold (not very well sometimes as you can see) tank tops, t-shirts, pj pants, and sweatshirts.  As the seasons change I will move around what is on each shelf and trade some of them for items in the big off-season boxes.

In the middle I hang dresses and above them store purses.  I am not a huge purse kind of a gal so I don't have too many to store.  The seldom used bags (evening bags) are in one of the white boxes.

Below my dresses I keep shoe racks.  These are IKEA also and I've had them for some time.  They are a fabric/wood combo and I love them!  I have two fabric drawers, one for white socks and the other for colors.  My girls love hiding in the space between the shoe racks. ;)  You can also see that I use the area on top of the racks for extra storage.  I'd like to take the time to organize those better and use the boxes above, but I haven't gotten around to it recently so they're stacked instead.  Mostly hidden though, so not too bad.

I use baskets to hold my unmentionables and swimsuits.  It's hard to tell but below those I have two dark brown (leather) larger open boxes.  One box holds gym clothes for easy access.  The other hold pj tops and short bottoms.  In the shelf above those boxes I have shorts (sort-of) folded.  I will trade those out (hopefully) soon for winter pants.  The white box holds bags and I have larger bags (carry-on type) on the shelf next to it.  Suitcases are also in the closet btw, they are hiding under my husbands hanging pants.

Yes, my husband has clothes in the closet too.  He has the other half, and although it is smaller than mine he still doesn't fill it all up.  So I am using some of his space too. ;)  Note the stool behind my daughter.  Having somewhere to sit while getting dressed (or feeding your baby in the middle of the night) is helpful.  That open space above it would be great to hang a mirror but we haven't gotten around to that yet.

The boxes on the top shelf of this side hold my daughter's outgrown clothes (saving for baby).  They have labels with the sizes inside.

We had extra space behind the door since my husband didn't need the hanging space.  We put a dresser there instead.  This way we don't have to use any of the bedroom space for clothing furniture.  Those white boxes hold more of my things of course, but hey it looks more balanced this way. :)

So there you go, you saw my closet.  What do you think?  I've got more closets and organizing to show you another day if there is any interest. 

Saturday, October 13, 2012

Sugar Cookie Bars Recipe

Pinterest is a dangerous place.  First I found a quick fudge recipe and now this.  I saw photos of these cookies and had to have them.  Fortunately (or unfortunately, depending on how you look at it) this recipe was so easy I could make it while making dinner.  That's right, I made dinner and dessert at the same time.  I am a miracle worker I tell you. ;)  The cookies were easy since I didn't have to take the time to roll them out and make shapes.

I recommend that you make these cookies when you have people to share them with.  Under no circumstances should you make them when your significant other is out of town or on a diet.  Trust me.  Give some away.  Your hips and rear will thank me later.


Sugar Cookie Bars
Cookie Ingredients: 
 2-1/2 cups flour (I used wheat flour from our CSA)
1/2 tsp. baking powder
1/2 tsp. salt
1/2 cup butter, softened
1 cup granulated sugar
1 egg
1-1/2 Tbsp. sour cream
1 tsp. vanilla extract

Directions:
1. Preheat oven to 375 degrees and grease a 9x13 inch baking dish.  I used a glass dish and greased it with a little coconut oil.
2. In a medium bowl combine flour, baking powder and salt.  Set aside.
3. In a large bowl (I used my kitchenaid mixer) cream together butter and sugar until light and fluffy, about 3 minutes.  Add egg and combine well.  Add the sour cream and vanilla and mix until completely blended.
4. Slowly add the flour mixture and stir until well combined.
5. Gently press the cookie dough into the baking dish and spread out with hands.  Try hard not to eat the dough first.  Ha!
6. Bake 17-20 minutes, until edges become lightly golden.  Set aside to cool completely.

Frosting Ingredients: 
1/2 cup butter, softened
4 cups powdered sugar
1/4 cup half and half
1 tsp. vanilla
Pinch of salt

Directions: 
1. In a medium bowl, cream together butter, powdered sugar, and half and half until light and fluffy. Stir in vanilla and salt, combine well.
2. Frost your (completely) cooled cookie bars. Cut into squares and serve.

I found that the cookies were even better the 2nd day.  I will warn you again that they are difficult to stay away from.  I may have had 4 (or 5) last night.

Friday, October 12, 2012

Fisher Price Friday - Chatter Telephone


It's another classic today on Fisher Price Friday.  The Chatter Telephone #747.  Didn't we all have one of these?  It was made from 1962-1990 although variations of the phone continue to be made all the way to today but with different model numbers (2251, 2063 & 2035 & finally 72251).  My version was most likely made between 1967-1985.  It has a wood base, plastic wheels and a plastic top.  The very first phones had a wood base and wood wheels. The last ones to be made were all plastic.

There have been some changes over the years but the basic design is the same.  It has a yellow pull chord and the wheels make a "chatter" sound when they move.  The wheels could be either blue or black, wood or plastic.


The eyes also move up and down when the phone is pulled.  The phone has a big open mouthed smile drawn.  The smile didn't change until the 1992 version.

The rotary dial makes a ringing sound when you pull it, just like the real ones.  Now of course our kids today have no idea about rotary phones, but they still like to move the dial around. :)  

The red phone headset is connected to the phone by a black and white fabric chord.  Later 747 versions had a blue fabric chord.  

One way to tell your phone's age is by the lithographs on the side.  After 1986 the phones no longer had "f" and "p" (as shown) but instead "Fisher Price".  The 747 also has colored stars on the base, newer versions switched to colored confetti.

I bought our Chatter Phone on eBay for my baby's 1st Birthday.  Her sister tried to show her how to use it.

Since we only have cordless phones around here she wasn't sure what to make of the phone.  She loves pushing or pulling it all over the house and can often be seen "talking" to someone on it.  Love this toy!


Get your own Fisher Price Classic Chatter Telephone for around $14.99 on Amazon.  It's a reproduction of the 747 and looks almost exactly the same but with a yellow phone chord and black pull chord. 

We have the tiny Fisher Price Ornament version of the phone too, more on that during my next Christmas Ornament installment. :)