HomeVintage Fisher PriceMy Etsy ShopCategoriesAbout

Saturday, September 29, 2012

7 Minute Dark Chocolate Fudge Recipe (yes 7 minutes)!

The other night I was looking around Pinterest and I saw this recipe from about.com.  It said 7 minute fudge and I thought hey, I have 7 minutes.  Pinterest is such a dangerous place when you're having sweet cravings.  This recipe is my new favorite and I think will be on a regular rotation around here.


The fudge is rich, sweet and has a great texture.  I will no longer be a sucker to those fudge sellers at the open markets and fairs. :)  You must try this recipe, I'm not kidding!

Seven Minute Dark Chocolate Fudge
Ingredients
1 (12-ounce) package semisweet chocolate chips
1 (14-ounce) can sweetened condensed milk
1 tablespoon butter
1 tablespoon cream (some skipped this but I never say no to heavy cream)
*1/2 cup milk chocolate chips, if desired (I didn't, I prefer the darker chocolate taste)

Directions
1. Put chocolate chips and condensed milk in a microwave safe bowl.  Microwave on medium power for 2-3 minutes, stirring after 2 minutes.  Continue microwaving, stirring at 1 minute intervals until chips are melted and the mixture is smooth and thick.  Make sure not to over cook, you don't want burnt chocolate!  You could also melt the mixture on the stove, just keep the temperature low and watch it closely.
2. Stir in butter and cream until mixed.  Then pour into a greased 8" square pan and cool.  I used coconut oil to grease my pan.  I recommend keeping the fudge in the refrigerator.
3. If you are more adventurous you could add nuts, marshmallows, chopped dried fruit, peanut butter chips or other flavored chips after the cooking time is done.


Try it, you'll thank me later.  Well, unless you're on a diet then you might be mad at me.  Sorry.

Friday, September 28, 2012

Fisher Price Friday - Play Family Farm

Today on Fisher Price Friday I'd like to revisit the Little People Farm.  My very first Fisher Price Friday I shared the Little People Farm #2555 from 1990.  It was the chunky people version of the classic Play Family Farm.  Today I'd like to show you an older (but still not original) version of the farm, the Play Family Farm #915.  The farm was made from 1968-1985 and went through many many small changes and piece variations.  It is tricky to figure out which pieces went with which version, really I think it's best to pick the farm/pieces you like best and go with it!

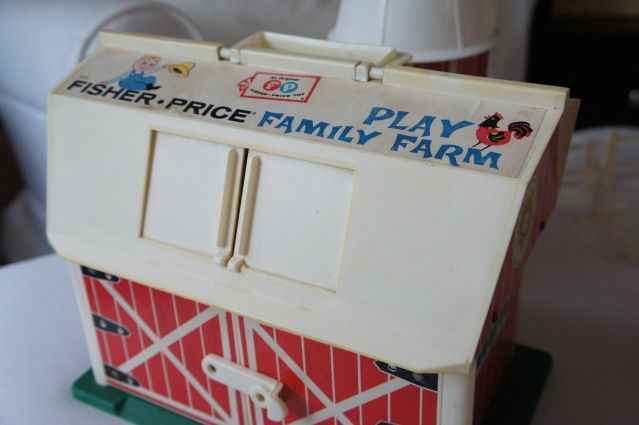
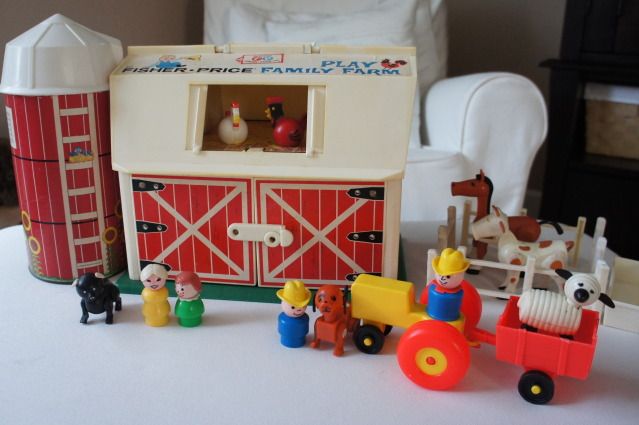
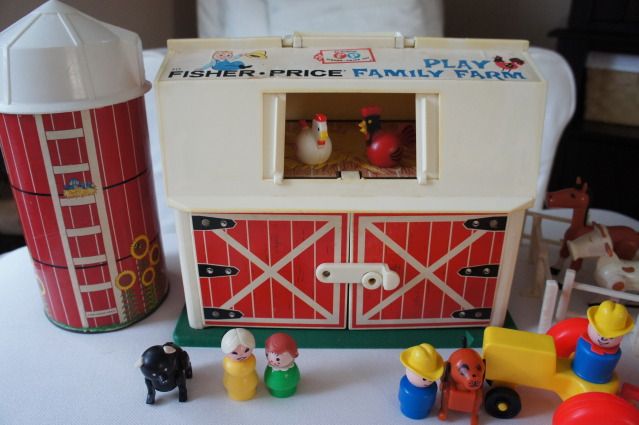
I believe that my version is from 1979 because of the plastic base.  It has a green plastic base rather than masonite (which was on the farm from 1968-1978).  The roof is white plastic with a Fisher-Price logo and stickers.  There are lithographs inside and outside the barn.  The set came with a silo (not the one pictured though), animals, a farm family, tractor and cart and fence pieces.  The barn can be carried by the plastic handle on the roof.

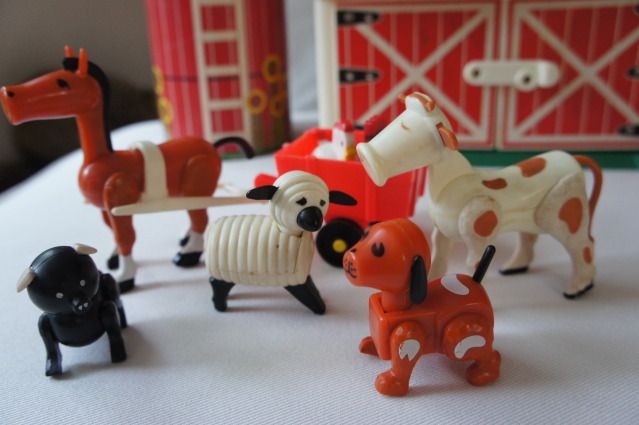
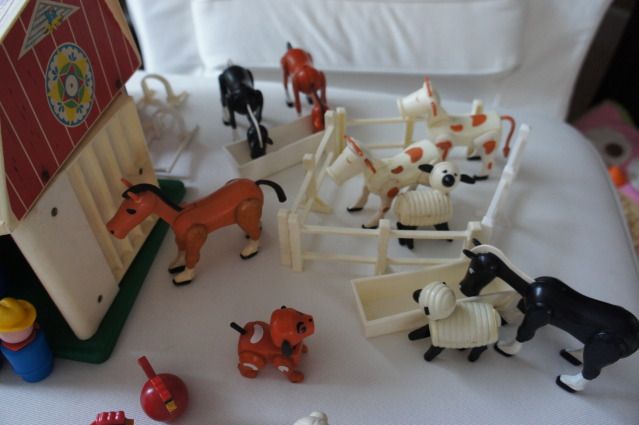
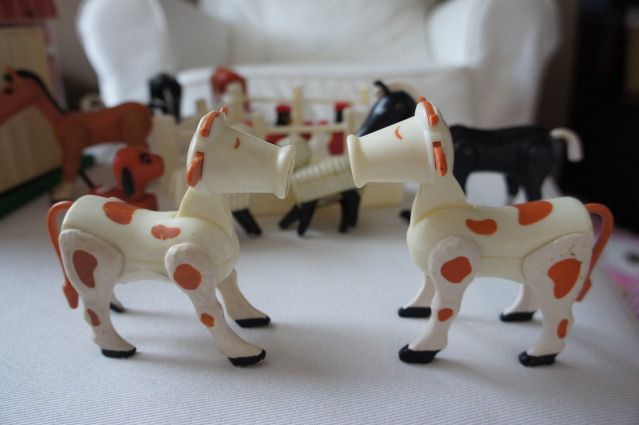
There are many variations to farm animals that came with each set over the years.  The 1979 version came with a black pig (bottom left), white sheep, brown dog, white & brown cow, white chicken, red hen and a brown horse.  I believe that these are the same animals pictured (except the white sheep, she's older).  On the original FP boxes the animals were named: Rusty Rooster, Henrietta Hen, Horace the Horse, Wooly Lamb, Spot the Dog, Pudgy Pig and Bossie the Cow.

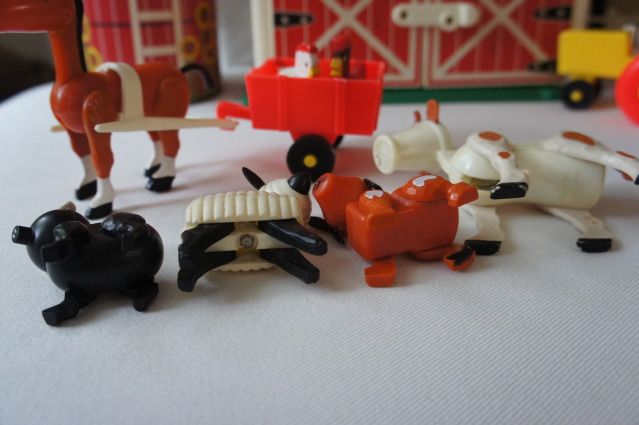
None of these newer animals should have metal hex screws in their bellies (as seen in the older sheep).  They were all plastic and say "Made in Hong Kong" on their bellies.  

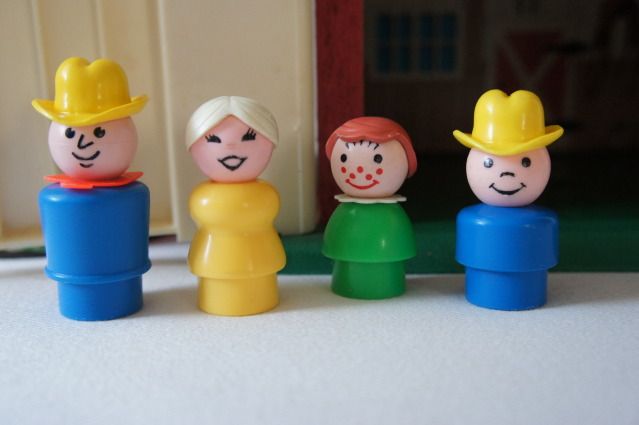
The 1979 family included a farmer, farmer's wife, brown haired girl and yellow farm boy.  They were named: Farmer and Mrs. Brown and their kids Cathy and Clem.  The sets had some variations to the farmer's family over the years as well.  Until 1974 Cathy could be green or blue with either red/yellow ponytail hair.  The Farmer had different colored hats and scarves.  Clem could be red with a yellow hat, blue with a red hat, or blue with a yellow hat.  Mrs. Brown's only changes were from wood to plastic.  Her white bun and yellow body stayed consistent over the years.

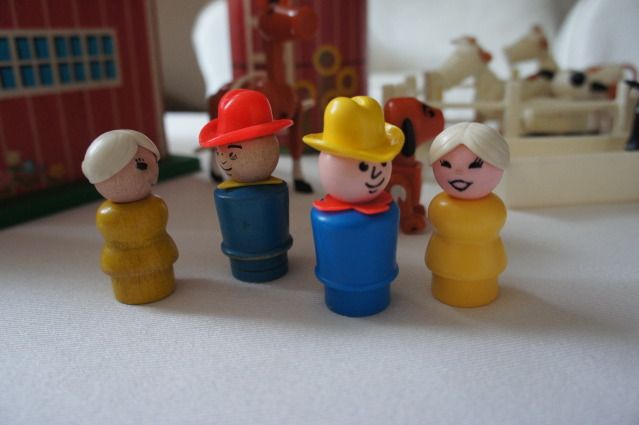
The earlier farms had wooden people.  Here are the older and newer Farmer and Mrs. Brown side-by-side.

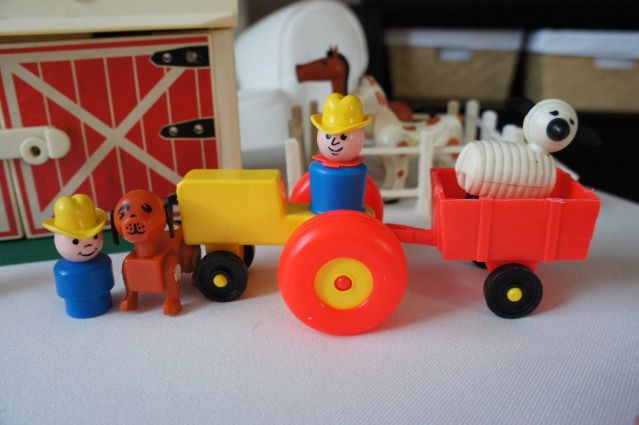
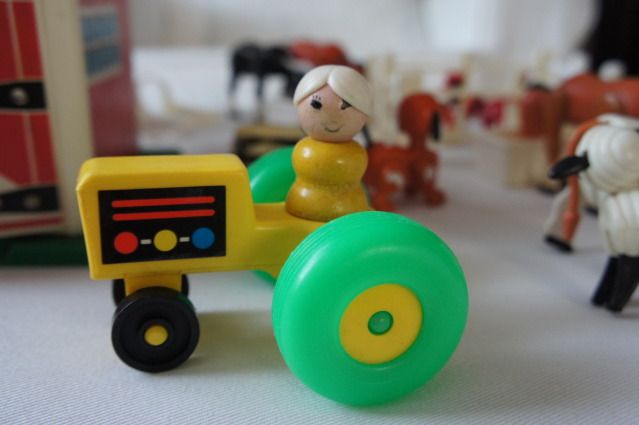
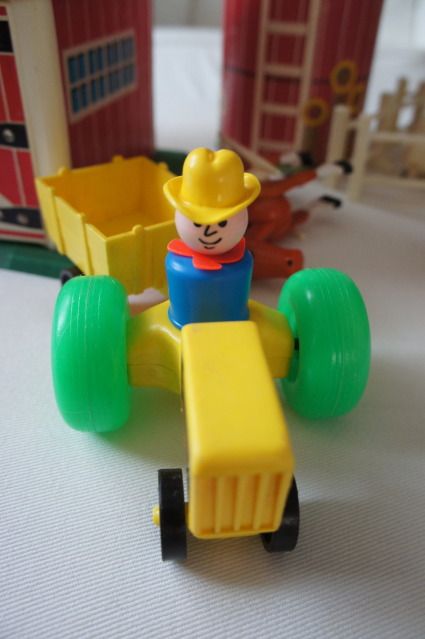
This tractor/cart combo is for the 1979 version.  Tractors could also be yellow w/green wheels or red with yellow wheels.  The carts could be red, yellow or green.  The carts connect with either the tractor or via a harness to the horse.  The tractor should have a lithograph of a "engine" on the front as seen in the photo below of a yellow/green tractor.


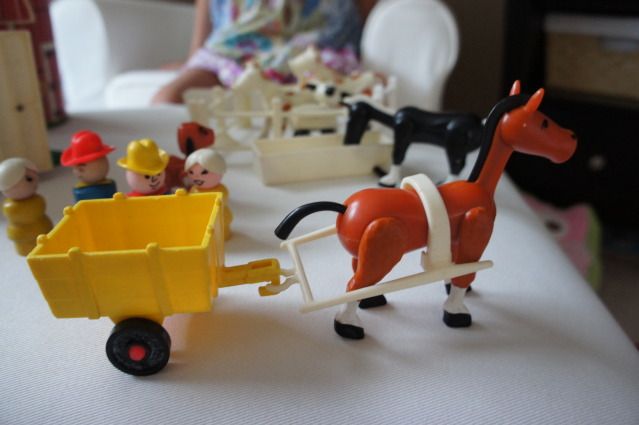
The horse wearing the harness.  

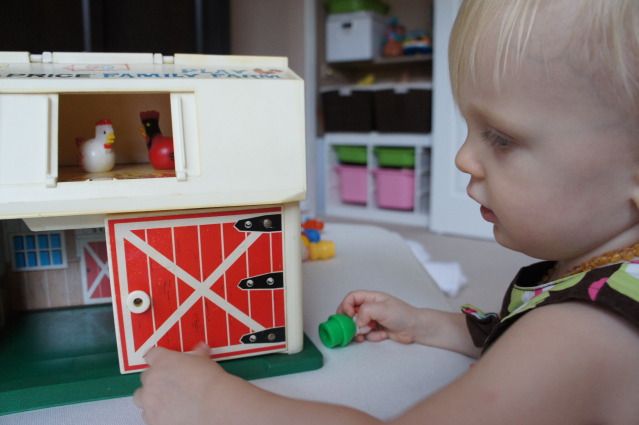
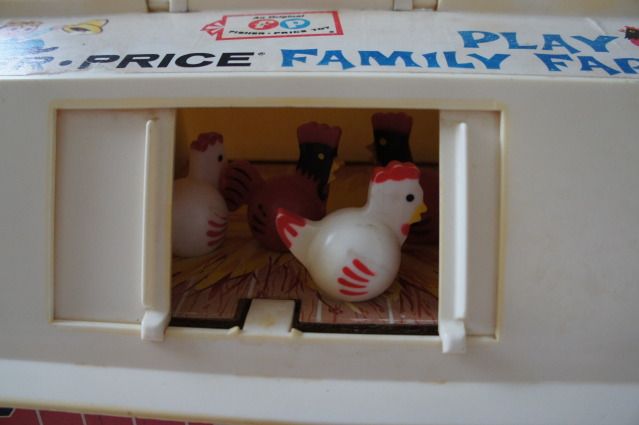
The barn door on the left makes a "mooing" sound when you open and shut it.  One of the best features of this classic toy!  The doors of the barn keep closed with a plastic latch.

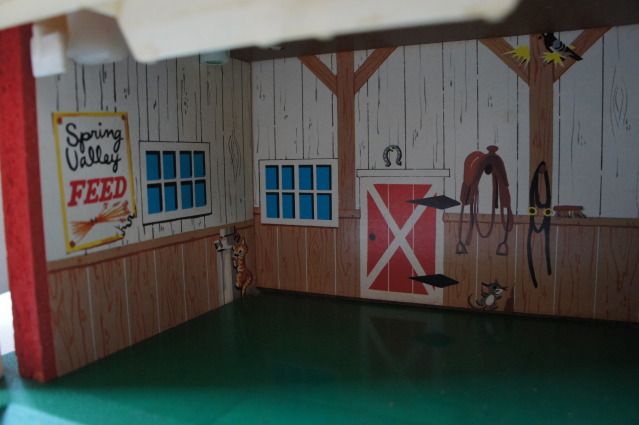
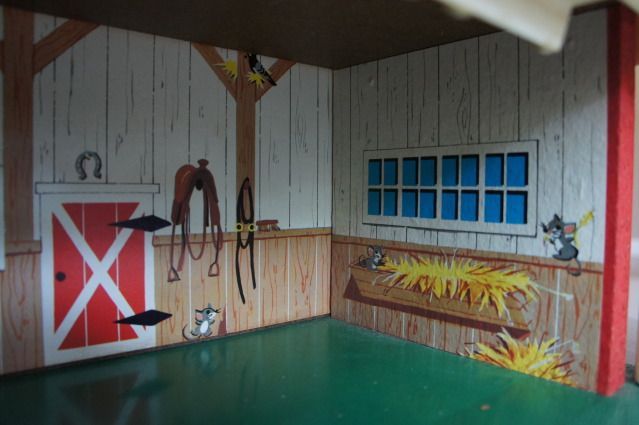
Inside the barn there are lithographs on the walls of (surprise) a barn interior. Ha!  The interior includes a Spring Valley Feed sign, 3 bays of windows, a back door, milk container, a saddle and other horse tack.

The animals in the barn include a few friendly mice, a barn swallow and a barn cat.  There is also a hay trough.

The hayloft has a lithograph of hay on a wood floor.  The white doors open and shut.  You can fit quite a few animals in that loft!

The right side of the barn has lithographs of the windows (correspond with the inside ones), flowers and a lovely decal.

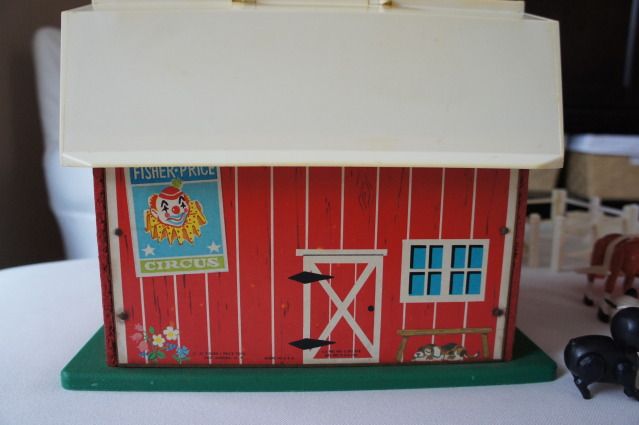
The back of the barn has a lithograph of a Circus sign, small windows, a sleepy dog under a bench, a back door and some more flowers.

The left side of the barn has a small window, flower in a pot, another decal and a small bird's nest in a hayloft air "vent".

We have a few other animals in our set, enough to make a full barnyard.  The white plastic fence pieces (4) are the old style with a "knife-whittled" finish.  Newer fence pieces are smoother and have a whiter finish (if you look closely the fence piece on the right is a newer one).


Until next time, have some fun on the farm!

Wednesday, September 26, 2012

Wordless Wednesday - Episencial Sunscreen

Can you ever have enough sunscreen? :)

My daughter is applying our favorite (kid) sunscreen, Episencial Sunny Sunscreen 35.  She's got about $2 worth on her face right there.  Ha!

Tuesday, September 25, 2012

Traveling with gDiaper (cloth) Review

During our recent road-trip to Zion National Park I brought along a new cloth diaper to try out, the gDiaper.  The gDiaper setup is a cloth cover with a snap in plastic liner.  In this liner you stuff either a cloth insert or disposable (and sort-of flushable) liners.  I received 2 gPant covers with liners and a whole pack of disposable liners from a friend.  I thought a road trip would be the perfect time to give them a whirl.  Normally I (reluctantly) switch to disposable diapers during trips, since laundry while travel can be a bit iffy at best.  So this time I did a pack of disposables and the gDiaper cover w/disposable liners.

So what did I think?
icon

The cover: super cute, flexible and looked comfortable for my baby girl (she wore a medium at 17 lbs).  I did have a bit of a learning curve as I put it on backwards at first, whoops.  It resembles my other covers but the velcro goes in the back instead of the front.  It still worked though!  It dries quick and is breathable.  The covers come in a variety of colors and they are also sized (sm, med or large).


Baby-Girl rocking the orange gDiaper cover on backwards.

The inserts: They are huge!  To be honest they reminded me a bit of those pads you use PP.  Ha!  That said they were absorbent and worked well for all-night wetting.  I can't imagine flushing them though!  I've read that you need to break them up well before flushing and I'm not interested in that much contact with a used diaper. :)  I love that they are biodegradable and are made without so many of the harsh chemicals present in regular diapers.

The snap in liner: Great!  Easy to snap in and out.  Easy to clean and hand wash.

Overall I think the gDiaper is a great travel system.  Unless...your child gets the runs.  Which mine did.  For almost the ENTIRE trip.  Then this system is not-so-great.  Let's just say you'd need a lot of covers to make it work, even with easy hand washing.  Since I only had two I was very grateful for that pack of disposable diapers I'd also brought.  In fact, about 1/2 the way thru the trip I gave up on the gDiapers and ended up buying more disposables.  Sigh.

Bottom Line: I highly recommend gDiaper as a part of your usual diaper stash (and travel stash), but make sure you have some other options for the times your baby has the runs. :)

Where to get them: All over the internet and in some stores like BRU.  I recommend buying from ecomom, they have great customer service.  
ecomom 20% Off Sitewide

Monday, September 24, 2012

First Days with a Italian Greyhound Puppy - what you need.

Almost eight years ago we brought home the sweetest little Italian Greyhound puppy.  He was only 10 weeks old and weighed 3 lbs.  We bought from an out-of-state breeder so he arrived at the airport (after a very short flight) and we were so excited.  This was our first "baby" and we struggled through potty and puppy training together.


Our "puppy" turned 8 on September 15th and he still continues to be our fur-baby even though we've added 2 human babies to the family as well. :)  We recently decided to add another fur-baby to the family and brought another little Italian Greyhound home, a girl puppy.  This time we could pick her up with a car instead of an airplane.

I still have vivid memories of potty training so this time around we were more proactive in the products we bought and plans we made to help her transition into our house.  Here are a few of the products we bought in preparation for her arrival.  Some may be more specific to her breed, but overall they're just puppy care items.


What we bought to prepare for the puppy:

Midwest Black Exercise Pen 24" icon$45.99
We made the puppy her own space and put it in a central area of our home since we want her to be socialized.  This pen was the perfect size as it's not too big and not too small.  Also easy enough to reach over or walk over but high enough to make it difficult for the little humans.  It also folds down easily and was pretty inexpensive.  We put it on top of a folded over tarp (from Home Depot).  Inside the pen we made a little puppy land for her complete with a sleeping area, potty area, toys and feeding dishes.  She has her own safe place that the kids can talk to her (and see her) but can't get at her.  This is where she goes at night to sleep so that she has access to a place to rest and go to the bathroom too.

Petmate Kennel Cab Medium Dog Crate icon $32.99
A dog crate is important for a variety of reasons.  First your puppy needs a safe place to sleep or be alone.  Second, you'll eventually need them to be in the crate when you leave the house.  Lastly you may need a crate for traveling and transporting.  You don't want one too big (so they don't have space to use it as a potty) or too small.  It's tricky with a puppy since they'll be growing.  We are considering this one a temporary crate, as she'll outgrow it eventually.  We also have a soft-sided travel crate from our first dog that we're using for vet visits.  If we take her on a overnight trip (crazy thought) we'll use this plastic one.  For now we keep it inside the exercise pen with the door propped open.


Dog Bed icon $14+
The prices for dog beds have a huge range, from about $14 all the way into the hundreds.  We picked a simple brown on brown option that is washable.  Being washable is a must since we're talking about a puppy after-all.  We got one that is quite plush so that she could snuggle down in it.  Also small enough to be portable since it travels around our house.


Dog Toys icon$2+
Have you noticed that dog toys and baby toys look a lot alike?  Since I have both in my house right now I can vouch for their similarities.  Perhaps teething is the same whether you're furry or not. :)  We bought the puppy a soft "toy" that can also be used as a snuggle when she sleeps.  This time around we've avoided too many noisy toys as they can get a little out of control with the squeakers!  We did pick up a teething bone and also had a few toys left over from when our older IG was a puppy (if you can believe it!).  Let's just say Italian Greyhounds are far less destructive than other breeds. :)


Potty Patch icon $39.99
Last time around we trained our dog using papers.  It was messy and smelly.  This time around we used a Potty Patch since that is what the puppy had at her breeder's home.  The Potty Patch is a fabulous invention for inside dogs or puppies.  It has (removable) artificial turf on top, a layer underneath and then a tray.  They say it helps dogs to transfer from inside potty to real grass more easily.  It seems to be working well for our puppy as she has had almost NO accidents.  She just uses the Patch.  Worth every penny for that alone!  Now it does take some cleaning (try a bleach solution for cleaning then rinse-rinse-rinse) but it's not that bad.  We keep the Potty Patch in her exercise pen so that she can get to it during the day.


other items: dog dishes (we got small ones), dog food, chew toys and a blanket or towel to sleep on in the crate.

What we bought and didn't need (ended up returning):

1. Puppy Patch Spray - It's a spray that attracts dogs to go potty in a certain area.  We bought it thinking we'd need to spray the Potty Patch so she'd know to go there.  However, she figured it out without needing a spray.  Since it had cost us $15 (yes $15!!) we brought it back to the store.  Perhaps if you had a dog that didn't take to a Potty Patch, Pad or papers it would be worth a shot.


2. Doggie Diapers icon- Don't laugh but we bought diapers.  Not just any diapers but reusable cloth puppy diapers.  Ha!  Hey, if we use cloth on our kids why not our dog? ;)  Fortunately I didn't need to figure out how to wash puppy diapers b/c they weren't needed.  She was able to use the Puppy Patch in her pen so no accident prevention was necessary.  If you do need doggie diapers they come in a variety of sizes (disposable too).  Whatever it takes to train your puppy and keep your sanity I say!

We've had puppy-girl for 2 weeks now and she's doing great!  The girls love her and she's getting lots of quality one-on-one time with my husband during the day (and some nights).  Look here and here for more puppy photos.  I'll have more soon I'm sure.

Stay tuned for an entry on making your own dog clothes (hey, these little skinny ones need clothing, even here in hot-hot-arizona!).

Saturday, September 22, 2012

Have you maintained your Keurig lately?

I have had my oh-so-loved and very used Keurig B70 Platinum Brewing System for 5 glorious months now.  Let me tell you that receiving it (best birthday present ever!!) was very timely as I upped my caffeine intake quite a bit since baby #2 who happens to be sleep-challenged.  Our recent addition of an adorable but sleep-challenged puppy didn't exactly help.

This week I had a friend visit who reminded me that my Keurig needs maintenance.  I had forgotten and decided to show my Keurig some love by descaling it.  Descaling helps remove mineral build up which keeps it from breaking prematurely.  If you live in an area with very hard water like I do then it is especially important.

Does this look familiar?  It's the welcome packet that came with your glorious coffee machine.  It has instructions for the descaling process.  Fortunately it was easy, although a tiny bit time consuming to make my machine as good as new.

Descaling only requires time, water and a whole-lot-of white vinegar (I recommend the gigantic and cheap Costco bottle).  Make sure to start this process after your morning cup(s) of coffee as it will take 4 hours to complete.

Descaling Instructions
Step 1: Pour 72 oz of white vinegar into the water reservoir.
Step 2: Place a 10 oz mug on the drip tray plate.
Step 3: Lift and lower the brewer handle (don't add a k-cup pack unless you enjoy vinegar flavored coffee, ha!)
Step 4: Select a 8oz cup side and press BREW.  Empty the contents into the sink.  Repeat until "add water" shows on the indicator.
Let the Brewer stand with power on for 4 hours.  Then empty the reservoir, fill with cold water and repeat steps 2 through 4 (I did this twice just to be sure we were vinegar-free).  

Keurig recommends descaling every 3-6 months.  I recommend making a note of the date you descale on your directions.  If you don't have your booklet anymore put it on a sticky note and place it on the back or side of your machine.  You could also put reminders to descale on your calender.

Now go love your Keurig so that it can keep loving you!

Friday, September 21, 2012

Fisher Price Friday - Play Family Village


It's another big set so hold onto your seats, lots of photos are coming!  Today on Fisher Price Friday it's the Play Family Village #997.  The village was made from 1973-1977 and is the largest play set with the most accessories (not counting the school with all the different alphabet letters).  The set is large and somewhat unwieldy, can be difficult to carry around and keep together.  However, it is very fun with a variety of shops, stores and places for kids to make-believe.

The set has two halves that are held together by a removable bridge connector.  The bridge connector has a traffic signal that changes color when you turn the knob.  There is a white handle on top for carrying it around.

There are 32 accessories in the set including 9 people (almost all pictured correctly above, the boy should be smiling).  The vehicles include a fire truck, blue police car (not pictured), white and blue mail truck (as pictured), green top/white bottom 2 seater car (shown in the 1st photo), white top/green base 2 seater car (side to side, not shown) and a green top/white base single seater car (not shown accurately in the first photo).  There are many vehicle variations by the way in color combinations and whether or not "Fisher Price" was stamped on the wheels.

The furniture includes a yellow fireman's "cot" (twin bed), yellow table with a green umbrella (not red as pictured), 4 yellow captain's chairs, 2 seat yellow couch, yellow coffee table, barber chair, dental chair and a yellow grill with separate legs.

Last but not least the set includes a phone booth (the blue mailbox does not belong with this set, there is already a mailbox molded into the set).  The telephone booth has a orange door that opens and shuts.  The back has a lithograph of a pay phone and phone book.

The red side of the set includes a Fire House, Post Office, Theatre, Dentist and rooftop restaurant.  There are mail slots in each business.  The firehouse door opens and closes and a crank on the roof makes a whirring sound.  The fire truck is the same Fire Truck #124.  


The street has a red mailbox and a green and white street light (on a spring).  The plastic base has molded in features like brick on the Fire House, stairs between the shops, lines on the doors and slats on the roof.

The boy should be smiling, but can you blame him since he's at the dentist?  The dentist office has a yellow "tile" floor and a lithograph of old school dental equipment.  There is a little picture of teeth on the top and a window on the opposite side of the room.  The dentist chair has a spitting sink on one side.

The blue post office door opens and shuts.  The floor is a lithograph of linoleum with Post Office stickers (including a loading zone for the PO truck).  The lithograph has a smiling postal worker, bag of mail, mailboxes, clock and a few other mail items.  

The set comes with 6 pieces of mail matching up with the different stores.  Each shop is printed in black with a different colored number (unlike the Main Street #2500 mail which is the same color printing and number).  The letters fit in the mail slots at each business, in the back of the mail truck and in the mailbox on the side of the set (once again, this blue mailbox does not go with the set).  Due to it's size, mail was easily lost and is one of the more valuable parts of the set.  I see them on eBay selling individually for around $6-9 each.

The Theatre has built-in seats for 4, a yellow stage and a lithograph of a movie screen and curtains.  The movie is a scene from the Village of course.  It shows everyone at work (fireman putting out a fire).  The yellow door opens and shuts and there is a ticket booth.

The roof has "The Village Restaurant".  The entrance to the Restaurant is shown on a lithograph downstairs.  It also has a poster and some bushes (seen in the 2nd photo above).  There are stairs on the front that lead up to the restaurant and the Dentist Office.

The yellow half of the set includes a Police Station, Barber Shop, Apartment and Garage.  There is also a rooftop deck.  In front of the Police Station there is a red fire hydrant.

In between the Barber Shop and the Garage there is a gas pump.  Colorful lithographs show the different shops and their "address" numbers, which correspond with the mail.

The upstairs has an apartment that is reached by white stairs.  Each side of the apartment has a deck.  The apartment has a lithograph on the floor of a rug with a cat on a pillow.  There is a window seat that has a lithograph of a record player, television set, some books and a cabinet.

The Garage has an open door and a crank that lifts a red car lift up and down.

Next to the Garage is the Barber Shop.  It has a lithograph of an old time barber including jars of cotton and lollipops.  Also various jars and boxes of cosmetics.  A boys haircut will set you back 25 cents.  The white barber chair looks just like the dentist chair but without the spitting sink on the side.

Next to the barber is the Police Station.  It has bars on the outside window and a jail cell that opens and closes (with room for a prisoner inside).  The lithograph on the wall shows wanted photos, a brown dog, old fashioned telephone, window with bars and a police officer's uniform.

One side of the set (shown closed) has posters advertising the Main Street Steak House and a Village Market Grocer.

It's a happy little village.  I don't have one for sale in my Etsy shop right now, but keep checking back as I may have one next month.

If you like towns check out the Main Street #2500, a newer (and smaller) version of the #997 Village.