


First up we needed to remove all the wrappers. This was the most time consuming part, so my 5 year old and I spent lots of quality time together peeling them off!
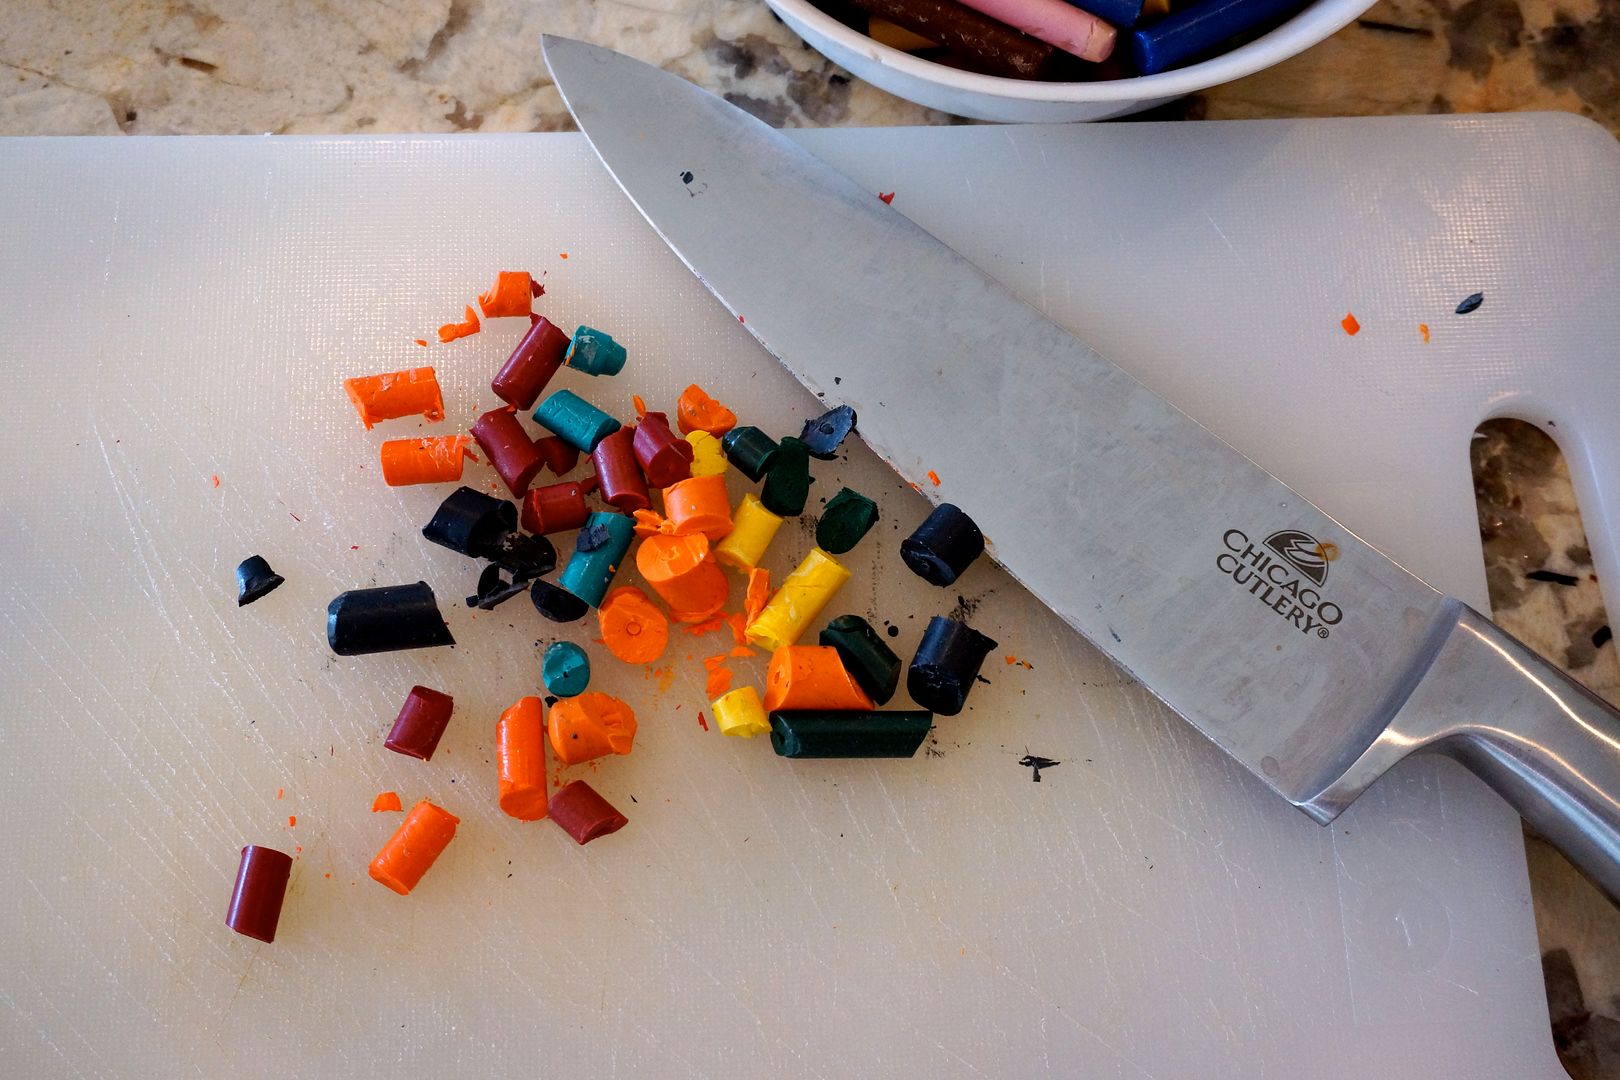
Next up I cut the longer pieces of crayon into smaller chunks. I found that the big knife worked best and kept the pieces from shooting all over my kitchen.
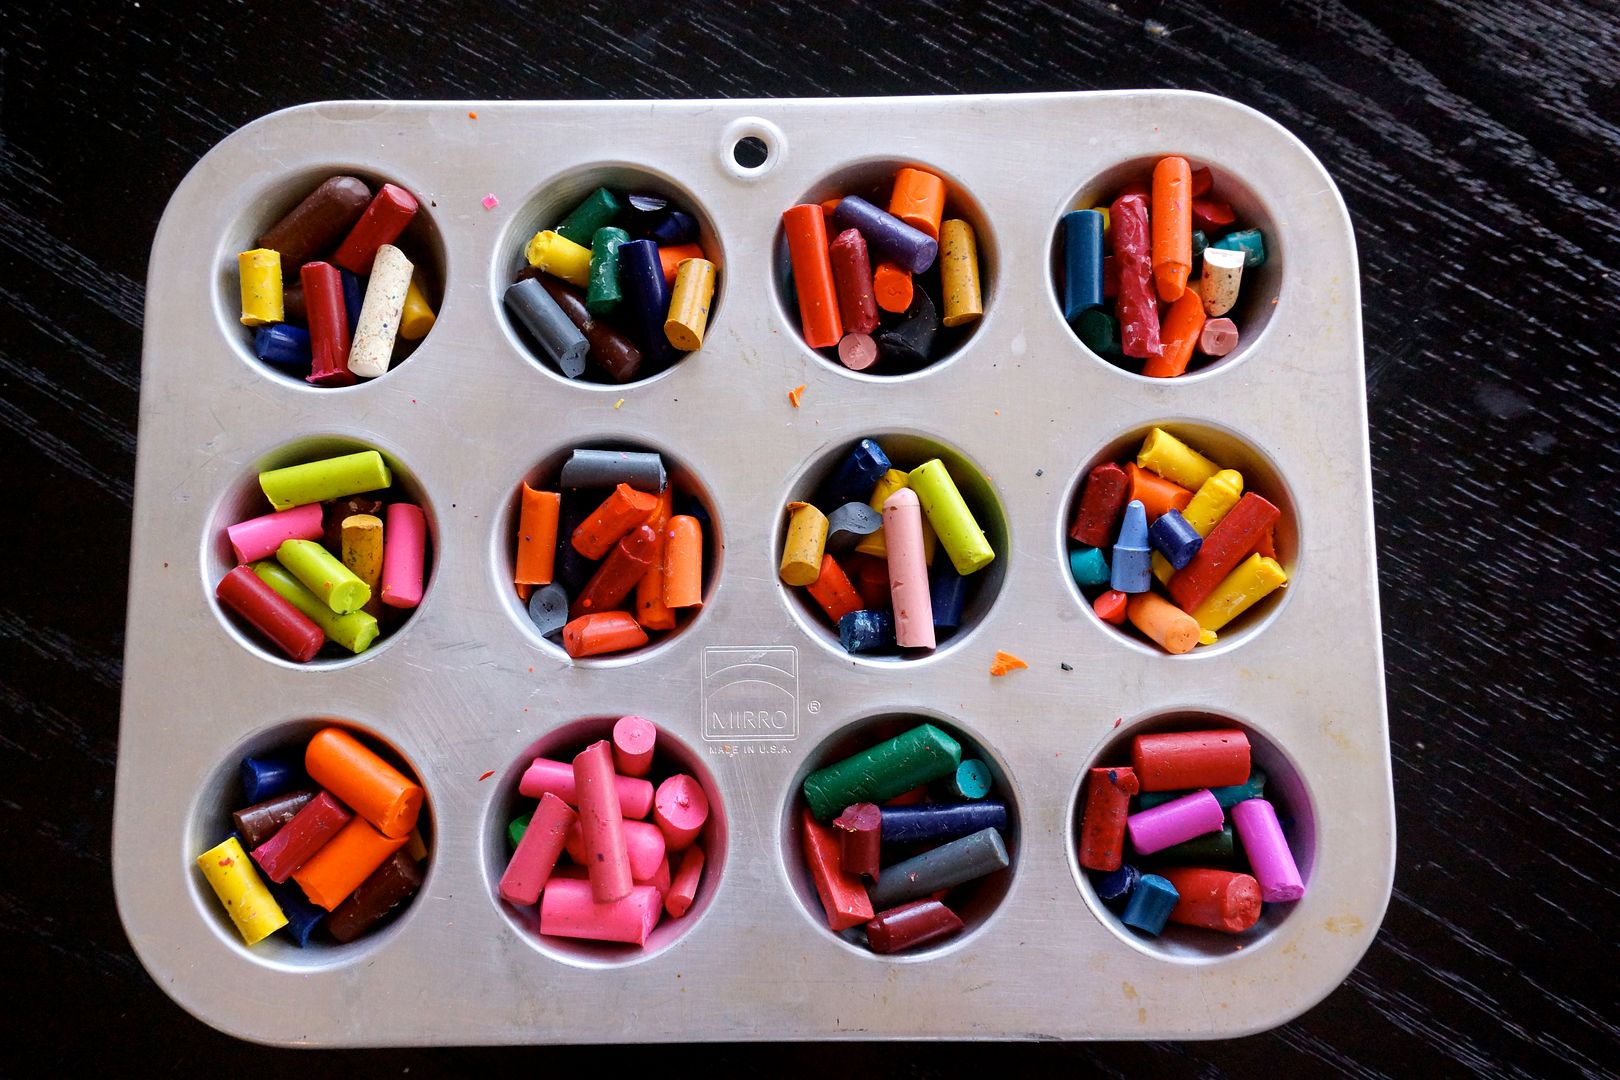
My daughter helped with the next step which was to arrange the pieces in a muffin tin. I used a mini muffin tin but you could use any size that you want. If you have a shaped muffin tin that would work great too, especially if you have a theme in mind. For example if you had a heart muffin tin you could make valentine favors! I didn't do anything to the tin ahead (no greasing) nor did I place any liners in, just the crayons.
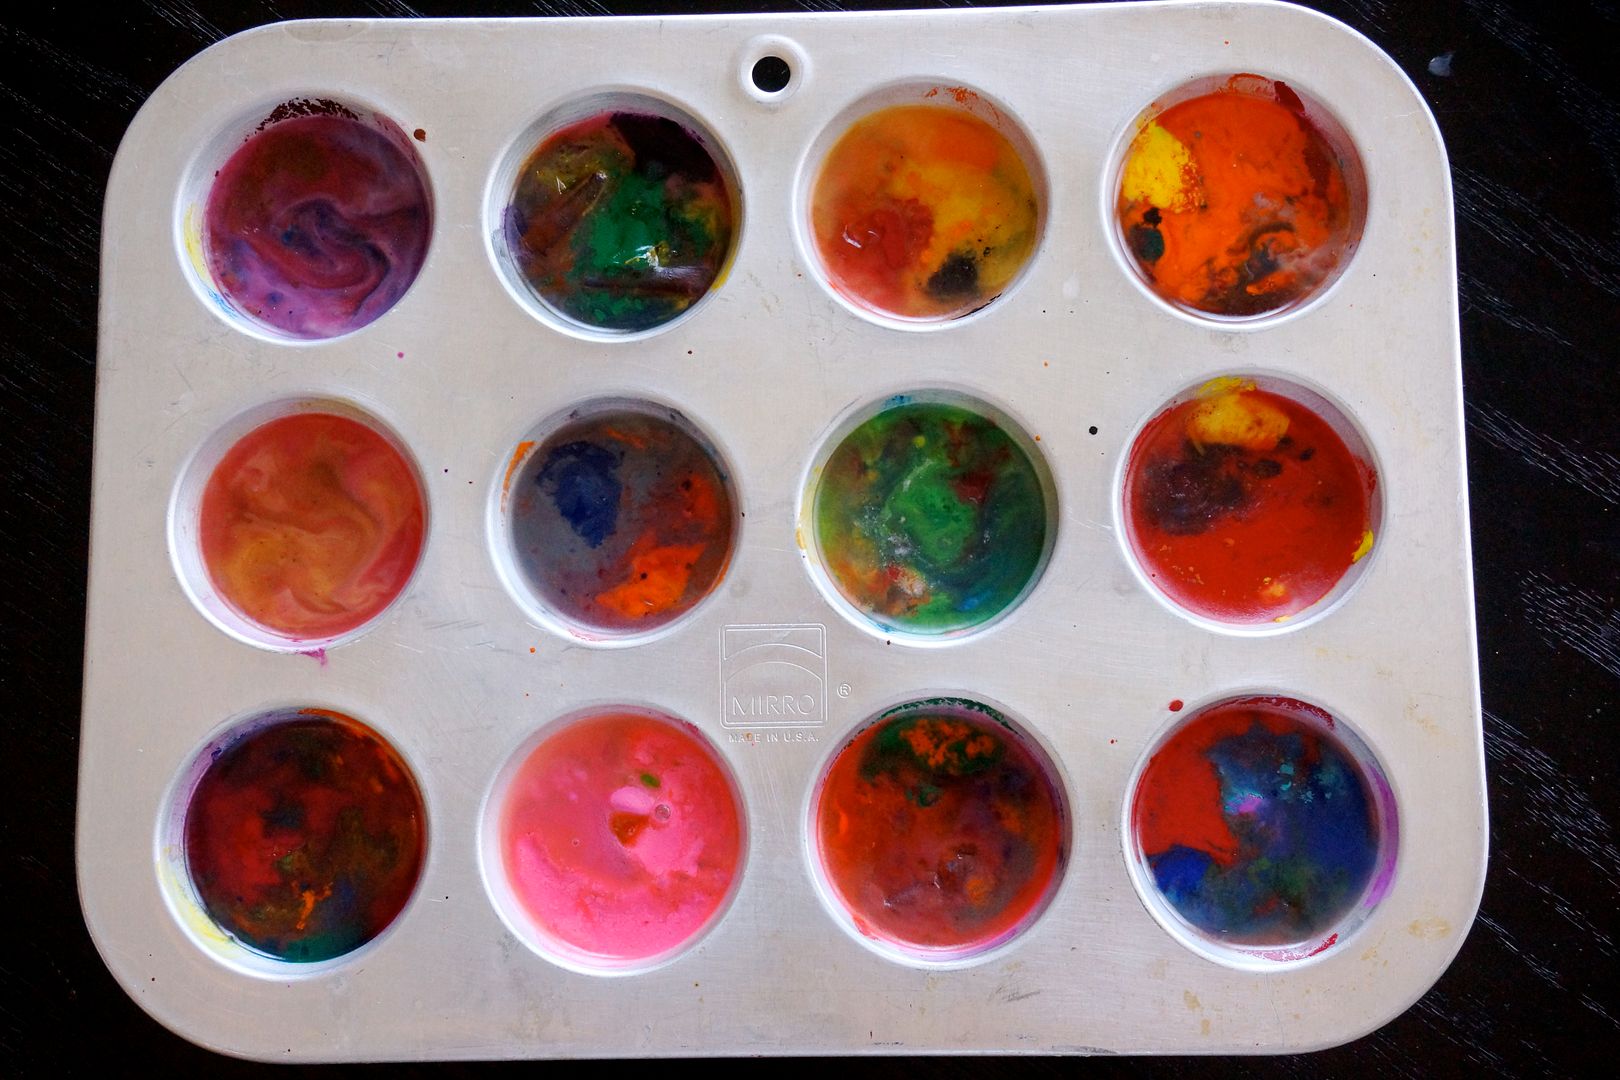
You preheat the oven to 230 and "bake" the crayons for about 15 minutes. Keep an eye on them towards the end to make sure that the big pieces are all melted. Remove the pan from the oven and it should look something like this. Set on the counter to cool and once the pan is cool/warmish to the touch put it in the refrigerator for about 10 minutes.
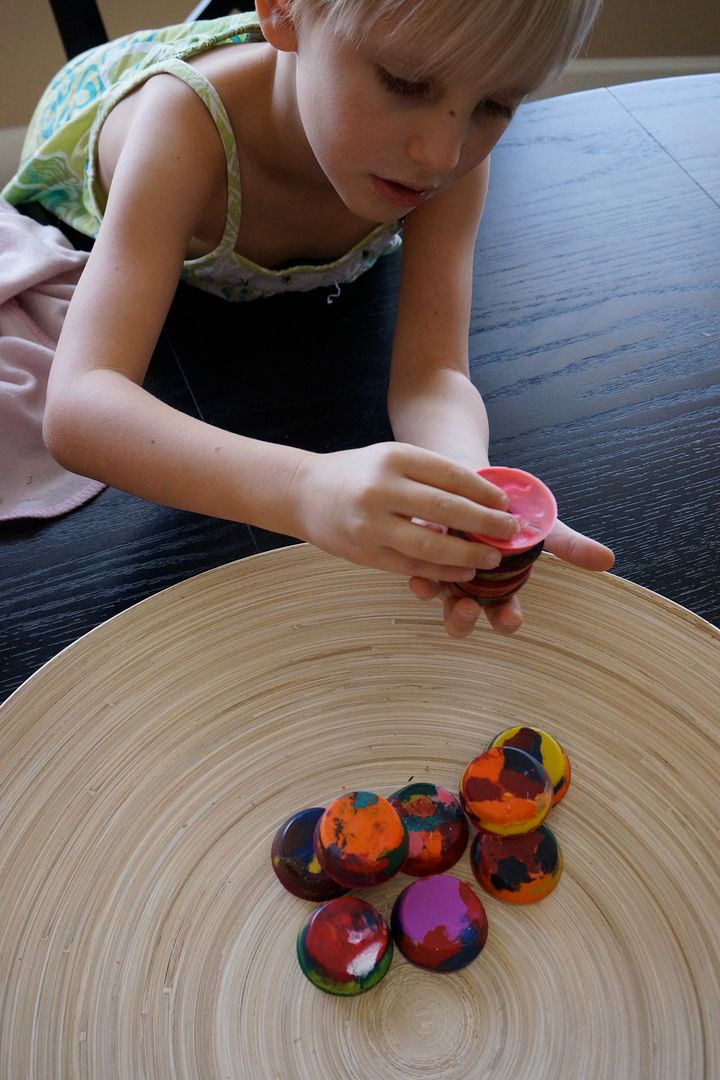
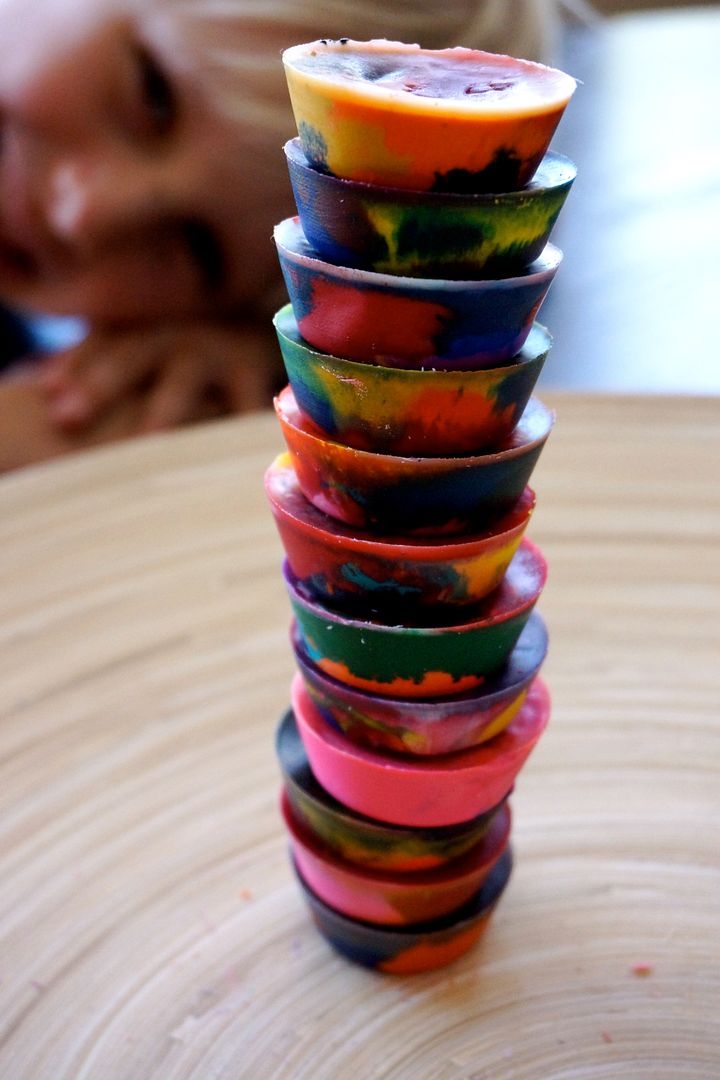
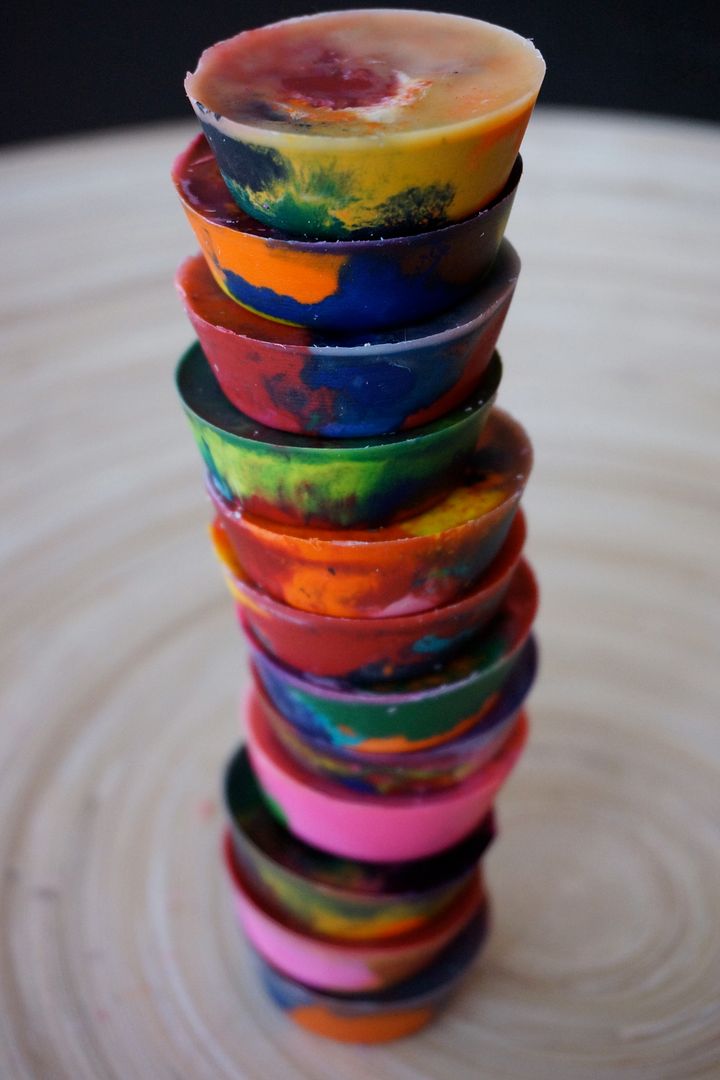
The crayons should then easily pop out of the tin and there you go, beautiful works of art!
My 5 year old loves them but I think they make a perfect crayon for a toddler as they're easy to grasp and hard to break. I plan on giving them as gifts in sets of 6.
FYI: My 1 sandwich bag of crayons produced 22 mini muffin tin crayons.
No comments:
Post a Comment