HomeVintage Fisher PriceMy Etsy ShopCategoriesAbout

Tuesday, July 31, 2012

Peruvian-style corn, pepper and chicken soup recipe

My oldest has a summer cold.  Despite the 106+ temps outside we've had chicken soup the last two days to help her. :)  Last night I tried a recipe that I found in the most recent (Aug) Sunset Magazine.  I have never seen corn served in soup like this, but I thought I'd give it a shot.  We happened to have a few ears of local organic corn from our CSA, so it was perfect timing.  We are not a super-spicy family so we left out the aji amarillo paste, and we only had green and yellow peppers (not red).  Oh, and I may have used boneless breasts b/c I'm a bit lazy.  But besides that it was the same. ;)


Peruvian-style Corn, Pepper and Chicken Soup
Ingredients
8 cups chicken broth
2 lbs skin-on chicken breasts
3 ears corn, husked and cut crosswise into 1-inch rounds
1 1/2 red bell peppers, cut into 3/4 inch chunks
About 1 Tbsp aji amariollo paste
Juice of 1/2 a lemon
1/3 cup roughly chopped flat-leaf parsley

Directions
1. Put broth and chicken into a large pot.  Bring to a boil, then reduce to a gentle simmer and cook until chicken is cooked through, about 20 minutes.  Transfer to a plate and allow to cool. Skim broth.

2. Add corn and bell peppers to broth and bring to a boil, then reduce to a simmer and cook until peppers and corn are just tender, about 5 minutes.  Meanwhile, remove skin and bones from chicken and shred meat into pieces.

3. Return shredded chicken to pot and stir in chile paste to taste and lemon juice.  Ladle into bowls and sprinkle with parsley.

So a little advice.  The corn is best eaten with a fork.   My husband asked if next time we could use regular cut corn instead.  We probably could but those little rounds make quite the statement don't they?

Monday, July 30, 2012

Luscious Lemon Ice Cream Recipe


It's time for another ice-cream recipe!  My 4 year old requested lemon (can I say that I love that she wanted lemon, that's my girl!) so I put a few recipes together to make this one.  It has that perfect combo of sweet and tart.  I will admit however that I have yet to try an ice-cream recipe that I didn't love.  How can you not like heavy cream, sugar and fresh ingredients?  Yum!


This ice-cream was especially fabulous with a few fresh raspberries on top.  Doesn't that look amazing?  Is it time for dessert yet?

Luscious Lemon Ice Cream
1 tablespoon freshly grated lemon zest
1/2 cup fresh lemon juice
1 cup sugar
2 large eggs (I had jumbo)
1 cup heavy cream
1 cup milk
1/2 teaspoon vanilla

Instructions
In a saucepan whisk together the zest, lemon juice, sugar and the eggs.  Combine the heavy cream and milk (I used a 2 cup measuring cup) and whisk 1 cup of it and the vanilla into the saucepan.  Cook the mixture over moderately high heat, whisking constantly until it just comes to a simmer. Strain the custard through a fine sieve into a bowl, pressing hard on the zest and chill it covered with plastic wrap until it is cold.  Whisk in the remaining 1 cup milk/heavy cream mixture and freeze the mixture in an ice-cream maker according to the manufacturer's instructions.  Makes about 1 quart.

ETA: Remember when I told you about adding interesting toppings to ice-cream?  One of them was Meringue cookies from Trader Joe's.  I had the BEST idea tonight.  Crumble up a couple of those cookies on the luscious lemon ice-cream and you have lemon meringue!  I am eating a bite of this combo at this exact second. :)

Sunday, July 29, 2012

Baby Birthday Pink Balloon Shoot

My baby girl's first birthday party was a week ago.  After looking at photos on Pinterest for a few weeks (months) I had a perfect one that I wanted to copy.  It was a little girl sitting in a bright colored chair with a bunch of pink balloons floating above her.  So the morning of her party I went and bought 18 pink balloons, not an easy feat especially with our 100+ degree weather!

I thought I could use the balloons as party decorations and then also do a quick photo shoot.  Well, the best laid plans and all that but the balloons were only used that afternoon as decorations.  However, the next morning as the kids were playing with the fallen balloons on the ground I had the best idea and our pink-balloon shoot was born.

I love it!  You could also do the photos with a white backdrop on the ground and behind, but our kitchen floor worked just fine.

Just a bit of her birthday banner showing in the background.  I'll have another entry on her decorations and oh-so-yummy food menu coming soon.


These sweet little bloomers were a birthday gift the day before from a good friend.  Perfect for our photo shoot.


You can also add other props like a party blower.  A fun way to get some spontaneity in your photos.


My husband is the resident photographer and he developed the photos by applying a split tone in Adobe Lightroom 4.1.  We thought the cross processing turned out well so we decided to make a LR 4.1 preset and make it available for others to try out.   You can download the file here if have some sweet baby photos to develop, or would like to give the pinkish split toning a try:  


Let me know what you think!  A bit of warning: this preset was set to adjust all the settings for a photo including exposure, curves, everything.  If you only want to apply certain parts of the preset then you'll want to be sure to save your settings on the photo in question first, and then re-apply your settings that differ from the preset and save your own.   This one is not designed to be stacked or layered but that is easily changed by just re-saving it with the appropriate options unchecked.  We couldn't find a preset that captured the mood of the day the same way this did which is why it was created from scratch.   

There are so many Lightroom presets available on the Internet it is hard to know where to even begin.  We've waded through over 7000 presets, both paid and free.  There are some really great ones out there!   Here is our contribution at 7001 for your enjoyment.  

Even our dog got in the action.  He was all tuckered out after so much fun!

Friday, July 27, 2012

Fisher Price Fridays - Nursery School


Happy Fisher Price Friday!  Today I'd love to show you the Play Family Nursery School #929.  The Nursery School was made between 1978-1979 and then again for one year in 1989.  It is a sweet little day-care or pre-school set.  A few of the nursery set #761 pieces would be a perfect addition if you wanted it to be a day-care.


The Nursery School has four rooms, but no exterior walls.  It has a completely plastic base with lithographs on almost all surfaces.  It is similar to the very popular (and older) #909 Play Family Rooms, but with a school theme.  The base includes a kitchen, bathroom and two classrooms.  It came with 6 little people; 2 adults and 4 children.  I have only 3 of the little people from the set pictured.  It also had a small school bus, the same size as the yellow mini-bus #141 but with a much smaller lithograph of a school theme on the side instead of a camping theme.


There are three exclusive pieces to this set including the blue project table.  The table has a lithograph of arts and craft supplies.  The set included four yellow chairs.


The classroom has colorful and bright lithographs on the walls that include paintings, toys, a clock, a riding toy (do you see the #978 horse toy?) and other fun activities.  


The other two exclusive pieces for this set are this easel and teeter-totter.  The easel has a little lithograph of a child's painting.  The teeter-totter works either inside or on the playground and fits two little people.  


This classroom has sky-blue walls and pictures of a chalk board, bulletin board, coat closet, the alphabet and a very colorful fish mobile.  There is a doorway that connects the two classrooms in one "wall" and a front door entrance.


Unlike the #909 Play Family Rooms this set included a removable roof.  The roof is made of cardboard which unfortunately didn't make it very durable.  It is common for the top to have ripped off or have damage around the handle.  It has pictured roof tiles, a skylight, the Fisher Price logo and children playing on a slide.

The roof doubles as a playground when you turn it over.  It has pictures of a stone walkway, small fountain, sand box, flowers, grass and hopscotch squares.  

The set came with the merry-go-round and slide.  Both pieces were used in several other FPLP sets including the playground #2525, swimming pool #2526 and play family school #923.


The bathroom is very cute with blue "tile" floors, yellow "tile" walls, a mirror, plant, soap dispenser, towel dispenser, smiling trash can and a cabinet with just a peek of what's inside.  The toilet has a lid that goes up and down and a sink.  Both the toilet and the sink are the same ones found in the Camper #994 and the #909 Rooms.


The kitchen is another detailed room complete with brown tile floors, lime-green walls, another clock, towels, a cupboard and even a picture of the dish running away with the spoon. :)  The set comes with a double sink and a stove with 4 burners on top.


The exterior has a open doorway and a window.  The entrance includes a stone walkway and grass/flowers.  There is a small notch cut out of the plastic where the walkway/entrance starts.  The front has shrubs, a mailbox complete with letters and a bird and a sign with a little lamb on it.  


This side also has "landscaping" that includes shrubs, grass and flowers.  Notice the brickwork on the wall and the other side of the lamb sign.  I do love the details, don't you?

Thursday, July 26, 2012

Salmon Cod and Corn Chowder Recipe


I found this recipe on a whim the other night after realizing that I only had 1 salmon steak and 1 cod steak left in the freezer.  I adapted a salmon chowder recipe by adding cod, but really any firm fish would work great.  I was surprised at how completely easy this dish was.  And I found myself irrationally proud to have made said fish chowder. ;)  Of course, that may have been due to the added challenge of having a baby crying around my feet (I had to spoon feed her while cooking) and a 4 year old asking non-stop questions and needed lots of re-direction.  Really most dinners are this way, it feels like an olympic event!


So if you have cod, halibut or salmon around your house I highly recommend this easy summer chowder.  It is easy to make with or without an ankle biter. :)

Salmon Cod and Corn Chowder
Ingredients
3 tablespoons butter
1 large onion, chopped
3 medium potatoes (1 pound), cut into 1/2-inch cubes
3 tablespoons all-purpose flour
4 cups chicken broth
2 cups fresh or frozen corn kernels
1 cup heavy cream
1/4 teaspoon paprika
Sea salt, to taste
Freshly ground pepper, to taste
1 1/2 lbs of fish fillets (salmon, halibut or cod) skinned and cut into 2-inch pieces
Fresh lemon juice, to taste
1 to 2 tablespoons chopped fresh dill
1 to 2 tablespoons chopped fresh parsley

Directions
1. Melt butter in a large saucepan over medium heat. Add onion and potato, and cook, stirring often, 5 minutes. Add flour, and cook, stirring constantly, 1 minute. Add broth, and bring to a boil; reduce heat, and simmer, covered, 5 minutes or just until potato is tender.
2. Stir in corn and next 4 ingredients; return to a simmer, stirring occasionally. Add salmon, and simmer 4 minutes or just until fish flakes. Add lemon juice and fresh herbs; season with additional sea salt and pepper, if desired.

Tuesday, July 24, 2012

Cilantro-Lime Rice with Black Beans recipe.

I found this recipe on Pinterest and gave it a try last night.  I often say how yummy or delicious recipes are but I really mean it this time.  Let me put it this way, I had three servings last night and finished off the rest of the leftovers for lunch today.  So yes, I liked it!

It is from a blog called Favorite Family Recipes.  I made only a couple changes (per usual) including using a rice cooker instead of a pot on the stove (much easier for me).  They call this recipe Our Version of Cafe Rio's Cilantro-Lime Rice and Black Beans but we don't have a Cafe Rio around here so I'm not sure how similar it is.  I just know that I like it.

Cilantro-Lime Rice 
Ingredients 
1 c. uncooked rice (long-grain, white rice)
1 tsp. butter 2 cloves garlic, minced
1 tsp. freshly squeezed lime juice
2 cups chicken broth
1 cup water
1 Tbsp. freshly squeezed lime juice
3 tablespoons fresh chopped cilantro

Instructions 
In a rice-cooker combine rice, butter, garlic, 1 tsp. lime, chicken broth and water. Cook as usual. In a small bowl combine lime juice and cilantro (you can add 2 tsp sugar if you want but I didn't). Pour over hot cooked rice and mix in as you fluff the rice.

Black Beans 
Ingredients 
2 Tbsp. olive oil
2 cloves garlic, minced
1 tsp. ground cumin
1 can black beans, rinsed and drained
1 1/3 c. tomato juice (or use tomato sauce using a 1:1 water to sauce ratio as a substitute)
1/2 tsp. salt
2 Tbsp. fresh chopped cilantro

Instructions 
In a nonstick skillet, cook garlic and cumin in olive oil over medium heat until you can smell it. Add beans, tomato juice, and salt. Continually stir until heated through. Just before serving stir in the cilantro.


Sunday, July 22, 2012

Eggplant Salad with Chickpeas and Feta


I've had this recipe pinned for awhile and after getting 5 small eggplants in last week's CSA I decided now was the time to try it out. I was afraid that using chickpeas and eggplant together might be too much of a culinary stretch for my family but surprisingly it was a hit with the majority of us. The 4 year old wasn't too fond of the dish, but her baby sister loved the chickpeas so 3/4 isn't too bad. :)

I found the recipe on martha stewart.com.  You'll need to start by roasting the eggplant, here is a simple recipe also from martha.

Roasted Eggplant 
3 medium eggplants (about 1 lb each, I only had 1.5 lbs total but the recipe still worked fine for me)
3 Tbsp olive oil
1 Tbsp coarse salt
1/2 tsp ground pepper

Directions 
1. Preheat oven to 475. Cut eggplants into 1 inch cubes, divide between 2 baking sheets.
2. Dividing evenly, drizzle with olive oil, coarse salt and ground pepper. Toss to coat. Spread in a single layer, roast, turning once until golden and tender about 25-35 minutes. Cool on sheets. 

Now you're ready for the salad recipe.

Eggplant Salad with Chickpeas and Feta 
Ingredients 
3 Tbsp fresh lemon juice (about 1 lemon)
2 Tbsp olive oil
1/2 tsp coarse salt
1/4 tsp ground pepper
Roasted eggplant
1 can (15.5 oz) chickpeas, drained and rinses
1 cup (4 oz) crumbled feta cheese
1/4 cup chopped herb of your choice (I used basil, martha recommended mint)

Directions 
1. In a large bowl whisk together lemon juice, oil, salt and ground pepper.
2. Add roasted eggplant, chickpeas, feta and chopped herb. Toss to combine.

Saturday, July 21, 2012

We love Little Golden Books.


You may have noticed that I have a thing for vintage and collectibles.  I have one foot firmly in the modern world, but I keep a few toes back in the past.  My family eats off of vintage (and new) fiesta ware and Taylor Smith Boutonniere.  I cook and bake using my grandmother's old pyrex bowls.  My kids occasionally wear clothes I wore back in the 70's.  They play with vintage Fisher Price toys.  And you will probably not be surprised to hear that we read them old Golden Books.  I have new books too but there is just something about a old Eloise Wilkins illustrated story that makes me smile.  The stories seem sweeter, the children less obnoxious, the values more simple.  We have over 100 little golden books, many of them old or reproductions of old books.

Some of my favorite books growing up were actually my mother's LGB, or ones my grandmother had at her house.  Books like Nurse Nancy, We Like Kindergarten and Little Mommy.


I have all of those for my daughters as well as quite a few more.  I find them at Thrift Stores, Etsy and garage sales.  My mother is always on the look out as well, in fact we both keep lists of what books I have in our purses so we don't duplicate.


I recently decided that we had too many (including some accidental duplicates) so I listed a few in my Etsy shop.  I'm not an expert (yet) on LGB.  I have learned that first editions have the letter A on the back page and the letters go from there for subsequent editions (but I'm not sure at what letter it stops).  I know that the backs look different on the older ones, but beyond that I'm still learning.


Do you love Golden books too?  Which titles are your favorites?

Friday, July 20, 2012

Fisher Price Fridays - Ferry Boat


Welcome to Fisher Price Friday.  I have a unique Fisher Price Little People (FPLP) set to show you today.  Have you heard of the Play Family Ferry Boat #932?  You may not have because it was a very short lived set, only made for six months between 1979-1980.  They stopped making it because it wasn't very sea-worthy.  The colors on the lithographs ran when wet which led to many customer complaints.  This is also why it is difficult to find a Ferry that has intact and non-washed out lithographs.

My sister and I collaborated to purchase this ferry for my mother's birthday.  My parents live near the water and she has a soft spot for Ferry boats of all shapes and sizes.  It was fun to be able to surprise her with this rare set.  The set is almost complete but is missing one more life-preserver and a orange AA man with black stamped hair (similar to Gordon on Sesame Street but without a goatee).  

The boat has fold up and fold down red barricades to keep the cars from rolling out.  The back should also have a yellow fold out ramp to help the cars unload, but our boat doesn't have it.  I'm on the lookout for one. :)  The set came with two passenger cars.  A green topped/white bottomed two seat with raised fins and a white topped/green bottomed one seat.

The top deck includes a steering wheel that moves back and forth.  Also two holes on each side for figures to fit into (the captain is in one).  The lithograph is of flags and a brass bell.

The bottom of the front deck has a hole to attach a yellow pull cord.  When you pull (or push) the boat around it makes the familiar clicking sound like so many other FPLP toys.  You can also put little people on the yellow knobs seen on each side of the boat.  I'm not sure if that was their original purpose, but it works!

The top of the boat has a yellow push-down whistle.  Also spaces to hold two yellow life preservers as well as the blue dingy/life-boat.

The Ferry originally came with the life boat pictured.  It has a blue top and white bottom.  There is also a variation with a white top and blue bottom.  That version is the same boat that attaches to the Houseboat.

The lithographs on the left side include a seagull and a Fisher Price nautical themed sign and the right side has a pelican and the same Fisher Price logo.  The seagull is wearing a sailor hat the and pelican appears to be wearing a captain hat and holding binoculars.  Gotta love the little details. :)  

It's a unique set and was a hit with my girls when we visited.  My baby held onto the top and used it as a walking-push toy.  I'll be looking for the 3 missing pieces (one more preserver, the orange AA man and the ferry ramp) to complete her set.

If you like boats make sure to check out the Houseboat #985 and the Floating Marina #2582.

ETA: Here is another ferry boat with all three of the original people. 

Thursday, July 19, 2012

Diaper Liner Reviews

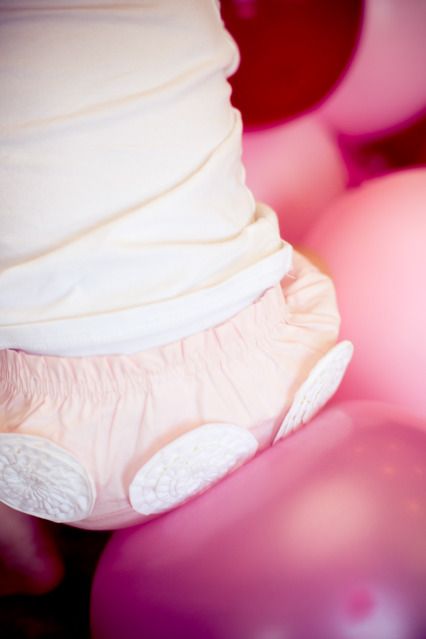
As you may know one of the "crunchy" things that I do is cloth diapering for my kids.  I've written about cloth diaper liners briefly here, but I thought I'd do a quick product review for you today.

I started using disposable diaper liners when my baby-girl began eating solid foods.  Once her poop switched from exclusively BF it was no longer washing-machine friendly (before that it really isn't a big deal).  In order to avoid the dreaded sprayer or swishing in the toilet (gasp) I use disposable and somewhat reusable biodegradable liners.  

Bumkins Flushable Diaper Liners:

These liners come in a box of 100.  They are biodegradable and flushable (but not recommended for septic tanks).  They cost about $9.95 a box and can be found many places online.

The Bumkins liner laying in a Best Bottom diaper with a medium insert.

Pros: Very soft.  The box makes them easy to access.  The liner is folded much like a kleenex, which makes it easy to put in the diaper.  This liner would also help protect a cloth diaper from non-safe diaper creams as it is thick.

Cons: Cannot be used more than once.  With other liners if the child only peed they can be washed (with the diapers) and reused at least 1-2 more times, but not these liners.  They become a ball of stretched out fluff that can't go back into a usable shape.  Another con is that they are made of viscose, and although it is biodegradable it is made using caustic chemicals that pollute, which isn't very earth friendly.

ImseVimse Bio Liners

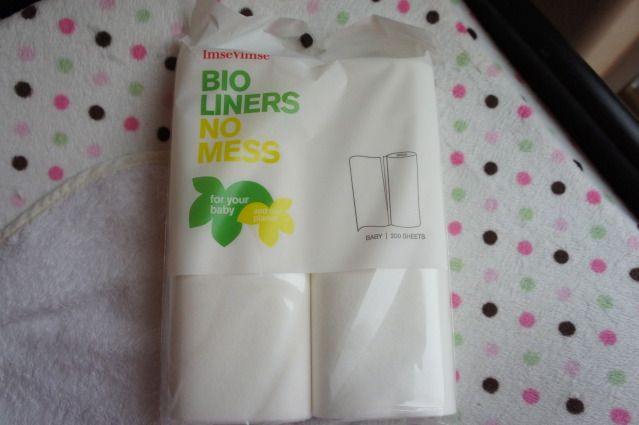
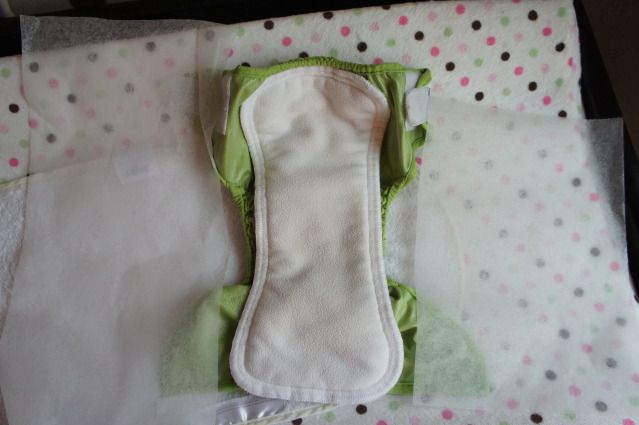
The ImseVimse brand is the one I've used the longest.  They come in a long roll and are sized either for baby or toddler.  They are also biodegradable and flushable and made out of all natural paper products (no bleach).  They cost about $14 for 200 baby liners or $9 for 100 toddler size.  They can also be found many places online like Amazon for $13.95.

On the left is the toddler size and on the right the baby size.  I would recommend the baby size until your child is in a size large diaper.

Pros: Can be used more than once.  These wash beautifully (get softer) and can be used at least 2 more times if only with a pee diaper.  They have two sizes, which is helpful as baby grows.  I know one mommy that buys the toddler size and cuts them down, but I'm too lazy for that. :)  Another big pro for me is that they are all natural and made out of rice paper.

Cons: They are a little rough and resemble more of a dryer sheet.  They are not appropriate to  use with unsafe diaper creams as they are too transparent.

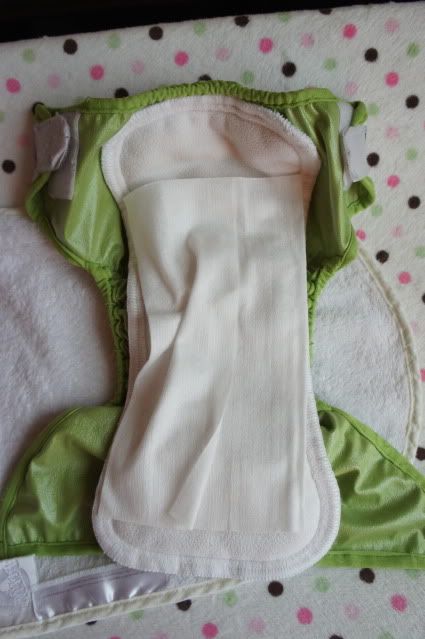
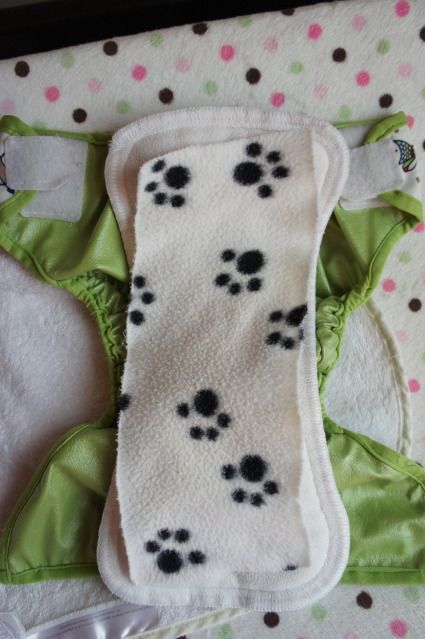
Make your own Fleece Liners

Before my first daughter was born I went to a local fabric store and bought a yard of micro fleece fabric.   I looked for the thinnest fleece I could find, as this is Arizona after all!  I then went home and cut it into rectangles that looked like they'd fit in my diapers.  It was all very imprecise but they work.  I laughed later at my fabric design choice, I'd selected a spotted paw print pattern that reminded me of our little dog.  Why my very-pregnant self decided this I have no idea b/c the pattern isn't exactly the best for a diaper if you get my drift.  The spots look like ah-hem something that belongs in the diaper.  Ha!

These liners are perfect for protecting cloth from unsafe diaper creams.  In fact I only use them these days if my daughter has a rash and needs cream.  They can also help with solids though, as it is easier to get off of the fleece then the diaper.  I used them more when my daughter was tiny as they kept BF poop from staining her cotton diapers (fleece doesn't stain).

Pros: Soft, can be used over and over (I'm still using the ones from my first daughter).  Cheap and you can select a pattern that you like.

Cons: Can't be tossed so you still have to deal with laundering them.

Bottom line, I prefer ImseVimse liners and will keep buying them.  As much as I loved how soft the Bumkins liners are and how convenient the box is I don't like that they are made with chemicals and can only be used once.  I'll also keep using my fleece liners when needed.

For more information on cloth diapering check out:

and make your own diaper pail deodorizer