HomeVintage Fisher PriceMy Etsy ShopCategoriesAbout

Friday, May 31, 2013

Fisher Price Friday - Airport Jet


Today on Fisher Price Friday I was all set to introduce the #183 Play Family Fun Jet set (1970-1980).  I'd picked up a jetliner recently and put together what I thought was the complete set.  Then I realized that I actually had the jet from the #996 Play Family Airport made from 1972-1976.

They look remarkably similar, the main differences being the wing colors.  The original fun jet had red wings with blue engines which were redesigned for the airport with turquoise wings and red engines.  The lithograph on the tail was also changed from saying Fun Jet to just Fisher Price as shown.


So instead of a tour of the Fun Jet you'll get a tour of the Airport jetliner instead.  Come on board! Inside the plane seats 4 little people and behind them is space for 2 pieces of luggage.


The plane is pulled by a yellow plastic cord attached to the front.  It makes a whirring sound (one wheel) when pulled.


The plane is flown by a wooden headed pilot.  His head moves back and forth when the plane moves.  

If you have the #183 Play Family Fun Jet these are the family and accessories that came with it.  They could be wood or plastic people and were always this combination until 1977-1980 when the little girl switched to a brown bob.  The luggage pieces were always these two as shown, and this was the first time that luggage was created for a Little People set.  The green hatbox later appeared in the #934 Western Town and the #996 Play Family Airport.  The yellow suitcase appeared in the #996 Play Family Airport and the #2581 Little People Express Train.  Both shapes of luggage were also produced in different colors for other sets (light blue hatbox and brown suitcase).

So there you go, a jet from one set and pieces from another.  

Thursday, May 30, 2013

Traveling with a Toddler - Airplane Activity Kits


Today I'd like to talk a bit about traveling with a toddler, especially on a plane.  Our family recently flew together (5 year old and almost 22 month old) for 6 hrs on a plane.  The "baby" was still a lap child which complicated things a bit more.  I was very apprehensive about these flights and decided to prepare ahead by bringing as many activities and things to keep the youngest's interest as possible! 


Here are the activity kits that I created.  I put anything with little pieces in (easy) zip-lock baggies for storage and organization.  Pretty much everything here was found at home, the dollar store or the dollar section at Target.


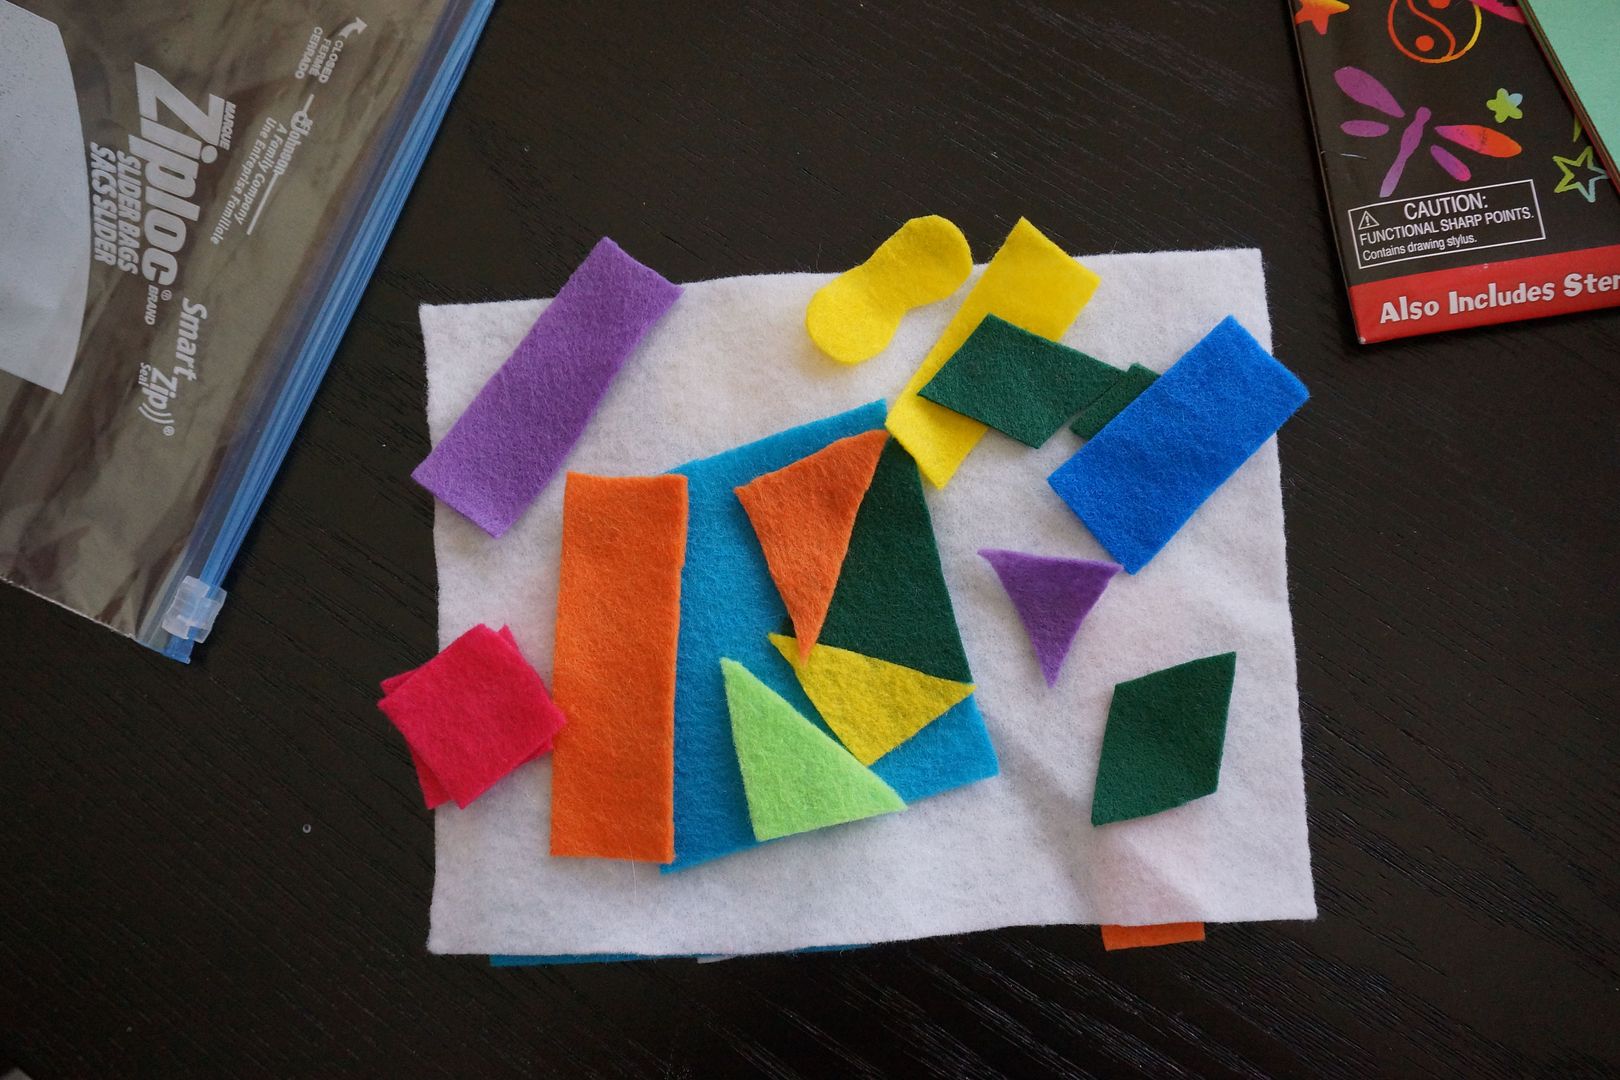
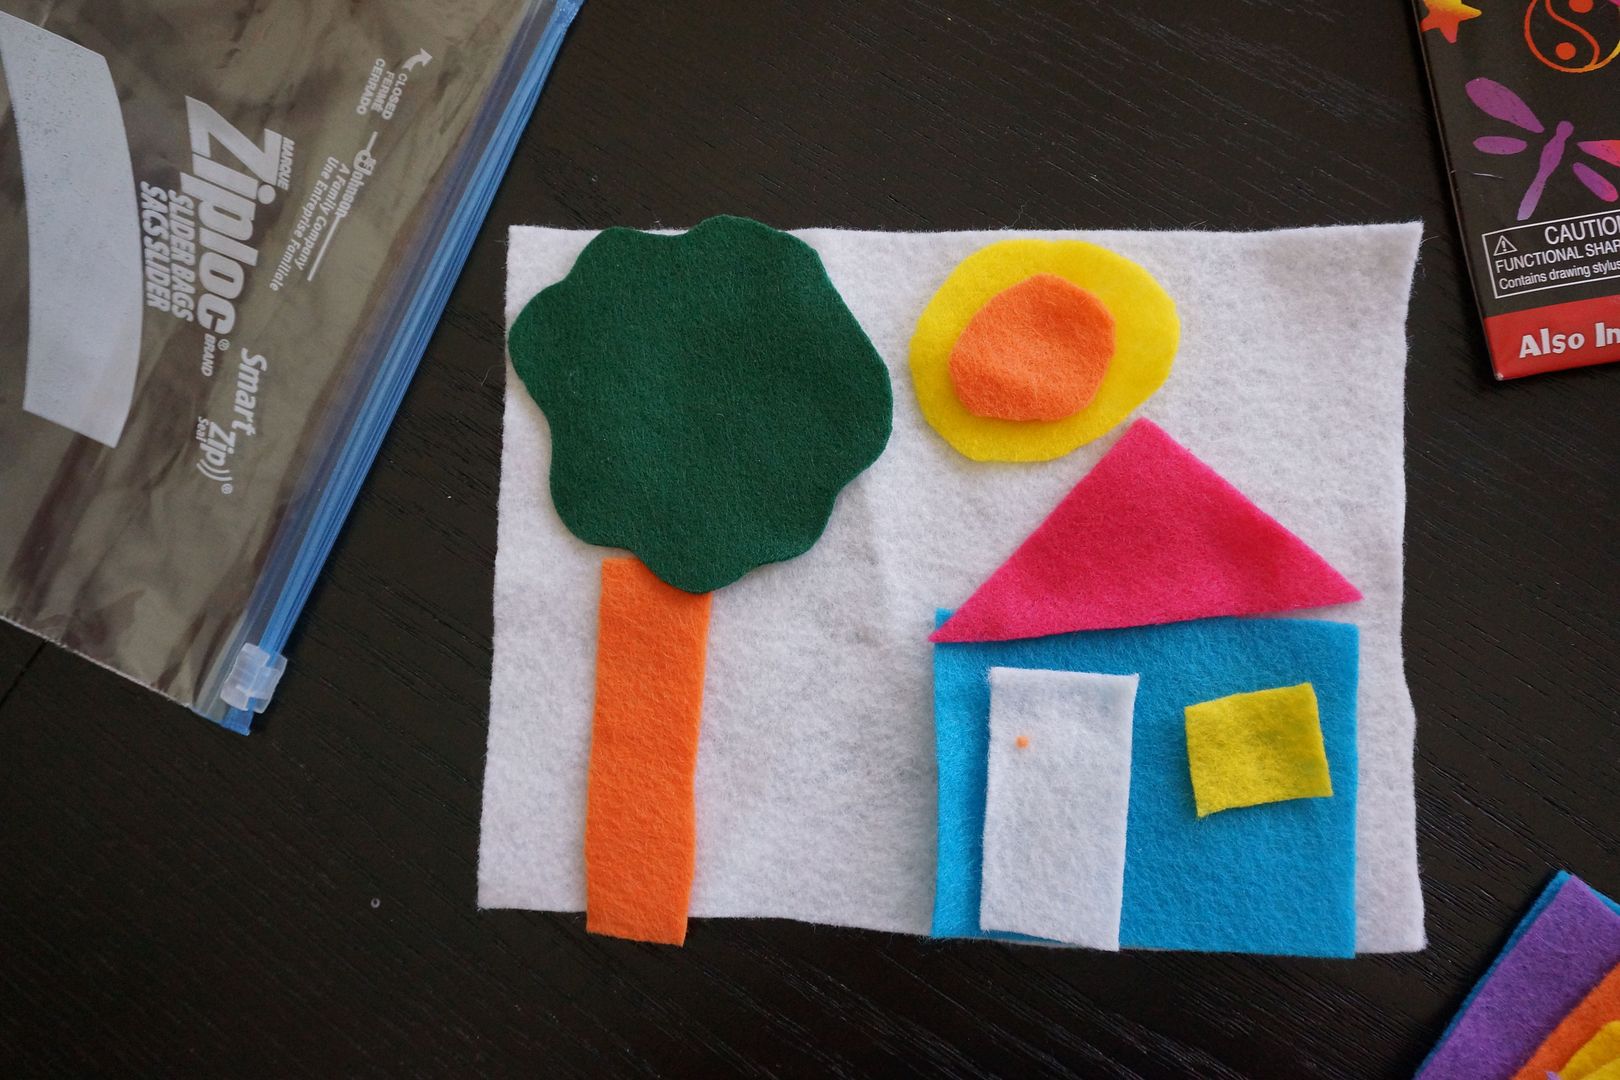
First up felt.  I had leftover felt from this Christmas Tree project.  I cut out a white rectangle and a variety of multicolored shapes.  I picked out some to make the above design, but the others were random.  She could create on either (or both) side(s) of the felt.


Next were stickers, sticky notes and masking tape.  It's a sticky activity kit!  I picked quantity over quality for the stickers, thinking that more was better!  I read that kids enjoy putting sticky notes on things and that masking tape can be used in all kinds of (non-destructive) creative ways.


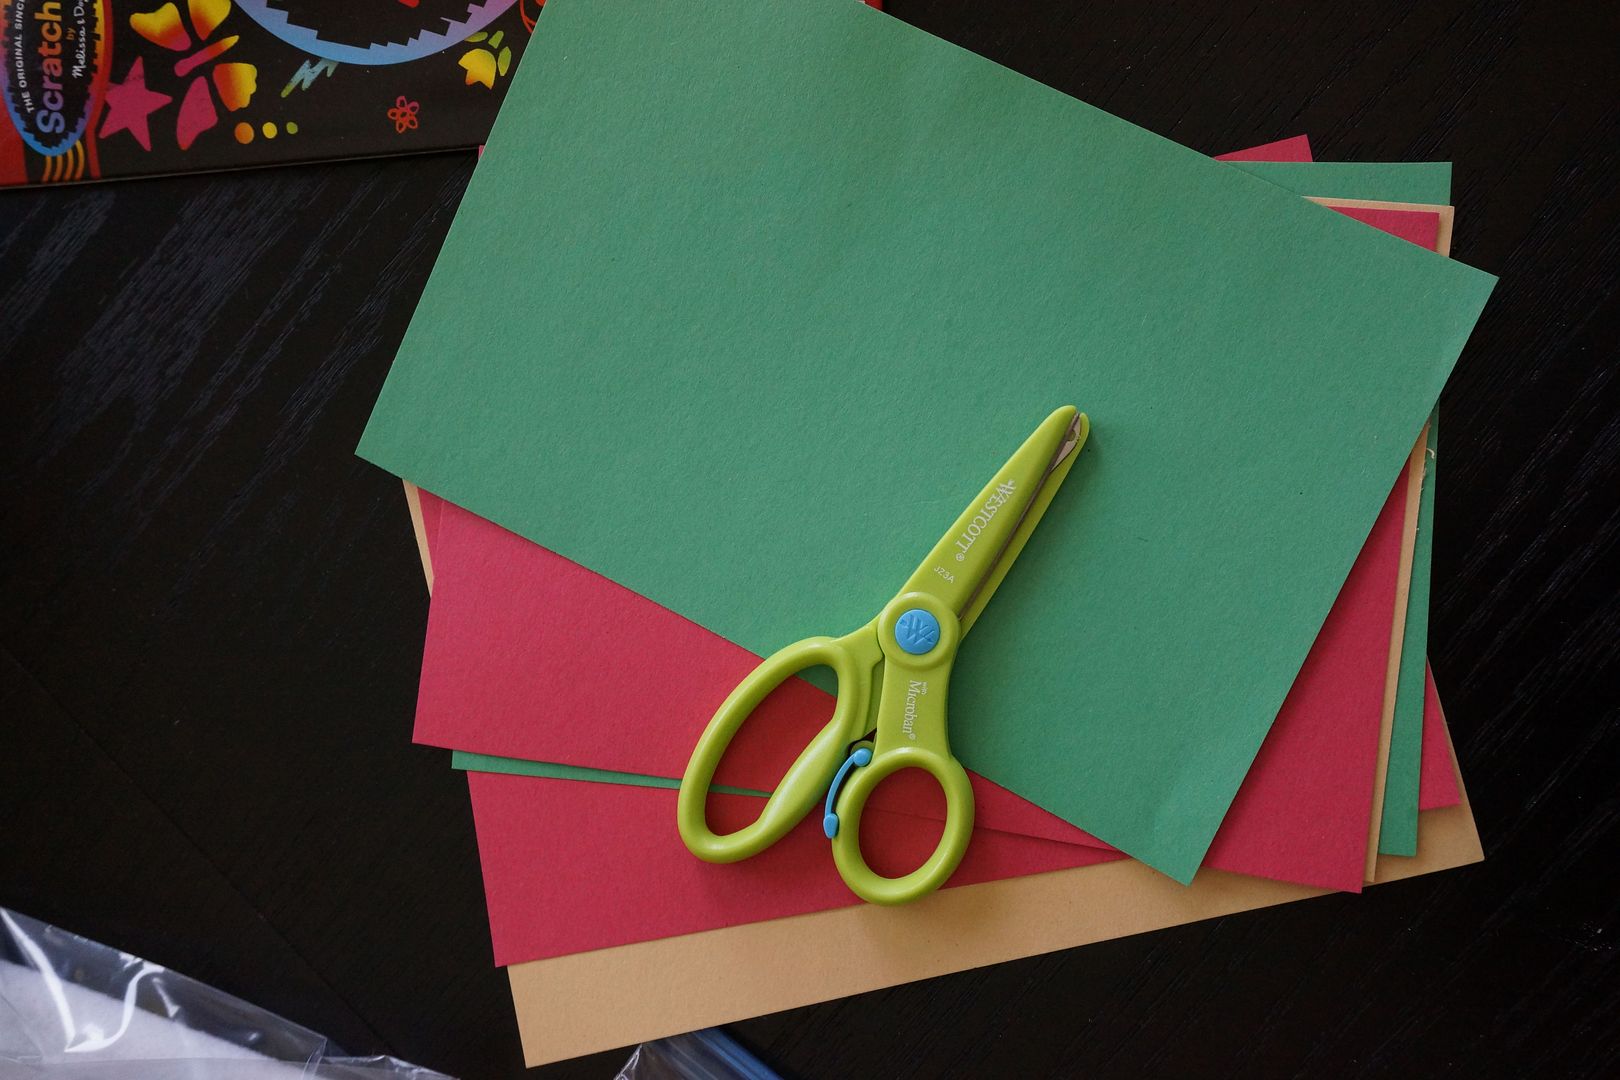
Along with the stickers I cut up some colored papers and included a pair of (very) safety scissors. No issues with the scissors going through airport security.

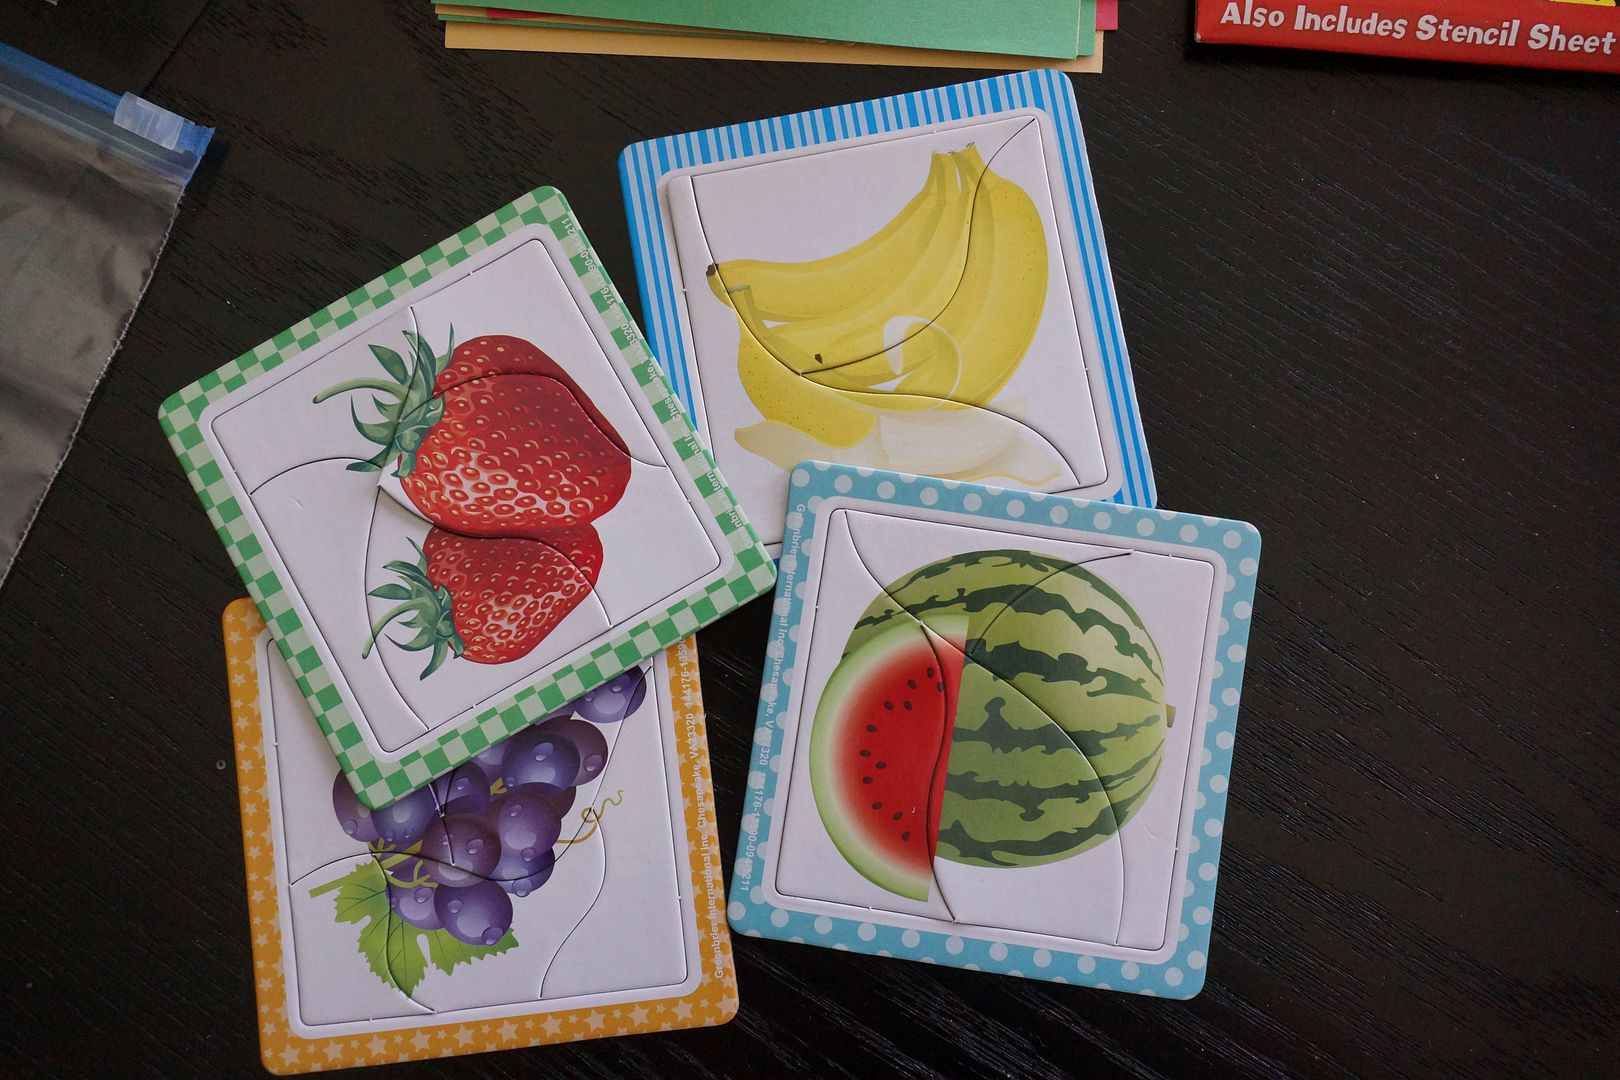
4 mini puzzles, seemed like a good skill level for the toddler and they were small.

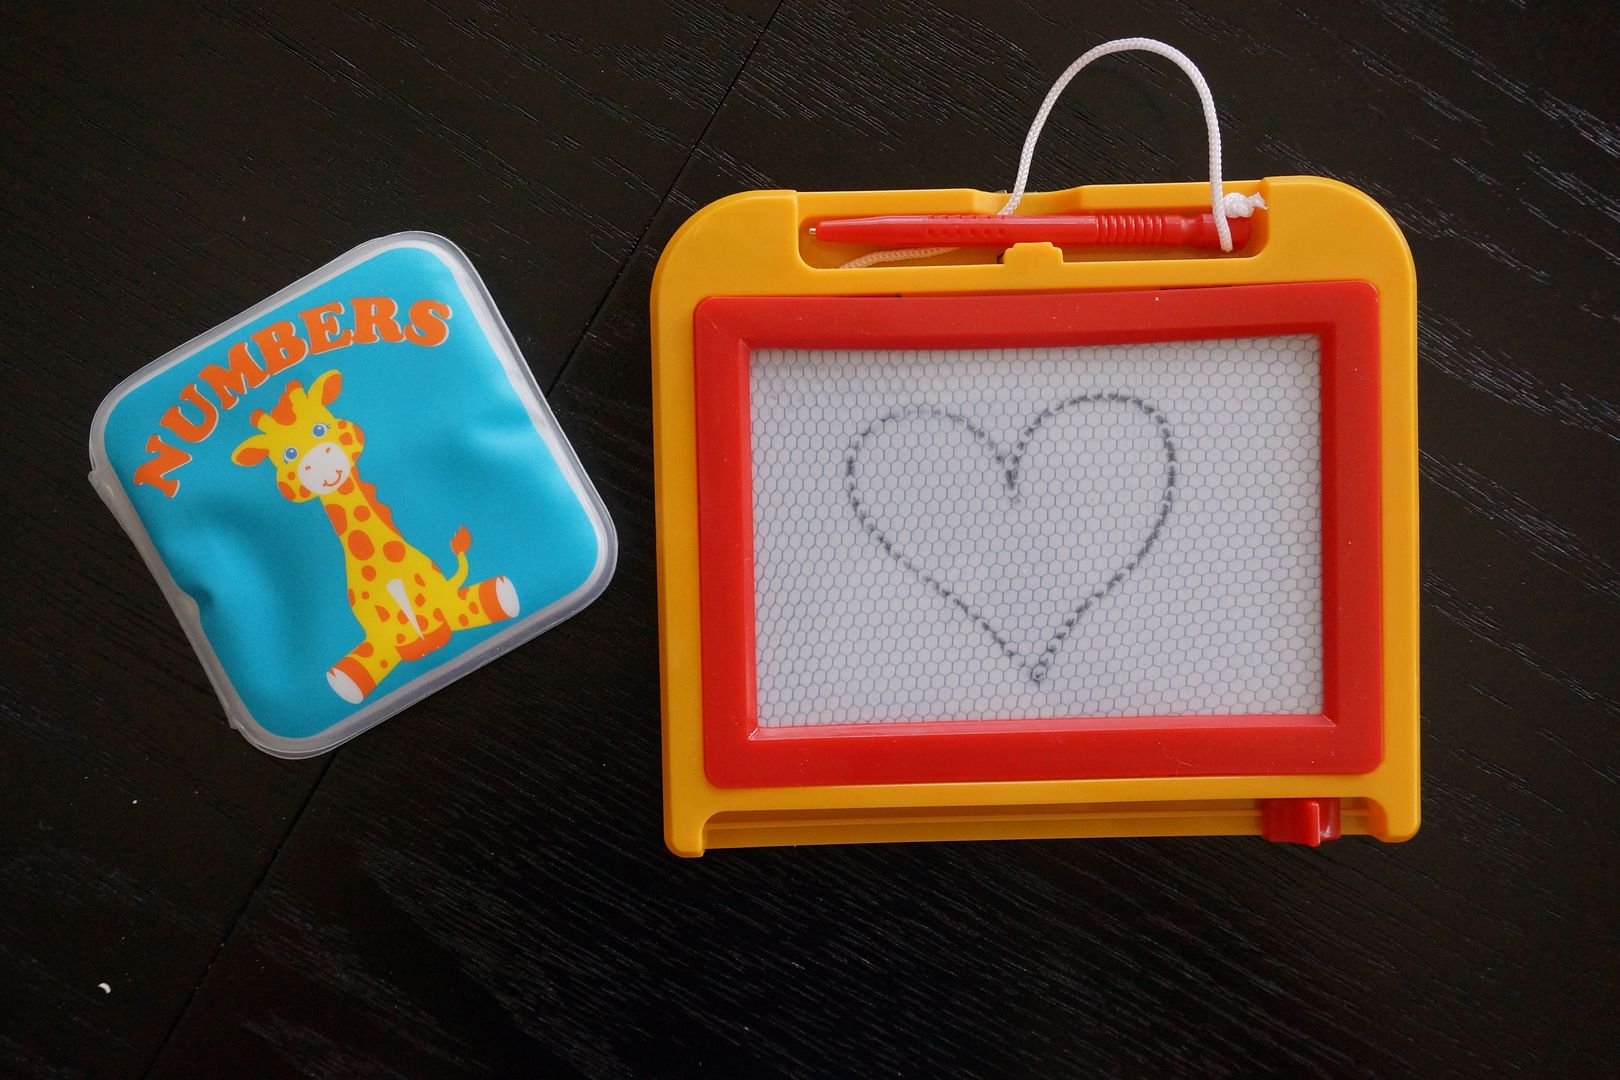
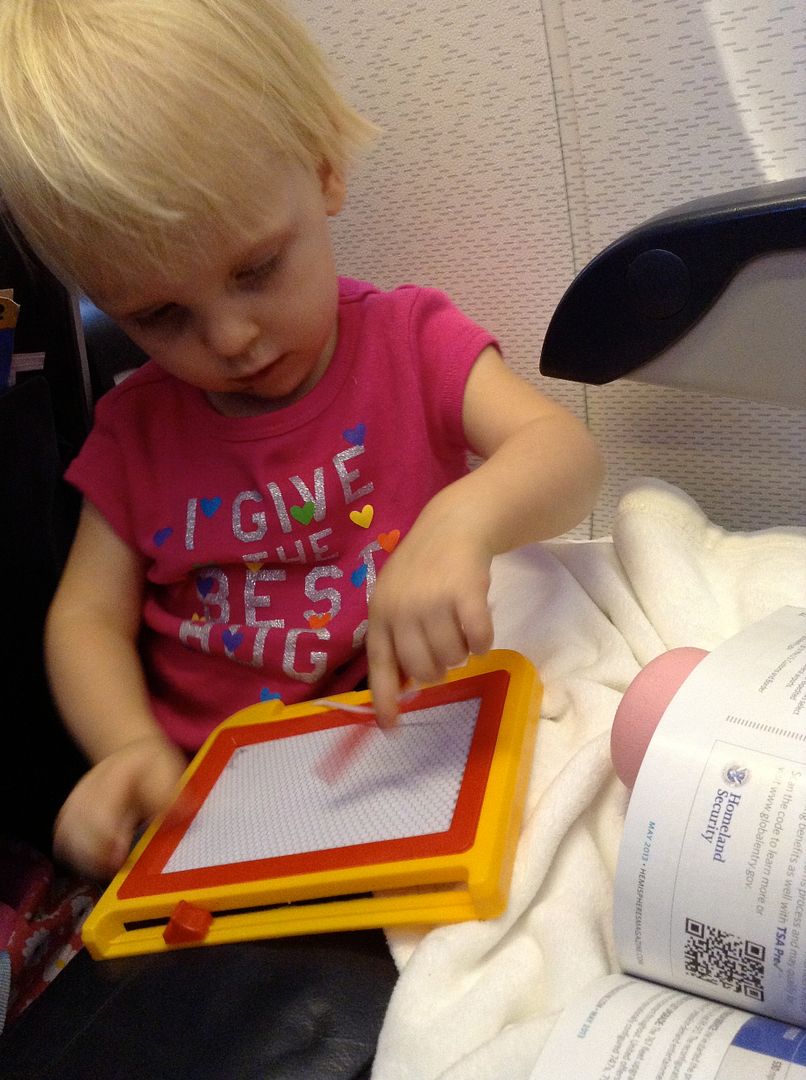
A little (water safe) book that squeaked and a magic write/erase board.  This was a really cheap dollar store version, they have more expensive ones at toy stores too.   

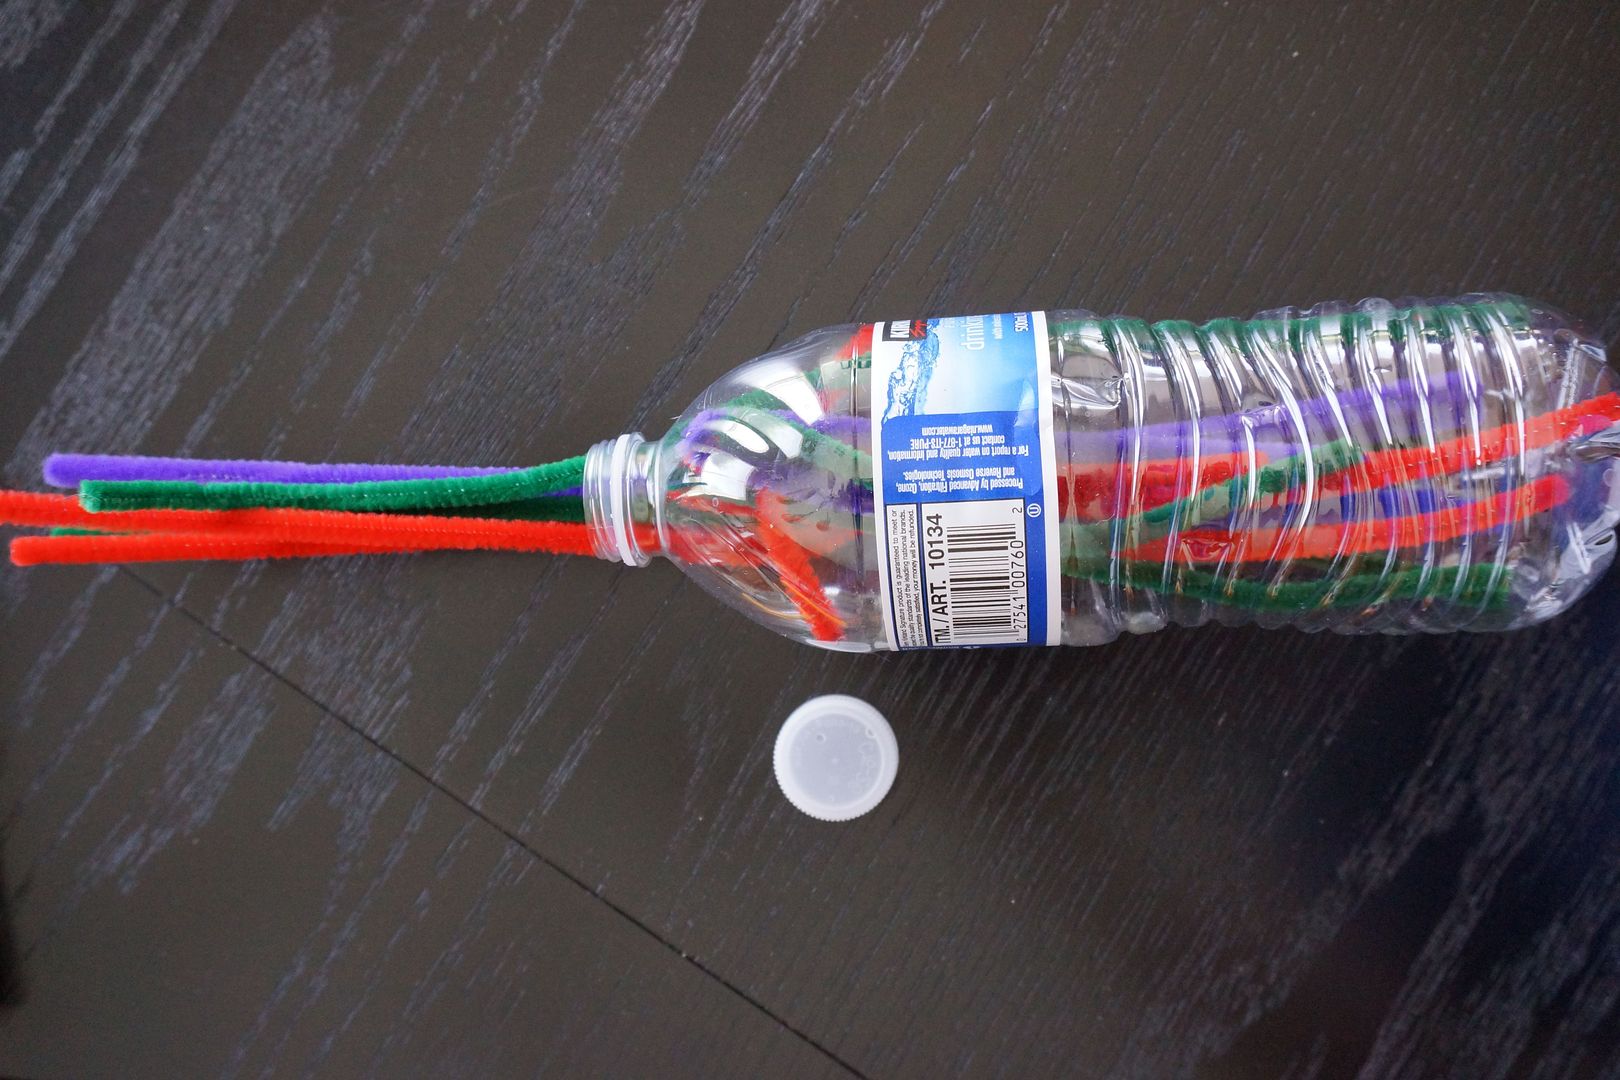
The plastic bottle activity.  This only needed a handful of pipe cleaners and an empty plastic bottle (with a lid).  Basically the child keeps busy pulling the pipe cleaners in and out of the bottle, scrunching them up, smooshing them down, etc.  Amazing how those little cleaners can be used.  My husband even made them into little shapes and animals to amuse the kids.


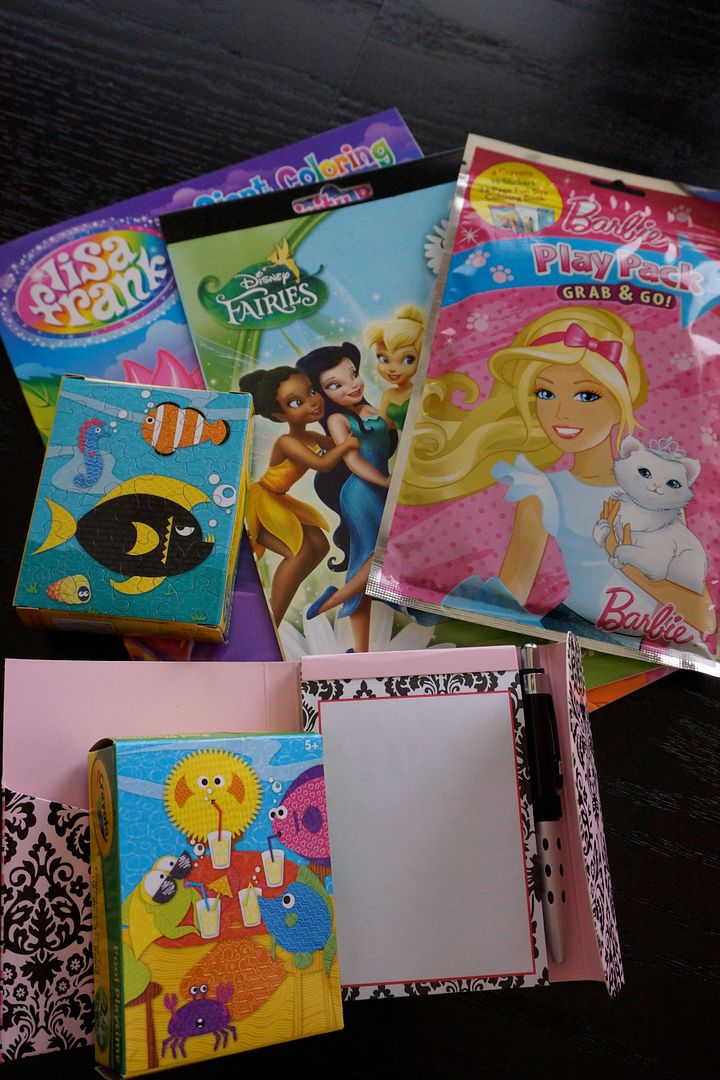
Not to leave her big sister out I planned a few activities for the 5 year old too. Although she would have been very content to play on the iPad the entire time I decided she needed a few less techie-things to do.  I bought her some grab and go packs, coloring books, big sticker pads (her choice), 2 mini puzzles and a fun mini-notepad and pen (a big hit).  

We also brought other basics like crayons, books, iPad and lots and lots of snacks!

So would you like to know what she actually played with?  The most popular activities hands-down were the magic/erase board and the felt pieces.  She also played quite a bit with the plastic bottle/pipe cleaners and the sticky notes.

The less popular kits were the puzzles (not her level yet I think), the stickers (shockingly!) and the magnetic shapes.  


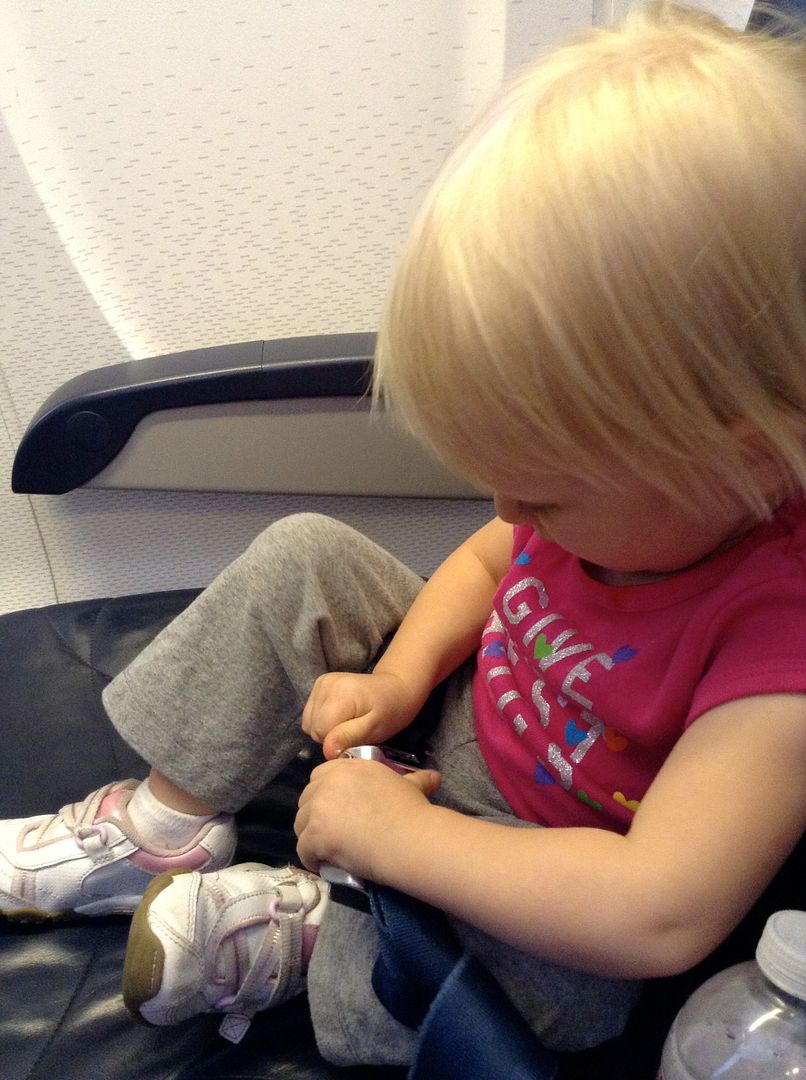
My busy 22 month old found other (non-planned) ways to keep busy.  They included opening and closing the seat-belt over and over and over.  Opening and closing the window shade and flipping through magazines.  Also reaching through or over the seats in front or behind us to say hello to the other passengers (didn't let her do that enough to wear out her welcome).

Oh, and hitting her head against the seat in front of us (when she'd bend down to get something out of a bag) that eventually resulted in the irritated (and very angry) man in front of us turning around and yelling at me.  Sigh.  I made nice with him at the end and apologized, he then grumped down a little and said it was okay.  Oh, and his wife commented over and over about how lovely both of the girls were. 

Another fun travel mix up involved my busy toddler's diaper.  First off it's challenging enough to change a child's diaper in those tiny tiny bathrooms.  I had the hardest time getting hers on and I discovered that the diaper's tabs were broken (wouldn't stick).  Being the creative think-on-my-feet mother that I am I carried my half diapered child out to retrieve the masking tape that I'd brought (see above sticky activity kit).  While out of the bathroom I heard my other child (5 year old daughter) yelling in the opposite restroom that she was stuck and couldn't open the door (the locks can be forced for future notice btw).  Once that issue was resolved I fastened the toddler's diaper with masking tape and we were set, or so it appeared.  

Fast-forward about 20 minutes later and her pants were drenched in pee.  Hmm, turns out that diaper was not actually broken after all....I'd put it on inside out.  In my defense it was one of those all brown diapers (no print) that looks very much the same on both sides!  Oh, and remember we cloth diaper when at home. :)

So let's just say it was a challenging experience made a little smoother by all the activities (and snacks) that I'd packed.  Oh, and a change of clothes for the baby!

Look here for red-eye flight tips and tricks including my experience with drugging a toddler!

Want more travel tips?  Check out my entry on Road Trips Tips and Tricks

Wednesday, May 29, 2013

(semi) Wordless Wednesday - Sew Excited


Look what the UPS man brought me today.  I am SEW excited to get started on this new hobby/adventure.

I'm very much a beginner.  You can read about my first time using a sewing machine (last month!) here.  Fortunately I have a very talented friend who is a seamstress and she's teaching sewing classes (to friends) every month.  My next class just happens to be this week, can't wait to try this baby out!

Monday, May 27, 2013

My Favorite Fudge in all the World


My favorite fudge in all the land comes from a tiny little town on the North Shore of the Big Island of Hawaii.  It is sold upstairs at the Kohala Coffee Mill in Hawi, HI.


Now you may already know that I love fudge, and I have a wonderful 7 Minute Dark Fudge recipe to prove it.  But this isn't like any fudge you've ever had, well unless you've been to Hawaii.  I'm talking about liliquoi fudge, liliquoi also known as passionfruit is a perfectly sweet tropical fruit.


I first had their beautiful fudge a couple years ago when I was pregnant with my baby-girl.  I bought only 1/4 lb at that time and had it polished off before we left the island.  I talked to everyone I knew about that fudge and dreamed of it on and off for the next 2 years.  A trip back up North was a must have on our recent trip.  We drove all the way up and straight to the shop.  When we arrived a sign said "Closed" and my heart dropped right there.  Well, turns out they were opening at 11am and it was 10:50.  Whew.  A few minutes later there we were ordering my beloved fudge.  A full pound this time thank-you-very-much.

Love!  I'm on the hunt for a recipe to make it myself, I'll let you know if I find a good one.

If you are ever on the Big Island I recommend a trip to Hawi.  Buy some fudge and at least sample the liliquoi, you won't be disappointed!

Friday, May 24, 2013

Fisher Price Friday - Kitchen Set


Today on Fisher Price Friday I'd like to introduce another accessory set.  This time it's the Play Family House Kitchen Set #729.  Let's just call it the Kitchen Set for short!  The Kitchen Set was made between 1970-1975 as an accessory set for the Play Family House #952.  Like the other accessory sets they came with furniture and people, so could be added to a play set or be used by themselves.


The appliances included a cabinet sink (dual sides), stove/oven (oven door opens) and a refrigerator (both doors open).  These same appliances were later made for the #909 Play Family Rooms set.  They were also used in the #929 Play Family Nursery School but in white.


The table has a lithograph of a beautiful place setting complete with a bouquet of flowers in the middle.  From 1972-1973 the table was brown (as shown), the years before and after it was lime green (like the chairs).  The set also came with two lime green chairs and two medium brown chairs (could also be dark brown or rust, don't get me started on color variations!).  The majority of the chairs having a dot on the back rather than a triangle, but after 1973 they were most likely made with a triangle.  The same table was introduced later in the #909 Play Family Rooms, but only in the lime green color (and with 4 lime green chairs).


A familiar family was included in the set.  From 1970-1973 they were made of all wood (body & head).  From 1974-1975 they had a wood body and plastic head or were all plastic.  The only other change in the family was the little girl, the last year of production she had a brown bob and a green body.  

For more Play Family Accessory sets check out:


And if you'd like some accessory pieces of your own check out my Etsy shop!

Wednesday, May 22, 2013

(semi) wordless wednesday - Anne Dreams of Sushi


One of my favorite parts about visiting Hawaii is the great food, especially fresh sushi.  


Although I have to admit that I ate my favorite sushi before I even arrived in Hawaii.  I had this lovely lunch in the San Francisco Airport on a layover.  It was so fresh! 


Here he is making the sushi, right in front of me.  In the airport.  Have you ever heard of such a thing?  I was quite impressed. :)


On my last day I had the most wonderful local plate lunch of Hawaiian food.  It included kalua pork, chicken long rice, lomi lomi salmon, haupia pudding and even some poi.  Not sushi but onolicious!

Are you hungry yet? ;)


Tuesday, May 21, 2013

Israeli Couscous with pine nuts and parsley


Vacation is over and I'm feeling the need to get back to cooking.  Last night I made Parmesan Seasoned ChickenRoasted Zucchini, Onions and Mushrooms and this new recipe.  I found it on the back of a Trader Joe's Israeli Couscous box and just adapted it a bit to fit my family's preferences.  We prefer to keep sweet and salty separate so I skipped the cinnamon and raisins.  

I really loved this recipe, but I'm a big fan of couscous.  What's not to love?  Little pearls of pasta, yummy!  My husband liked it even though he doesn't like pasta.  I convinced him that couscous was actually a cousin to pasta, not really pasta. :)  But seriously, it tasted a lot like a natural rice-a-roni.

Israeli Couscous with Pine Nuts and Parsley
Ingredients
3 Tbsp butter, divided
1/4 cup pine nuts
1/2 cup l'itoi onions (or shallots), finely chopped
1 1/2 cups Israeli couscous (from Trader Joe's)
1 fresh or dried bay leaf
1 3/4 cups chicken broth
1/2 tsp salt
1/2 cup parsley, minced
zest of 1/2 a lemon
*optional 1/2 cup raisins
black pepper, to taste

1. Melt 1 Tbsp butter in a large saucepan over medium-low heat.  Add pine nuts and stir until golden brown.  Be very careful because there is a small amount of time between toasted and burned.  Transfer to a small bowl.

2. Melt remaining 2 Tbsp of butter in the same pan over medium heat.  Add onions (or shallots) and saute until golden.  Add couscous and bay leaf (and 1/2 large cinnamon stick if you're feeling adventurous, we skipped it), and stir often until couscous browns slightly.

3. Add broth and salt and bring to a boil.  Reduce heat to low, cover and simmer until liquid is absorbed and couscous is tender.

4. Remove from heat and stir in parsley, pine nuts and lemon zest.  Add the raisins for a savory sweet taste (we skipped this).  Season with black pepper.

Enjoy!

Sunday, May 19, 2013

Favorite Things - Leave Your Sleep (Childrens Book/Music)


Back in March my husband and I went to the most marvelous concert.  It was Natalie Merchant with the Phoenix Symphony.  If you are in your 30's -50's you must know who Natalie Merchant is, she performed in the 80's-90's with 10,000 Maniacs and then went on a solo career after that.  I LOVED her music in college and continue to be a fan although she has not produced as much music in the last 10-15 years.  Her most recent project is Leave Your Sleep (2010) an adaption of 19th and 20th Century poetry into song.  

She currently travels to different cities performing concerts with symphonies about once a month.  A perfect schedule for her since she is a single mother of a young girl.  She uses the concerts to play music from Leave Your Sleep as well as new music that hasn't been released yet.

She created a beautiful children's book and full length cd (16 songs) or you can get the 2 cd album (26 songs).  My 5 year old absolutely adores this book and album.  We bought the book at the concert (signed!!) and it has been playing around this house or in the car non-stop ever since.  This may be the only kid's music cd that we are actually happy to hear!
Some of these poems are more Grimm's like, for example The Sleepy Giant which is about a giant that eats small boys clothes and all.  We find them all in fun but you have to know how your kids react.

I can say that we've been so enchanted with the music and the book that I'll be giving it to all our little friends for birthdays in the year to come!  And if you see Natalie is coming to your area I highly recommend her concert, you won't be disappointed!  She did a full concert with the Phoenix Symphony then came out for an hour of encores accompanied by a piano, guitar and drums doing her most popular songs (Kind and Generous, Jealousy, Carnival, etc).  My favorite date night of the year!

Friday, May 17, 2013

Fisher Price Friday - Children's Hospital

Just a couple months ago I shared the Fisher Price Hospital People.  At the time I only had the people, not the hospital.  Well, I couldn't help myself, I had to get a hospital for my people!

So here it is, the Play Family Children's Hospital #931 made from only 1976-1978.  This set is full of pieces (20!) many of them exclusives to this set.  It is made entirely of plastic and the base has two parts and a handle on top for easy carrying.

When folded the front of the hospital has a big lithograph of windows, many pediatric patients and a few nurses.  The kids may be in the hospital but they're all smiles, well except one boy with a broken leg (in a sling) that isn't looking so happy.

The back of the hospital has more windows and a lithograph of a flag pole/flag, bird bath with many little birds, a happy puppy and the garage door to the ambulance bay.
 
The sides of the hospital also have lithographs.  The right side has the crank (for the elevator) and a lithograph of a nurse waving out the window while holding a brand new baby.  There are also bushes, flowers and a few (red) birds.  The left side has a lithograph of a difficult patient (refusing his medicine) in the window.  Below the window is a bus stop and a park bench with a nurse and a little blond girl holding a teddy bear.  And of course a couple more birds. This set has a lot of birds!

Now to the accessories, there are 13 different hospital pieces.  All but the ambulance are exclusives to the set.  They include (from L to R): ambulance (also found in sets #123 & #126), two twin beds, x-ray machine, scale, wheelchair (with wheels that move) and a blue chair.  The next row: operating table (with overhead lamp), privacy screen, deep bowl sink/counter, baby bed with "wheels" (they don't really move) and another chair.  Finally in the front a gurney with wheels (that spin) and a velcro strap.

The beds and chairs have familiar shapes (chair in the school, beds in many sets) but these are an exclusive turquoise color.
When you press the x-ray machine down (where the little person stands) it shows a picture of bones.  The scale piece also moves when you press on it (person standing on it) to show their "weight".


Here are the 7 hospital people.  For more information on them go to my entry here.

Inside the hospital there is a elevator.  The white door on the bottom opens and closes so that you can step into the elevator.  The elevator is operated by a crank on the side of the building and the numbers move from 1 to 2 depending on the floor.  There is also a cute lithograph of two children on the second floor trying to escape through the railing.  Good thing they're in the hospital!


The upstairs of the hospital has a lithograph of a red linoleum floor.  The wall has pictures of happy jungle animals.  Also a blue cabinet (matches the beds and chairs), a bouquet of flowers and another teddy bear.

Downstairs also has a lithograph of a blue linoleum floor and the left side has a picture of hospital staff, equipment and a clock (it's 9:25 by the way).  At the top (on the ceiling) you can see a red knob, when you pull it a bell rings.

The opposite side has a hospital person and pictures of supplies.
On the far left of the first floor is the ambulance bay.  It has a plastic molded floor that looks like stones.  The lithograph is of garage and ambulance supplies/tools.  The garage door folds up into the roof.


The top of the hospital has a flip up top with a lithograph of the set name and a few hospital patients and workers.  When the hospital is folded up the flap folds down to help keep the set closed.
Last but not least the fold down flap.  It has a large lithograph of a garden, wood benches, bushes and even a beautiful koi pond.  In many sets this fold down portion is either missing or broken (doesn't attach to the hospital any longer).

Thursday, May 16, 2013

Organization - Kid's Playroom Part 2


Back to the kid's playroom for part 2, today we go inside the closet!  Now I'm not saying my way or organizing is the best or even the prettiest, but it works for us.


The right side of the closet has my daughter's dress up clothes.  I use a combination of regular hangers and multiple (3 and 4 tier) skirt hangers.  The tiered hangers work great for tiny clothes, wings and the outfits that tend to fall of regular hangers.


Up above in the right side are shelves all the way to the ceiling, I love that!  I used fabric box "drawers" to hold little items and toys that they haven't grown into yet.  There are a few toys, off season and odd sized books on the shelves as well.  

Down below on the floor I used shoe storage units to keep their puzzles.  On top are Lego boxes and tubs.  On the far right I use the space to keep odd shaped toys like a fabric tunnel and parachute.  There is a mirror behind that my daughter can use to admire her loveliness when she's playing dress up.

The left side of the closet.  On the floor is an Ikea organizer (wood composite) with plastic drawers.  On top I've got 2 big baskets that I picked up at TJMaxx a few years ago.  They've been all over my house for different uses.  We've considered removing the clothing bar and having another shelf put in to use the space better but haven't gotten around to it.  For now I have a lightweight metal/plastic storage system up there from the Container Store.  Up above in the closet I have off season books (Christmas, Spring, etc) and other random toys that they're either growing into or out of.


Here's a closer look at those Ikea plastic bin/drawers.  You won't be surprised to see that I keep vintage FPLP in most (3/4) of them.  :)


In Part 1 I showed you the armoire but forgot to show you what's inside!  Just a few of our vintage Fisher Price Little People sets.  We took a tv/entertainment armoire and made it into storage by putting wire shelves inside.  I can fit quite a few sets in there (6 big ones plus 2 smaller and a few vehicles underneath).  Also, don't forget the top, I've got a couple displayed up there as well.  

To see more of our Playroom go to Part 1
Go here to see how I use the armoire to Cloth Diaper a Toddler.