HomeVintage Fisher PriceMy Etsy ShopCategoriesAbout

Friday, January 29, 2016

Fisher Price Friday - Dump Truckers


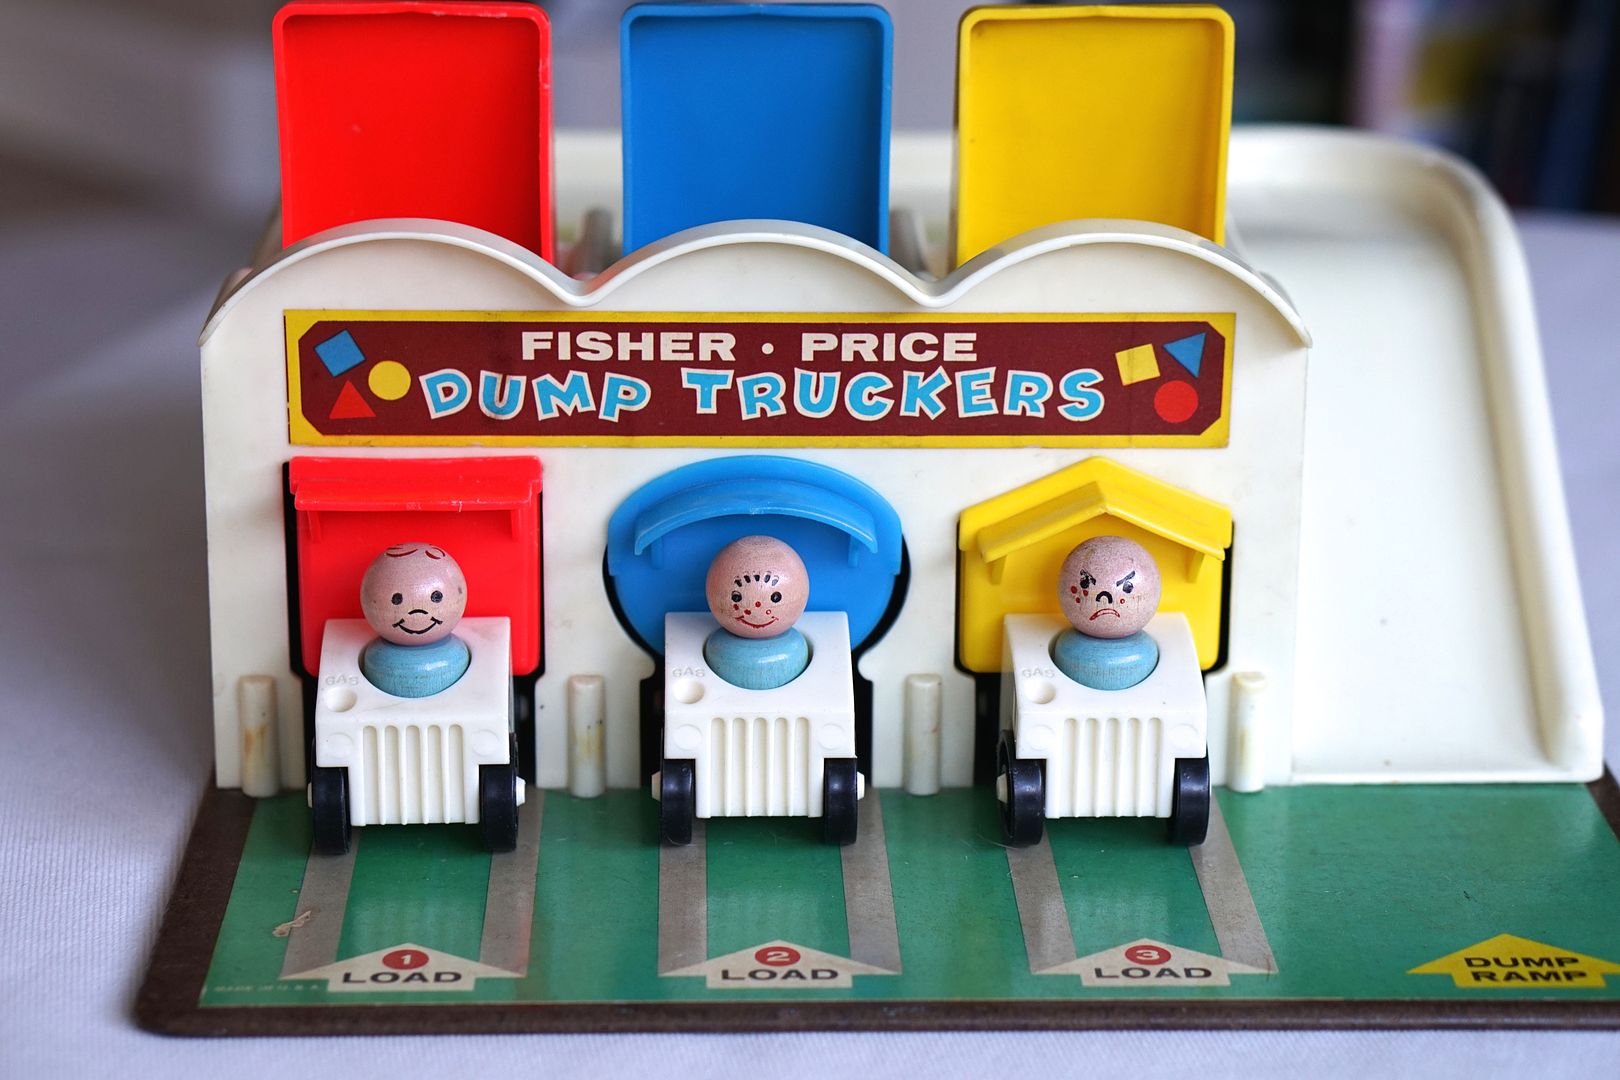
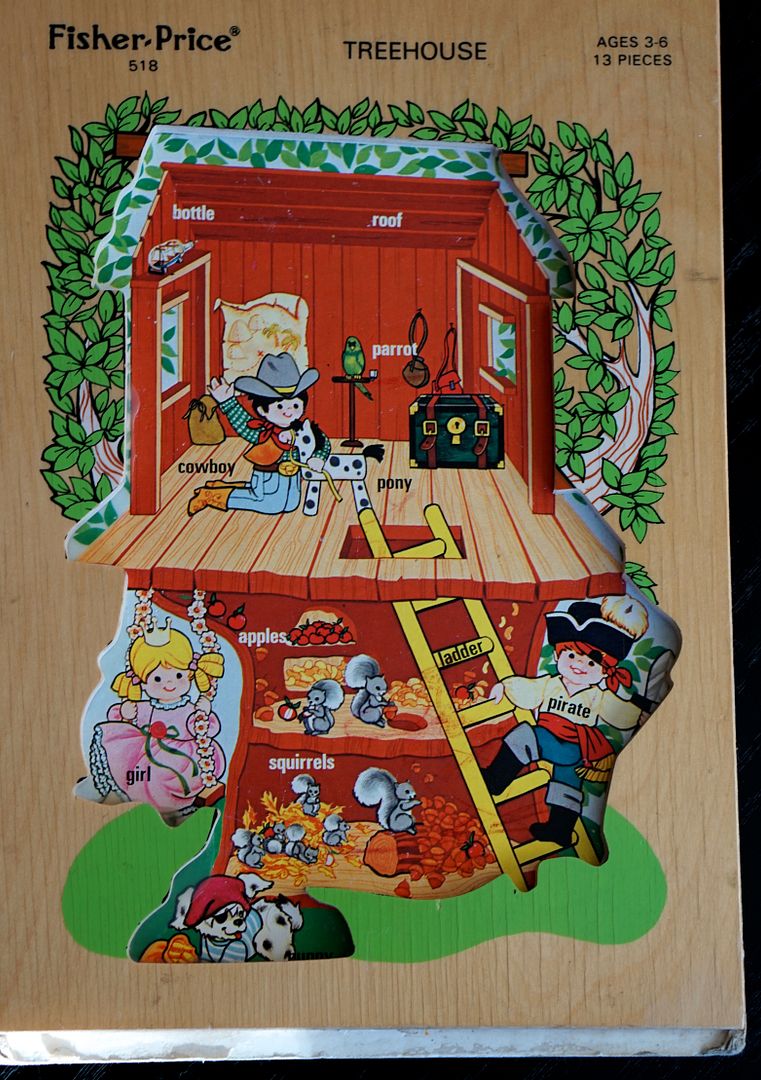
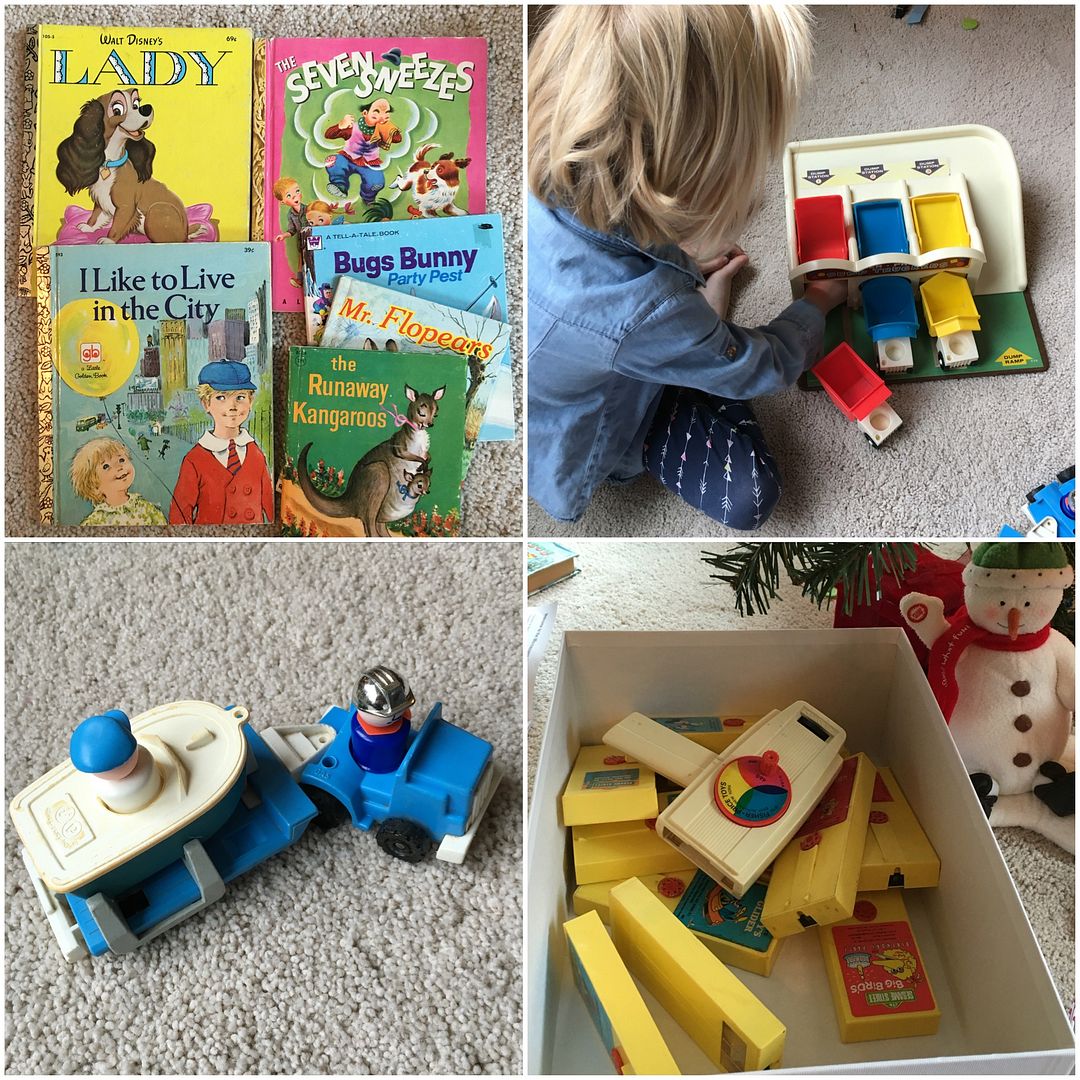
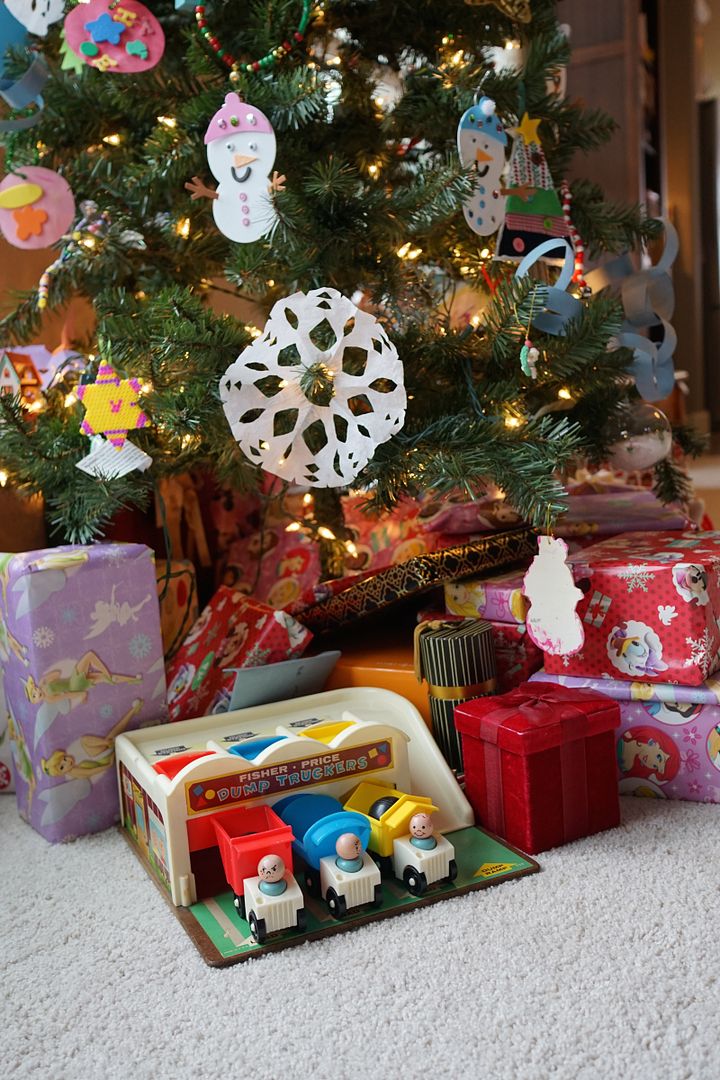
This sweet but not tiny set was placed under the Christmas tree this year for our youngest.  It's the Dump Truckers #979 made between 1965-1970.  This oldie but goodie was the first Fisher Price set made with a masonite base.  Toys before the Dump Truckers were baseless or pull toys.  After the Dump Truckers came many familiar and popular sets like the Play Family Farm, Play Family House and the Play Family School to name a few.

But first came the Dump Truckers #979.  This 10 piece set came with the base, three dump trucks, three little wooden people and 3 balls.  The base is made of masonite and plastic and has a variety of lithographs on each side.


The little little people were made of wood and came in two color options; light blue as shown or dark blue.  Each set came with one frowning boy and two happy boys.  They were shorter than the classic little people (which came later) and had straight sides.  The smiling boy with hair on his head was also found in the #719 Choo Choo, #932 Amusement Park and the #969 Ferris Wheel.  The other two boys were exclusives to this set.


The fun of the base is that when you back up the three dump trucks to their respective loading stations the balls fall into the back of the dump trucks.  The trucks can go up and down the ramps, underneath the station and can also get gas from the gas pump on the side.  Pretty fun stuff.


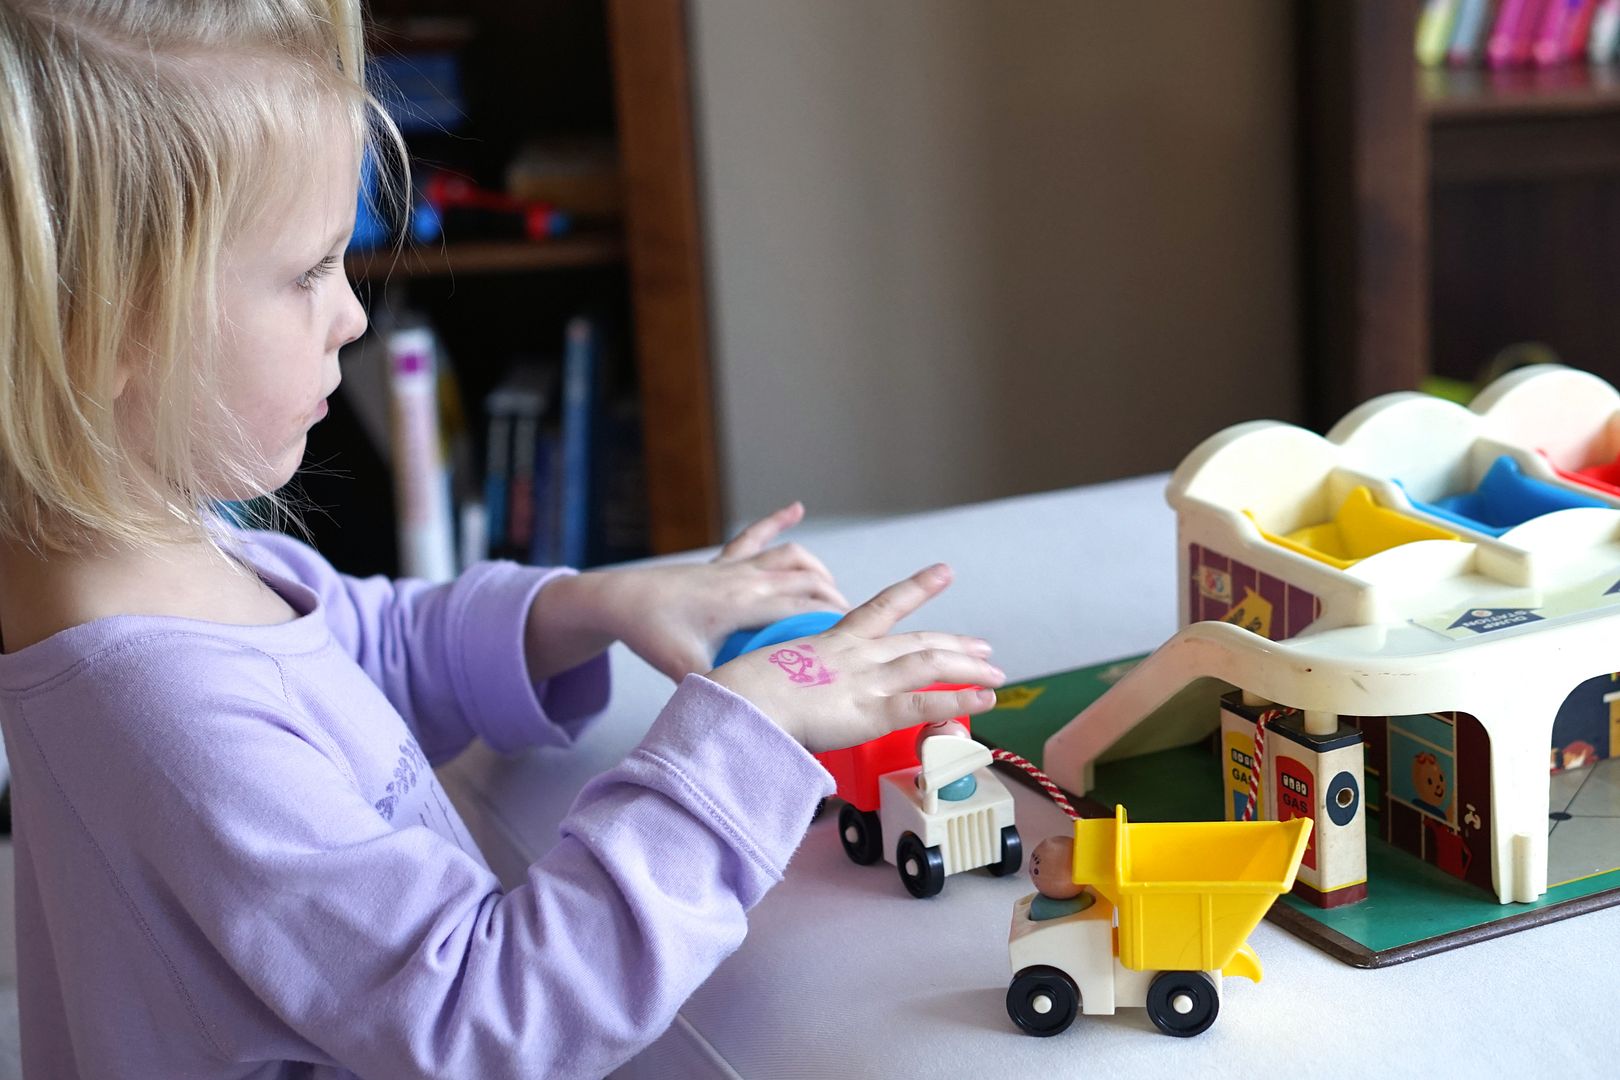
The set came with three black balls.  Initially they were made of solid wood and later hollow plastic.  When I purchased my set it only had two balls and within a couple weeks of play my daughter had lost one of those too.  So we're down to one original ball and two other creative balls that my daughter found to use as seen in the front above.  I am hopeful that we'll find the lost ball and I'm on the lookout for more to purchase!


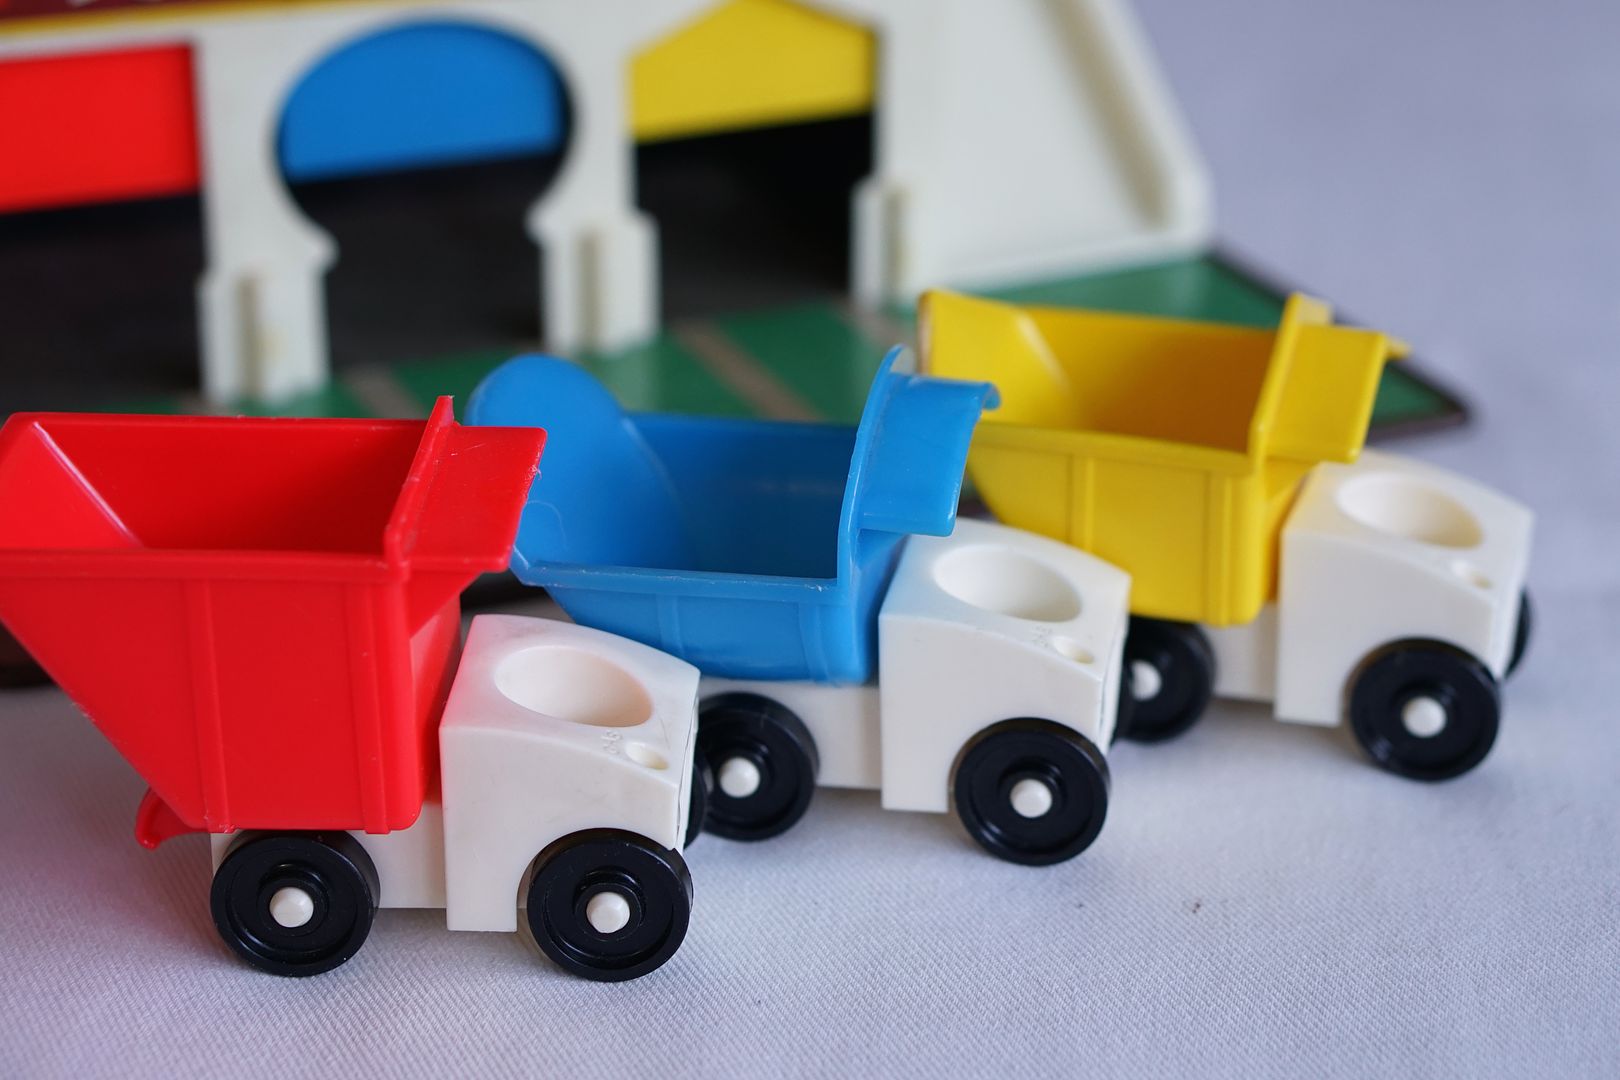
The brightly colored dump trucks are in three shapes; yellow squared, red rounded and blue trianglular.  The trucks only fit into their respective loading docks, a little fun learning opportunity for kids.  There were many variations to the trucks/bays, they came in all possible combinations but there were never two of the same color in one set.  

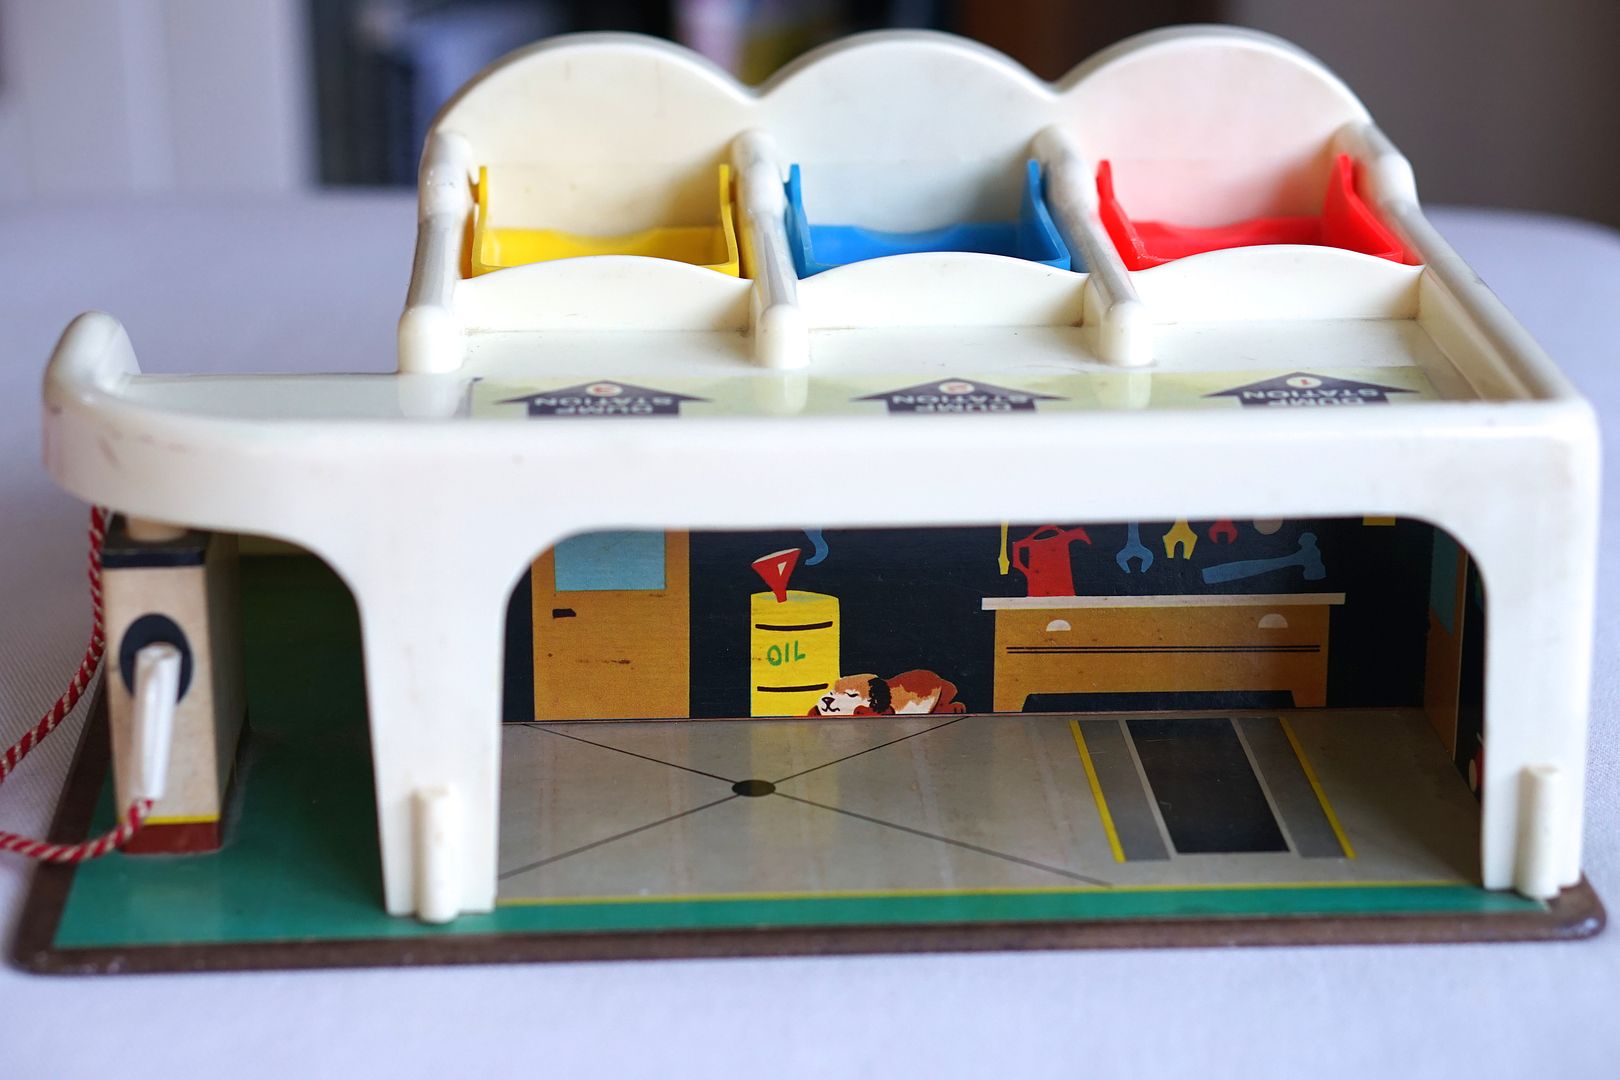
The trucks also fit underneath the garage when they need a little servicing. 


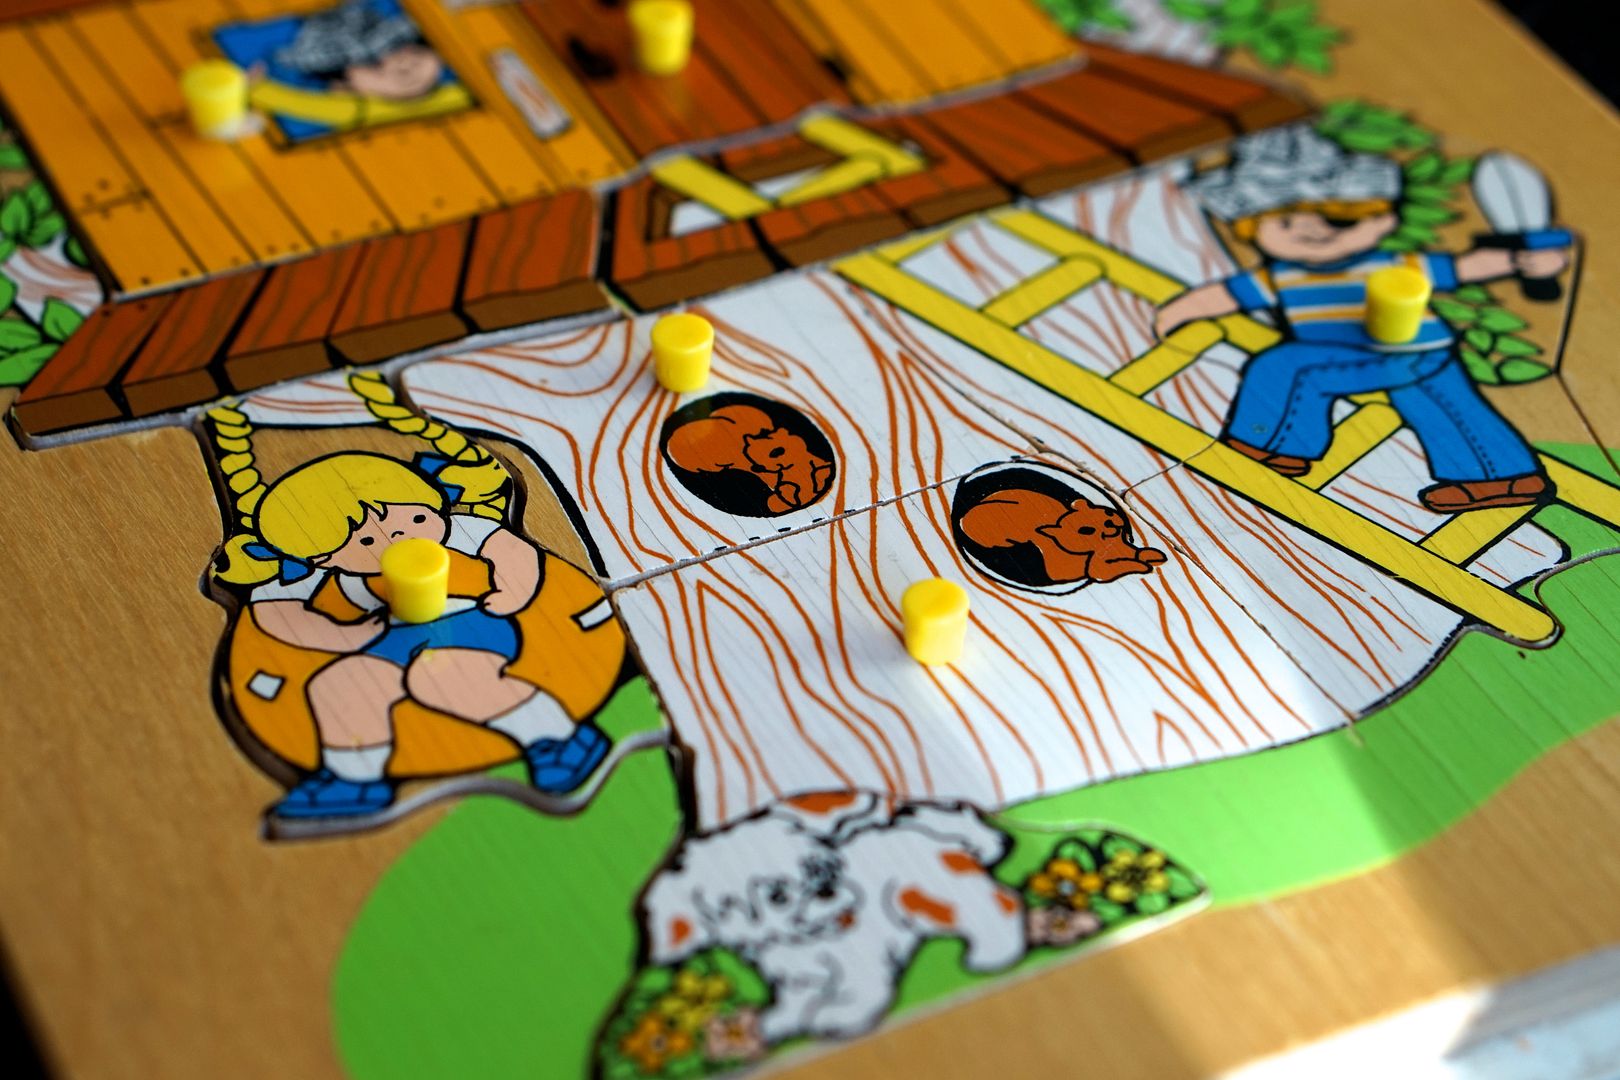
Now for a closer look at the lithographs.  Please note that two of them are reproductions as noted, but more on that in a bit.


Inside the lower garage there are quite vivid and detailed pictures including a sleeping dog, workbench with tools, hose, oil can and other odds and ends.  If you look on the right there is a toy that looks quite a bit like the Creative Coaster #979 which was also made in the 1960's. 


The other side of the garage has a door, clock and a little person looking out the window.  


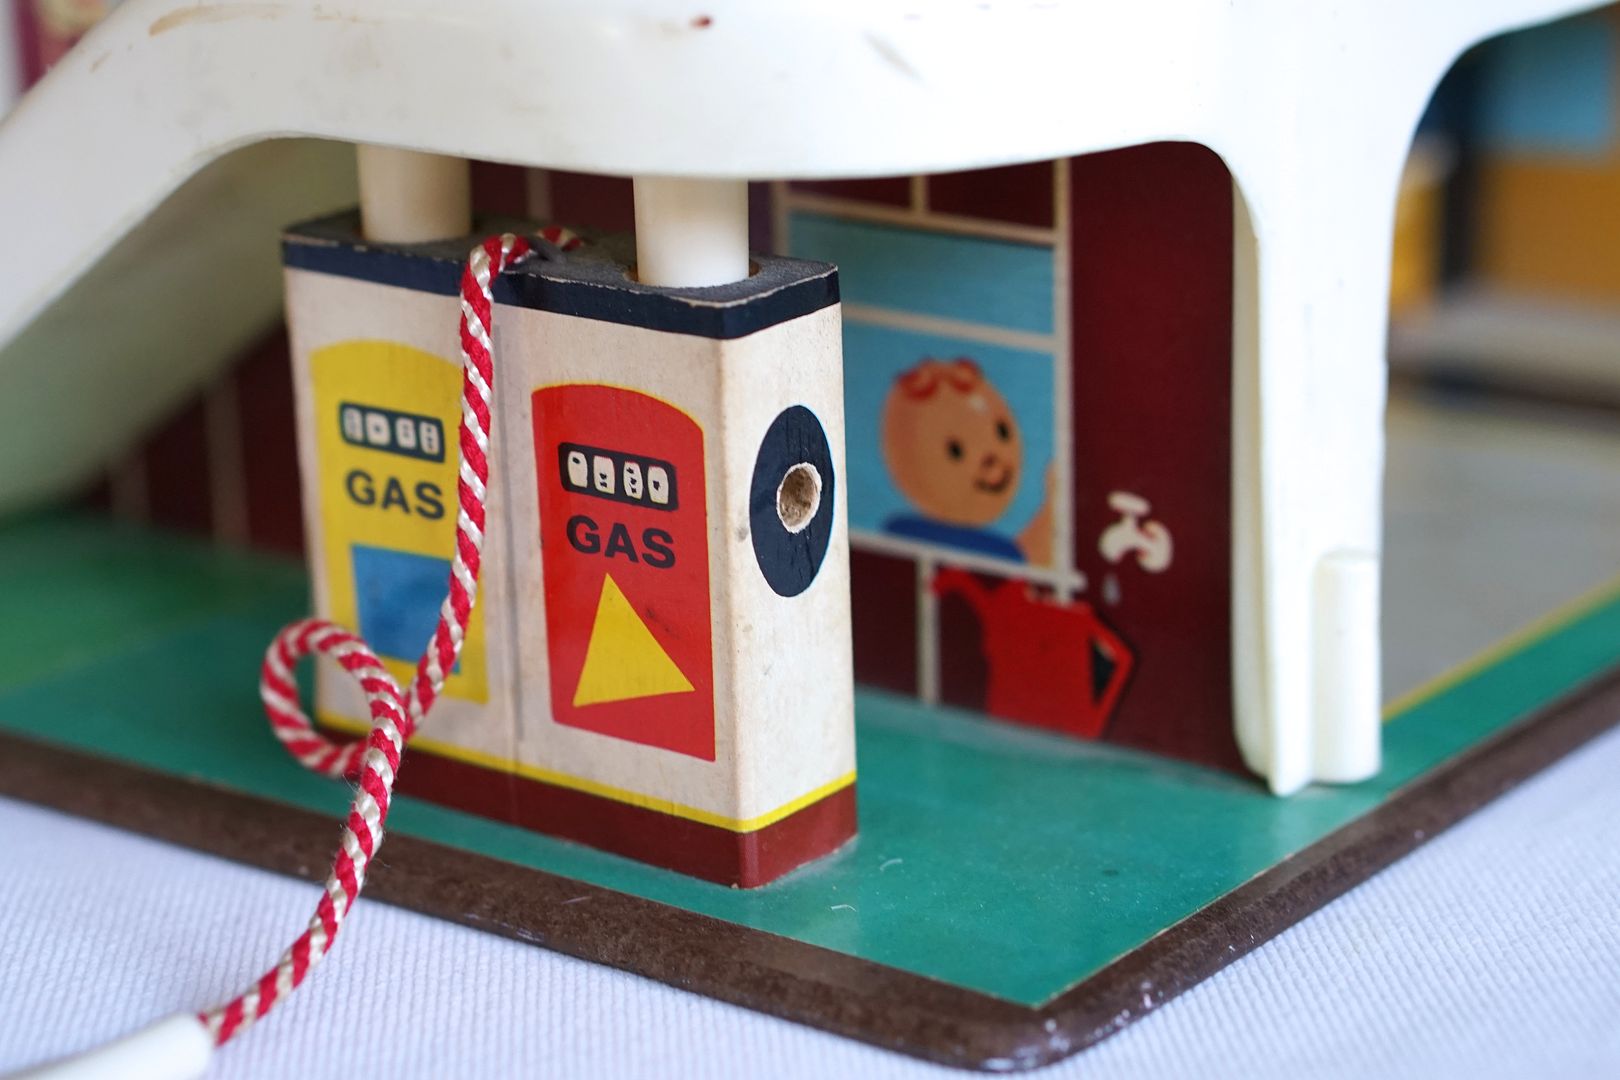
On the other side of the wall you can see the same cute little person looking out the window.  Oh how I love the consistency and attention to detail.  You can also see the gas pump with a hose that fits into each of the trucks.


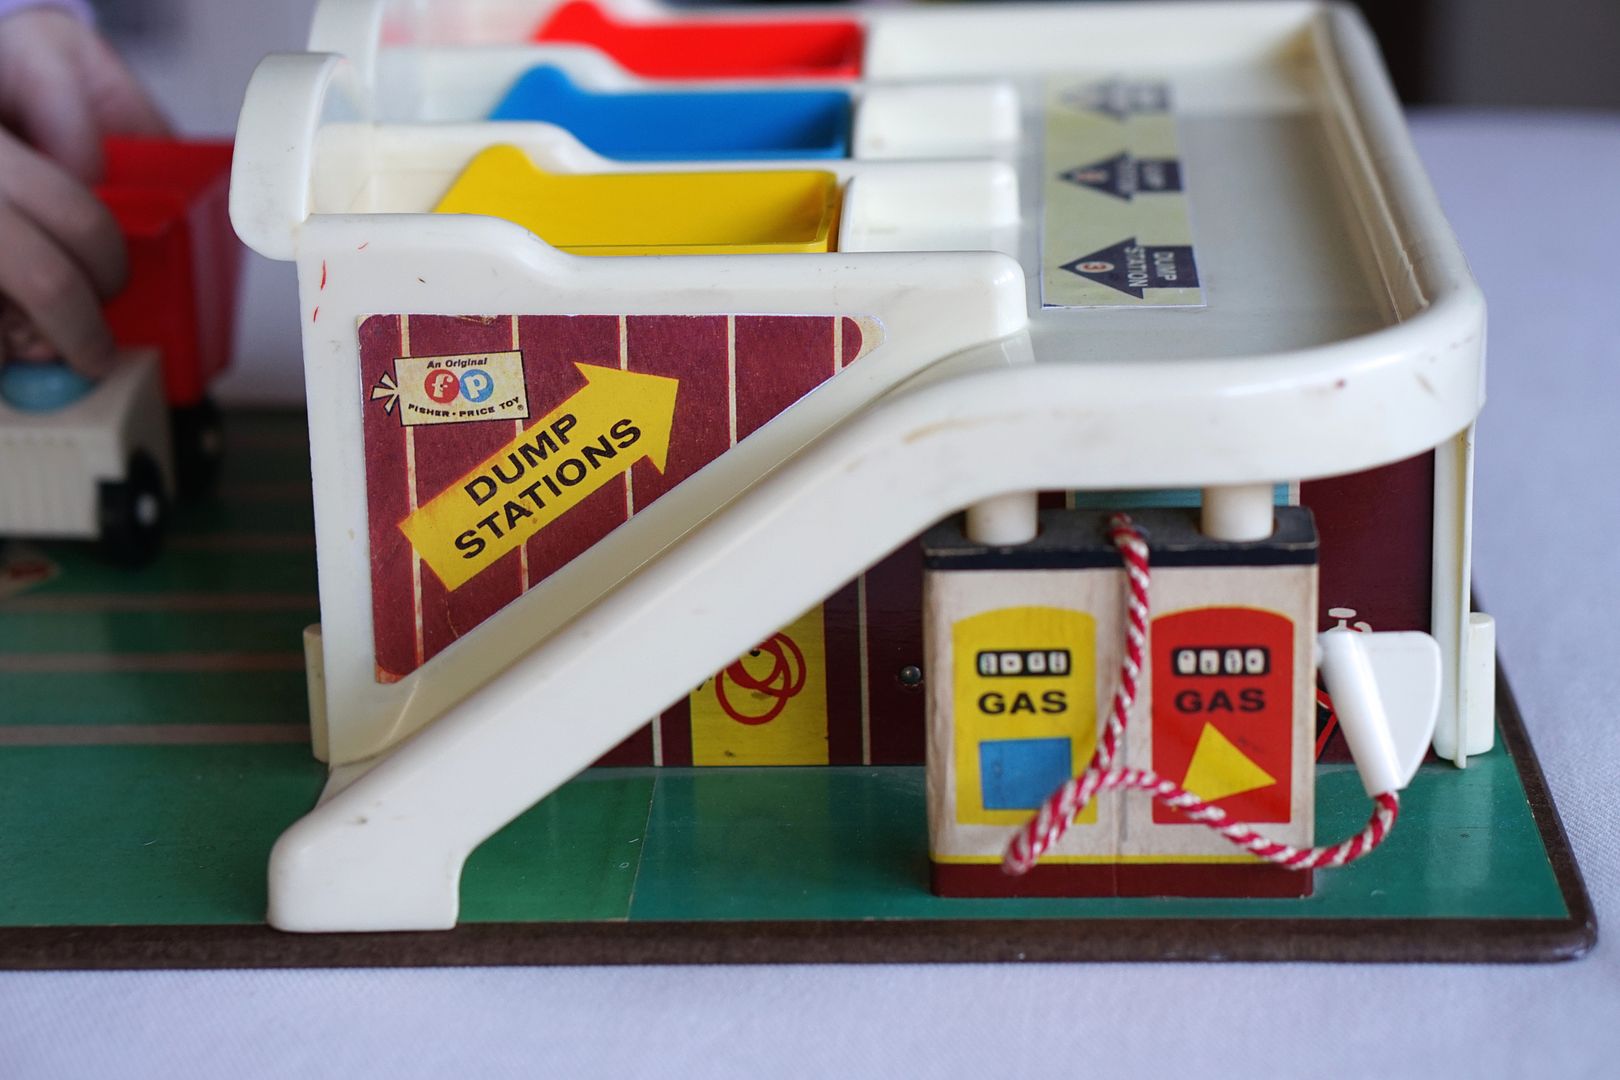
Going up the ramp there is a lithograph that points the way and includes the Fisher Price logo of the time.  This particular lithograph is often torn or missing on this set after many years of play.  This was the case with my set and I ordered a replacement lithograph online to spiffy up the set before giving it to my daughter. 

The dump station numbers on top of the set are also replacements.  That particular sticker is also often missing or damaged as years of children driving cars over the lithograph is naturally quite destructive.

Using replacement lithographs is a bit controversial amongst the Fisher Price collector crowd.  Many collectors have concerns that these incomplete/inauthentic toys will lower the values and dillute the collector market.  Other collectors/toy lovers like myself prefer to have the toys improved so that they can be used and played with.  
I personally have not yet sold any toys with replacement lithographs and if/when I do I would make it clear which parts were inauthentic.  However, other sellers may not be as honest so it is definitely a buyer-beware out there.  You can tell if you look closely enough that they are not the same as the originals.  The colors are a bit duller, the stickers thicker and if you look closely you can see where I cut them out.


Now back to the Dump Truckers set.  The other side of the base has another window with little faces looking out of it, but this time they are only pictured on one side.  But look how bright and vivid even after 50+ years of play!


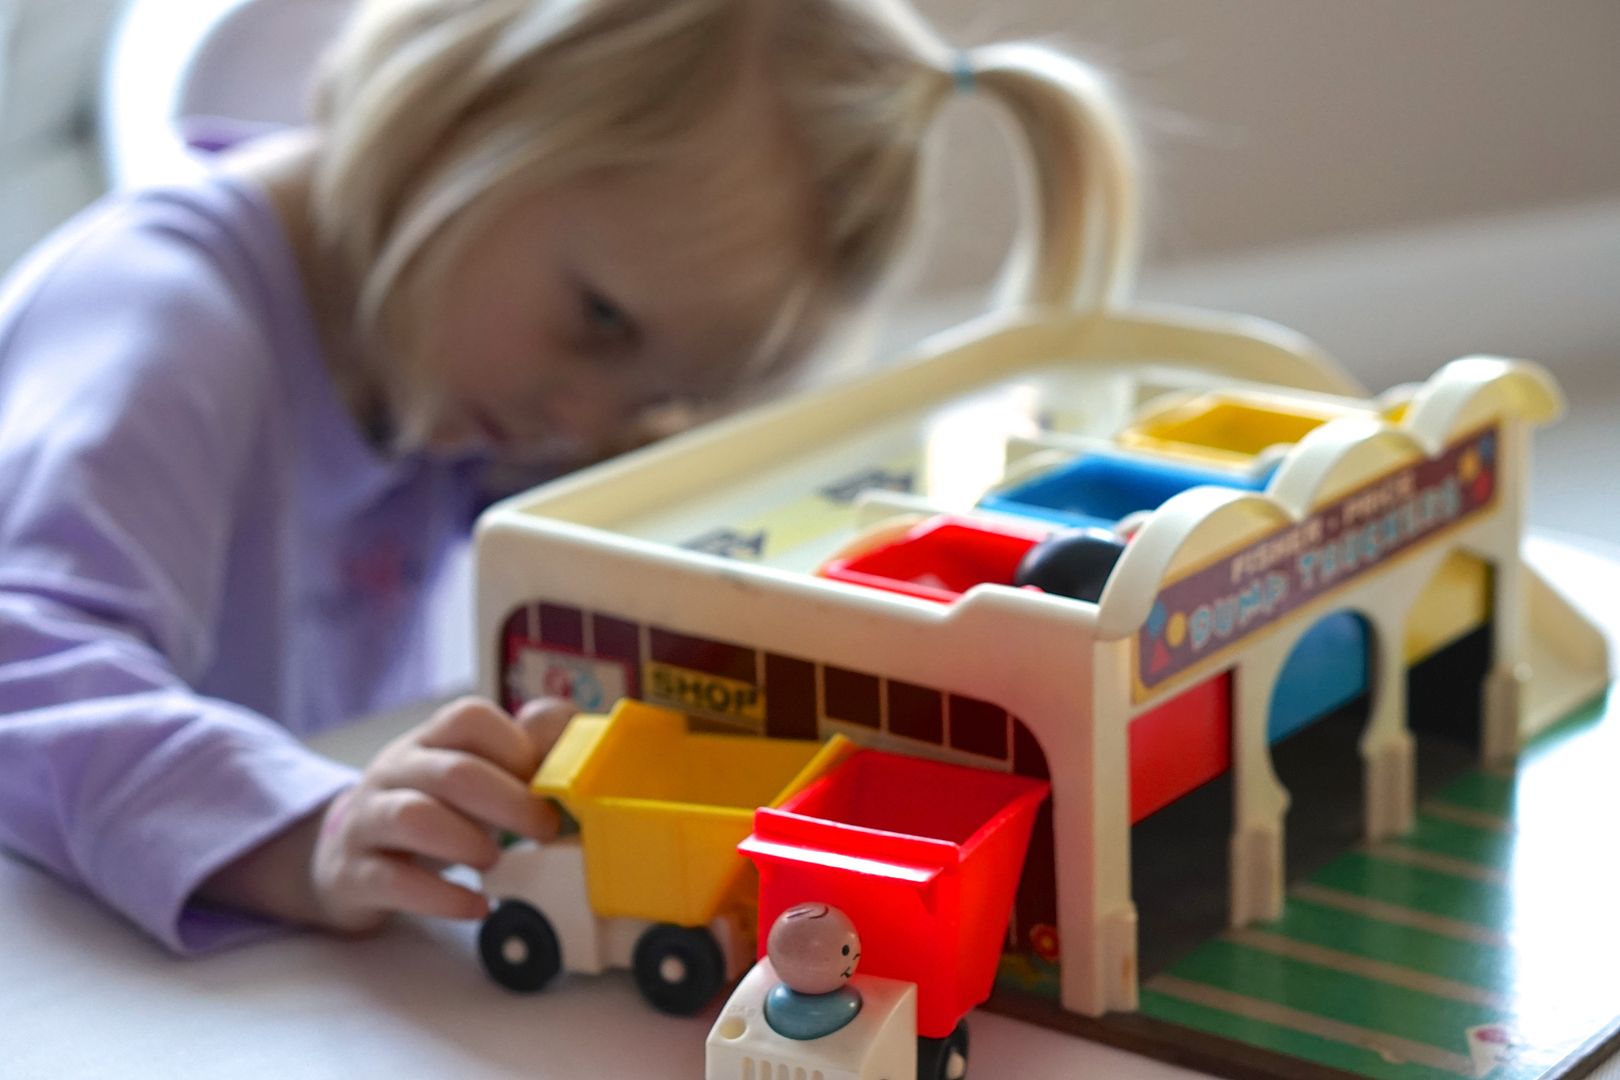
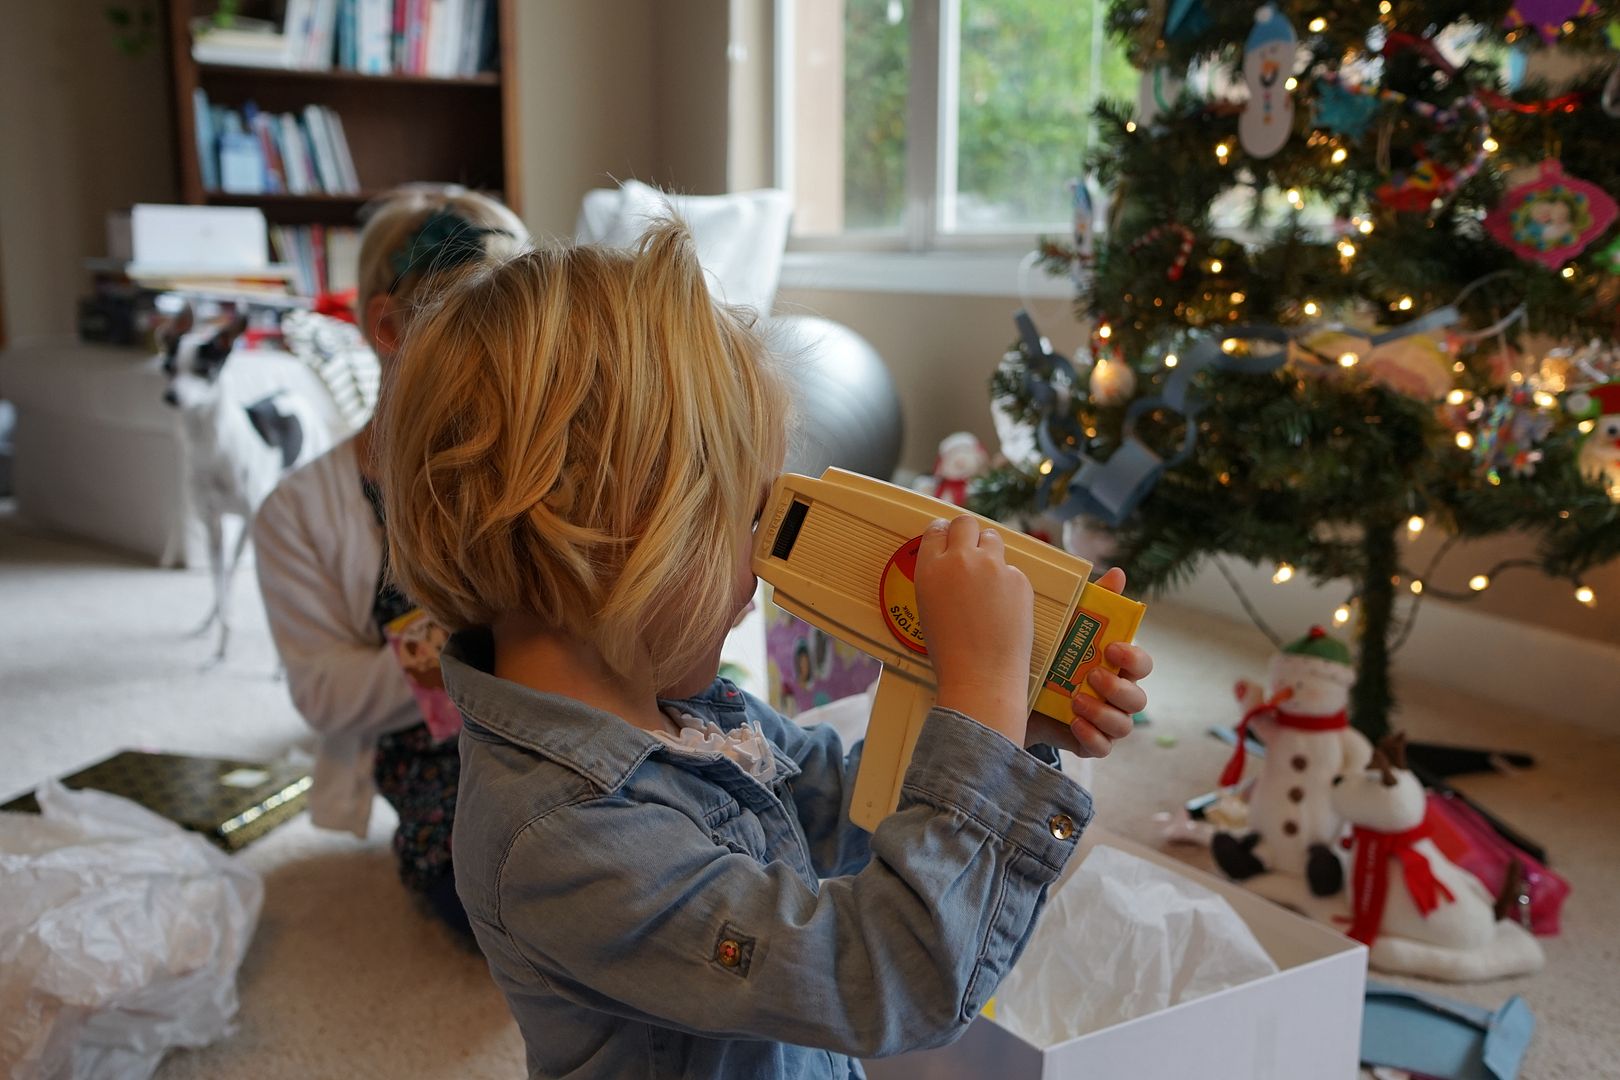
I wasn't sure if my youngest (4.5 year old) would be too advanced/old for this toy but I needn't worry, she loves it!  She's a fan and so am I.

Wednesday, January 27, 2016

Taco Stuffed Peppers Recipe


I branched out and tried a new recipe this week.  Turns out stuffed bell peppers are one of my husband's family favorites and yet I've never made it in the 12 yrs we've been married.  Whoops!  I found this recipe on Tasty but of course made a few changes.

My husband said it was good but nothing like the way his mother made.  So...I'll be checking with her ASAP to find her recipe. :)  But for now it was a success and about 350 calories per serving.  This recipe makes enough for approximately 7 servings (1 cup of filling each), but I only used 4 peppers and saved the rest for leftovers.  

Taco Stuffed Peppers

4-7 Medium/Large Bell Peppers (make sure they have a flat base so they will stand up when cooking) 
1 lb Ground Beef 
1 Medium Yellow Onion - Diced 
1 Can Black Beans - Drained 
1 Cup Cooked Brown Rice 
1 Cup Frozen Corn 
1 Jar Medium Chunky Salsa 
2 Tbsp of Taco Seasoning Mix (or one packet of store bought) 
1 1/2 - 2 Cups Grated Cheddar/Motzarella Blend Cheese 
Optional: Guacamole and Sour Cream to finish 

*To make your own Taco Seasoning at home: (makes more than needed for this recipe) 
1 Tbsp. Chili Powder 
1 1/2 tsp Ground Cumin 
1 tsp Salt 
1 tsp Black Pepper 
1/2 tsp Paprika 
1/2 tsp Garlic Powder 
1/2 tsp Onion Powder 
1/4 tsp Oregano 


Instructions  
Cut off the top and remove the seeds from each pepper. Place in a baking dish and bake for 20 minutes in a preheated oven at 350˚F (175˚C). While the Peppers are roasting - heat oil in a large skillet over medium/high heat. Add ground beef and season with taco seasoning mix. Allow beef to brown on all sides. Add diced onion - continuing to cook until softened. Reduce heat to Medium. Mix in the black beans, brown rice, corn, and salsa. Add in 1 cup of cheese and stir until incorporated and the cheese has melted. Remove from heat. Remove peppers from oven and fill each with the taco mixture. Top with additional cheese and return to the oven for 15 minutes until the cheese has melted. Top each pepper with guacamole and/or sour cream and enjoy!  

Monday, January 25, 2016

Saying goodbye to our baby bed.

This (finally) happened today.  I've been planning on getting the girls "big-girl" bunk beds to share and I finally did it.  I ordered the bunk beds from Amazon after seeing them in person at a friend's home.  Then we picked out a new much larger dresser at IKEA (Hemnes) and a white framed mirror.  

Today I took apart the twin bed and toddler bed (crib) and prepared the room for putting in the new furniture this week.  Let's just say the vacuum was well used today after discovering almost 6 years of dust underneath!

The girl's bedroom set "Ocean" by Baby's Dream Furniture was special, the crib was designed to convert to a toddler bed and then a twin bed.  It also had a drop top rather than a drop side so it was easy and safe to get to our babies.  

We were able to successfully convert the first crib into both of those (toddler then twin) with the help of a twin kit.  For baby #2 we had another crib made by getting a few spare parts (since some had been used to make the twin bed) but were unable to make it into another twin as the conversion set was no longer available by Baby's Dream.  So my sweet 4.5 year old needs a big girl bed as she's outgrown the toddler size.

Which leads us to the need for bunk beds and all my work taking apart the toddler bed/twin bed today.  I must admit that taking them apart was MUCH easier than putting them together.  All that assembling (and disassembling) over the years was quite aggravating and a test in patience for my husband and me.  However, I found myself getting a bit emotional as I took apart the crib for the (final) time.  So many sweet memories in that crib/toddler bed of both of my babies.  

So this evening I took a look down memory lane at the photos of this set over the years.

First up the nursery decorated and ready for my first daughter's arrival.  I LOVED decorating this nursery for her. 

This sweet little face joined our family and started sleeping in her crib (at night) around 4 months of age.  She didn't sleep well next to me in the co-sleeper and did much better in her crib at night although I joined her many many times a night for feedings and to calm her. :)


When my big girl was 2 and a 1/2 we moved to a new house and had her crib turned into a toddler bed.  It was a little early but I didn't want to do the job myself (the movers did it) as dropping the mattress had been difficult enough!


Then about a year later we prepared to add a new baby girl to our family so we turned the toddler bed into a twin and made another crib after ordering a few additional parts/pieces.

Big sister loved it!

Little sister arrived but did not sleep in this bed at night until she was over one.  She slept in my closet instead. :)  She did visit from time to time though and looked terribly cute.

Big Sister

Little Sister

Eventually she did join her big sister in the room.  Sweet baby girl.

At almost 4 years old we removed the crib side for little sister and turned it into a toddler bed again.  She loved her big girl bed!

Which brings us to tonight.  The girls are sleeping on their mattresses on the floor and later this week new beds!

I'll update with the new room once it's finished. And if you know anyone who could use a well loved crib/twin bed and dresser set let me know.

Friday, January 15, 2016

Fisher Price Friday - Treehouse Puzzle


I was given this Fisher Price puzzle by a friend recently to sell in my Etsy shop, but it's so cute that I may keep it around the house for awhile first. :)  The Treehouse #518 was made between 1977-1978 although the stamp on the back says 1971-1976.  I'm guessing they used an old stamp on a newer puzzle.  The puzzle has 13 pieces and is for kids ages 3-6, although it's too easy for my 4 year old.


The top of the puzzle has a picture of three children playing on and in a big treehouse.  There are also two little squirrels and a fluffy dog keeping them company.


Underneath the puzzle pieces is a different picture of the same three children but this time they're dressed up in costumes, even the little dog has a pirate costume on!  The squirrels are also shown but this time they are grey and there are more of them including a bunch of babies.

This particular puzzle had the cardboard backing put on the wood bottom a bit askew as seen in my photos.  Nevertheless, it works just fine and I imagine has been loved by many different children over the last 38 years.  Pretty soon I'll have it for sale and hopefully it will find its way to yet another child to love and enjoy.  


Thursday, January 14, 2016

A Year in the life of our Italian Greyhounds

I have a confession, I frequently take photos of our Italian Greyhounds.  We have two, Dante age 11 and Bella age 3.  I combined the photos from 2015 into one album and the majority of them were iPhone photos of the dogs cuddling/sleeping on the couch together. :)  Love those sweet dogs.  In fact they are currently next to me snuggled together under the blanket while I type this on my laptop. 


They weren't best friends when we added Bella almost 3 years ago but they are getting along just fine now.


For more Italian Greyhound info/photos:


Tuesday, January 12, 2016

Tazo Chai Tea House Party


In November I hosted another House Party with my mommy friends.  This time they sent me FREE samples of Tazo Chai Tea to share.  The day of the party we finally had a cooler day here in the otherwise hot desert so it was a perfect morning to wear a cozy sweater and drink some hot tea!

To make the party festive I included mason jars of cream, coconut milk and regular milk.  How cute were they?  Especially the tiny little sugar jar. :)

My party pack included a Chai tea concentrate and three varieties of hot tea (in bags).  Also lots of coupons!

While planning the party I realized that I could use a Carafe or three!  I think that perhaps I have arrived at the age (ah hem, late 30's) where a woman needs a carafe. ;)  Fortunately I was able to borrow 3 carafes from friends to make it work.


It was a lovely fun morning with my friends.  This photo is awesome because we are all holding babies but none of them are ours, ha!  It takes a village and all that. :)


It was a great turnout.  The tea was fabulous and easy (either tea bags or add equal parts hot milk to the concentrate).  House Party sends out the pack for free btw and I wasn't paid to hold the party or to write about it here in the blog.  I just do House Party for the fun and to share free things with my friends.  Thanks House Party!

Past House Parties I've Hosted

Friday, January 8, 2016

Fisher Price Friday - Little People/Vintage Loot


For the last few Christmases (and birthday's) I've included vintage toys and books for my kid's gifts.  Some years it looked more 1980s than 2000s under the tree. :) This year was no exception although I will admit that it's becoming more and more difficult to find vintage FP sets that we don't already have (or have had in the past)!  Perhaps this won't come as a surprise if you've read my blog regularly since I feature a different toy on here most Fridays for the last few years.  All good things must come to an end, although I still have a few more to feature that I haven't yet!


But back to Christmas, this year I gave both girls a few vintage golden books including one by special request from my 8 year old (The Seven Sneezes).  My youngest got the #345 Boat Rig and I had the #979 Dump Truckers left unwrapped under the tree.  I love to have at least one present out for the kids to play with when it's time to open presents. :)


Last but not least the #460 Movie Viewer with over a dozen cartridges.  I was super excited about this gift and thankful to have such a big collection of cartridges to include with it (thanks to a super FP friend who hooked me up). 

I'll be back with detailed info on the #460 & #979 in the next month so stay tuned.

2013 Christmas Gifts
2014 Christmas Gifts

Thursday, January 7, 2016

Seasoned Oven Roasted Cauliflower

Tis the season of vegetables, low calorie dishes and whole foods.  I've got a simple and healthy side dish recipe for you to try.  Cauliflower is the new "it" vegetable, haven't you heard?  So give this one a try and let me know what you think.

My family is tolerating cauliflower (not a favorite) so I added a little extra cheese to their portions. ;)


Seasoned Oven Roasted Cauliflower
Ingredients
5-6 cups cauliflower florets (one medium/large size head)
1/8 cup Extra Virgin Olive Oil
1 tbsp sliced garlic
2 tbsp fresh lemon juice
1 tsp Sea Salt
1/2 tsp black pepper

Directions
1. Preheat oven to 500 degrees.
2. Place cauliflower in a large Corning Wear, roasting or large saute pan.  Drizzle olive oil over cauliflower and season with garlic, lemon juice, salt and pepper.
3. Cook in oven for 15-30 minutes, stirring occasionally. (Cook longer if you prefer softer cauliflower, shorter for a crisper).
4. Remove and sprinkle with Parmesan.  Add more if you love a cheesier veggie! :)  Serve while warm.

Friday, January 1, 2016

Happy New Year!

Happy 2016!!  My little family has enjoyed a week in the Pacific NW enjoying Christmas with my parents.  We had a lovely time experiencing the cold, sometimes wet and often sunny WA weather.  I took hundreds of photos and my girls had the best time.  

Soon I'll be back to show off my parent's cozy guest house that we stayed in which is one of my very favorite places.  Before we left we had a Christmas celebration here in AZ and my girls naturally received some vintage toys and books that I'll share too.

Hope your year is off to a great start!  Happy New Year!